Category Archives: United Kingdom

  • 0

self guided pub crawl london

Category : United Kingdom

Welcome to the ultimate guide to self-guided pub crawls in London! Explore iconic pubs‚ historic trails‚ and vibrant nightlife at your own pace. Discover hidden gems‚ themed routes‚ and DIY tools to create unforgettable adventures in one of the world’s greatest cities.

Overview of the Concept and Benefits

Self-guided pub crawls in London offer unparalleled flexibility‚ allowing you to explore the city’s iconic pubs at your own pace. This DIY approach provides a personalized experience‚ enabling you to craft a route tailored to your preferences. Discover historic watering holes‚ vibrant nightlife spots‚ and hidden gems while enjoying the freedom to start‚ stop‚ and linger as you wish. It’s a cost-effective and immersive way to connect with London’s rich pub culture‚ ideal for both locals and visitors seeking unique adventures.

Popular Pub Crawl Routes in Central London

Discover iconic routes like the Monopoly board-inspired crawl‚ historic trails in the City of London‚ and vibrant paths through Westminster‚ perfect for exploring central London’s pub scene.

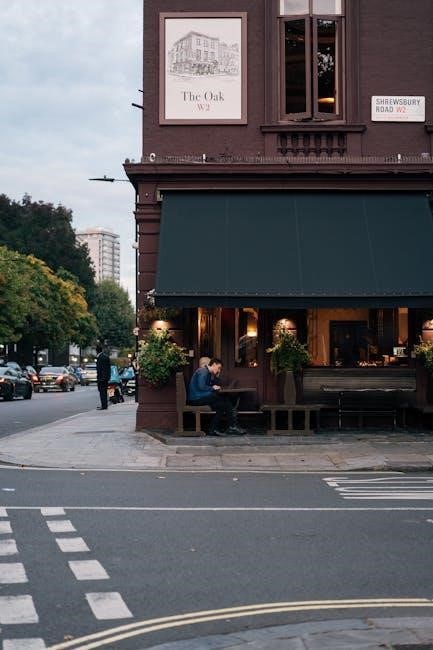
The City of London and Westminster: Historic Pub Trails

Embark on a journey through time in the City of London and Westminster‚ where historic pubs offer a glimpse into London’s rich past. Explore iconic spots like The Lamb & Flag and The Ye Olde Trip to Jerusalem‚ each steeped in centuries of history. These trails allow you to discover hidden courtyards and landmarks while enjoying classic British ales and atmosphere. Perfect for history buffs and pub enthusiasts alike‚ these routes provide a unique way to experience London’s heritage at your own pace.

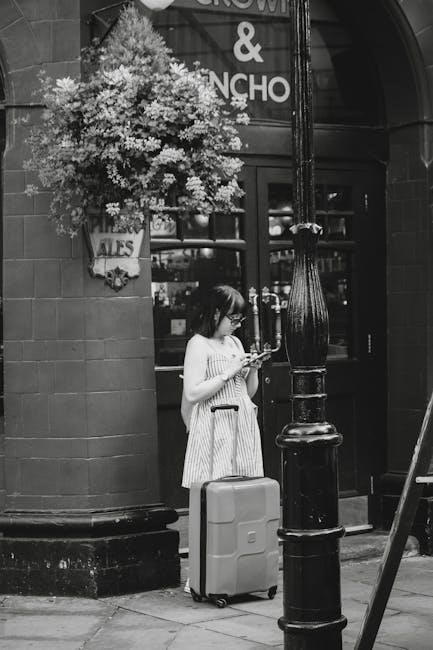
Covent Garden and Seven Dials: Vibrant Nightlife Spots

Discover the lively atmosphere of Covent Garden and Seven Dials‚ where historic pubs meet modern nightlife. These areas are hubs for socializing‚ with a mix of classic taverns and trendy bars. Popular spots include The Lamb & Flag and The Princess Louise‚ offering cozy interiors and craft beers. Perfect for both locals and tourists‚ these routes provide a dynamic blend of history and contemporary vibes‚ making them ideal for a self-guided pub crawl through London’s vibrant heart.

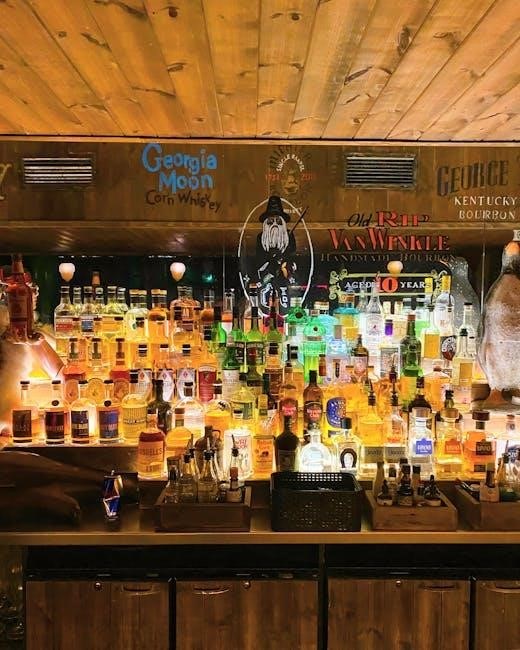
Historic Pubs to Explore on Your Crawl

Visit iconic pubs like Fitzroy Tavern‚ The French House‚ and The Salisbury‚ each offering a glimpse into London’s rich history and cultural heritage‚ perfect for your self-guided adventure.

Fitzroy Tavern: A Creative Hub

Nestled in the heart of London‚ the Fitzroy Tavern is a cultural gem and a must-visit on your self-guided pub crawl. Known for its rich literary history‚ this iconic pub has been a favorite haunt of writers and artists for decades. Its cozy atmosphere and historic charm make it a standout destination. Explore its vibrant past‚ enjoy a pint‚ and soak in the creative energy that has made it a cornerstone of London’s cultural scene for generations.

The French House: Soho’s Iconic Pub

Step into The French House‚ a legendary pub in the heart of Soho. This historic gem is renowned for its rich history‚ charming atmosphere‚ and literary ties. A favorite among writers and artists‚ it offers a warm welcome to those exploring London’s vibrant pub scene. With its unique character and cozy vibe‚ The French House is a must-visit on any self-guided pub crawl‚ providing a perfect blend of history‚ culture‚ and great drinks in one of London’s most iconic neighborhoods.

The Salisbury: A Victorian Gem

The Salisbury is a stunning example of Victorian architecture‚ offering a glimpse into London’s rich pub heritage. Located in the heart of the city‚ this iconic pub boasts ornate plasterwork‚ cozy booths‚ and a warm atmosphere. Known for its historic charm and extensive drink selection‚ it’s a favorite among locals and tourists alike. Whether you’re exploring the city’s past or simply enjoying a pint‚ The Salisbury is a must-visit destination on your self-guided pub crawl‚ blending tradition with timeless appeal;

Monopoly Board-Inspired Pub Crawl

Embark on a unique journey with a Monopoly-themed pub crawl‚ mapping iconic London locations from Old Kent Road to Mayfair. Explore 26 stops‚ each inspired by the classic board game‚ offering a fun and nostalgic way to discover the city’s diverse pubs and neighborhoods while creating memorable experiences with friends.

Mapping the Route: From Old Kent Road to Mayfair

Experience a unique pub crawl inspired by the Monopoly board‚ spanning from Old Kent Road to Mayfair. This route covers 26 iconic London locations‚ blending history and fun. Use Google Maps to plan efficiently‚ ensuring a smooth journey between stops. From historic pubs to modern bars‚ this adventure offers a taste of London’s diverse neighborhoods. Check pub opening hours and plan timings to maximize your experience‚ making it a memorable day exploring the city’s vibrant drinking scene.

DIY Planning Tools and Resources

Easily plan your self-guided pub crawl with Google Maps for custom routes and the WeGoTrip app for live GPS navigation‚ ensuring a seamless and enjoyable experience.

Using Google Maps for Custom Routes

Plan your self-guided pub crawl effortlessly with Google Maps. Create custom routes‚ mark favorite pubs‚ and navigate seamlessly with real-time GPS. Share your map with friends‚ track distances‚ and explore hidden gems. This tool offers flexibility‚ ensuring your London pub adventure is perfectly tailored to your preferences and pace.

Downloadable Audio Tours: Enhancing Your Experience

Elevate your self-guided pub crawl with downloadable audio tours. Apps like WeGoTrip offer immersive narratives‚ guiding you through London’s historic pubs with live GPS maps. Discover hidden stories‚ cultural insights‚ and pub histories as you explore. These tours provide a seamless experience‚ blending education with entertainment‚ ensuring your pub crawl is both enjoyable and enriching.

Themed Pub Crawls

Discover unique themed pub crawls in London‚ from Monopoly-inspired routes to historic docklands tours. Explore iconic pubs like The Mayflower and hidden gems in East London’s micropubs.

Historic Docklands: The Mayflower and More

Step into Londons maritime past with a self-guided pub crawl through the Historic Docklands. Visit iconic pubs like The Mayflower‚ The Prospect of Whitby‚ and more‚ each steeped in history. These watering holes‚ once frequented by sailors and traders‚ now offer a glimpse into Londons riverside heritage. Enjoy a pint where historic ships once docked‚ and soak in the atmosphere of these timeless establishments. Perfect for history buffs and pub enthusiasts alike‚ this route combines storytelling with great beer.

East London Micropubs: Hidden Gems

Discover East Londons thriving micropub scene‚ a treasure trove of small‚ independent venues. These hidden gems‚ like those in Sidcup and Blackfen‚ offer a cozy atmosphere‚ craft beers‚ and local charm. Perfect for a self-guided crawl‚ they showcase Londons grassroots brewing culture. Start in Blackfen at The Blackfen or The Broken Drum‚ then explore nearby micropubs. These intimate spots provide a refreshing alternative to larger pubs‚ emphasizing quality and community. A must-visit for beer enthusiasts seeking authentic‚ off-the-beaten-path experiences in East London.

Practical Tips for a Successful Crawl

Plan your route in advance‚ set a budget‚ and pace yourself. Stay safe‚ hydrated‚ and aware of your surroundings. Download maps or audio tours for guidance.

Timing‚ Budgeting‚ and Staying Safe

Start your crawl early to avoid crowds and allow time for each stop. Set a budget per pub to manage spending. Stay hydrated and eat between drinks. Keep valuables secure and stay with a group. Plan your route in advance to avoid getting lost. Use GPS maps for navigation and share your itinerary with a friend. Respect local pubs and their rules to ensure a smooth experience. Prioritize your safety and enjoy responsibly.

Self-guided pub crawls in London offer a unique way to explore the city’s vibrant culture‚ iconic pubs‚ and hidden gems at your own pace‚ creating unforgettable memories.

Final Thoughts on Self-Guided Pub Crawls in London

Embracing the flexibility of self-guided pub crawls in London allows you to immerse yourself in the city’s rich history‚ vibrant culture‚ and iconic pubs. Whether tracing the Monopoly board route‚ exploring historic docklands‚ or discovering micropubs‚ these crawls offer a personalized adventure. With tools like Google Maps and downloadable audio tours‚ you can craft a unique journey‚ savoring London’s diverse neighborhoods and making unforgettable memories along the way.


  • 0

cgp gcse maths revision guide

Category : United Kingdom

The CGP GCSE Maths Revision Guide is a comprehensive resource designed to help students excel in their exams․ With clear explanations, step-by-step examples, and practice questions, it covers all major exam boards like AQA, Edexcel, and OCR․ Updated for the Grade 9-1 curriculum, it offers flexible learning options, including a free online edition․ Perfect for both Higher and Foundation levels, this guide supports visual, textual, and practical learning styles, ensuring every student can achieve success․

1․1 Overview of the CGP Revision Guide Series

CGP’s Revision Guide Series is renowned for its clear, concise, and engaging approach to exam preparation․ Tailored to match the latest curriculum requirements, the series includes comprehensive workbooks, revision cards, and online resources․ Designed for all major exam boards, including AQA, Edexcel, and OCR, CGP guides are trusted by students and teachers nationwide․ Their popularity stems from their ability to simplify complex concepts, ensuring confidence and success for learners at every level․

1․2 Importance of Revision Guides for GCSE Maths

GCSE Maths revision guides are essential for structured exam preparation․ They provide clear explanations, targeted practice, and exam-style questions, aligning with AQA, Edexcel, and OCR curricula․ These resources help students identify weaknesses, build confidence, and achieve higher grades․ CGP guides, with their step-by-step examples and online support, are particularly effective, making complex concepts accessible and ensuring comprehensive understanding․

Key Features of the CGP GCSE Maths Revision Guide

The CGP GCSE Maths Revision Guide offers concise explanations, step-by-step examples, and practice questions․ It includes exam-style questions, grade stamps for difficulty, and a free online edition․ Designed for both Higher and Foundation levels, it aligns with AQA, Edexcel, OCR, and other exam boards, ensuring comprehensive coverage of the Grade 9-1 curriculum․

2․1 Concise and Student-Friendly Explanations

The CGP GCSE Maths Revision Guide is renowned for its clear, concise, and engaging explanations․ Each topic is broken down into digestible sections, avoiding unnecessary jargon․ The friendly tone and humor make complex concepts approachable, ensuring students grasp key ideas without confusion․ This approach fosters confidence and understanding, making it easier for students to tackle challenging maths problems effectively․

2․2 Step-by-Step Examples and Practice Questions

The CGP GCSE Maths Revision Guide excels with its detailed step-by-step examples, guiding students through complex problems with clarity․ Accompanying practice questions, mirroring exam-style formats, reinforce learning and build confidence․ Answers are provided at the back, enabling self-assessment and improvement․ This structured approach ensures students master concepts and apply them effectively in exams, making it an invaluable study resource․

Why Choose CGP for GCSE Maths Revision

CGP is the UK’s No․1 educational publisher, trusted for its concise, student-friendly resources․ With comprehensive coverage of all exam boards and expert support, CGP ensures confidence and success․

3․1 Reputation as the UK’s No․1 Educational Publisher

CGP is renowned as the UK’s leading educational publisher, trusted by students, teachers, and schools․ With over 25 years of expertise, CGP’s resources are celebrated for their clarity, accuracy, and engaging style․ Their guides are widely used in 9 out of 10 UK schools, making them the go-to choice for effective exam preparation and curriculum support․

3․2 Coverage of All Major Exam Boards (AQA, Edexcel, OCR, etc․)

CGP’s revision guides are tailored for all major exam boards, including AQA, Edexcel, OCR, WJEC, and CCEA․ This ensures comprehensive coverage of each board’s specific requirements, making it ideal for students across the UK․ The guides are meticulously aligned with the Grade 9-1 curriculum, providing accurate and relevant content for both Higher and Foundation levels, catering to diverse learning needs and exam formats․

Structure of the Revision Guide

The CGP GCSE Maths Revision Guide is organized by topics and difficulty levels, ensuring clarity and ease of navigation․ It includes grade stamps for difficulty assessment and exam-style questions with answers, helping students track progress and prepare effectively for exams․

4․1 Organization by Topics and Difficulty Levels

The CGP GCSE Maths Revision Guide is meticulously organized by topics, aligning with the curriculum structure․ Each topic is covered in-depth, with clear progression from foundational concepts to advanced skills․ Difficulty levels are clearly marked, allowing students to build confidence gradually․ This logical arrangement ensures that learners can systematically master each area, making revision efficient and stress-free․

4․2 Inclusion of Grade Stamps for Difficulty Assessment

The CGP GCSE Maths Revision Guide incorporates grade stamps, indicating the difficulty level of each topic․ These stamps, ranging from lower to higher grades, help students identify challenging areas and track their progress․ Clearly visible and strategically placed, they enable learners to focus on weaker topics and build confidence gradually, ensuring a well-rounded understanding of the curriculum․

Additional Resources and Support

CGP offers a free online edition, exam-style questions with answers, and additional workbooks for practice․ Revision cards and quizzes are also available, enhancing learning flexibility and success․

5․1 Free Online Edition for Flexible Learning

The CGP GCSE Maths Revision Guide includes a free online edition, offering flexible access to study materials anytime, anywhere․ This digital version mirrors the printed guide, featuring concise explanations, step-by-step examples, and practice questions․ It supports self-paced learning, allowing students to revise efficiently and effectively, whether at home, in the classroom, or on the go․ This feature caters to diverse learning preferences and environments․

5․2 Exam-Style Questions and Answers

The CGP GCSE Maths Revision Guide features exam-style questions and answers, mirroring actual exam formats․ These questions cover a wide range of topics and difficulty levels, helping students assess their knowledge and identify areas for improvement․ The included answers enable self-assessment, allowing learners to track their progress and refine their problem-solving skills effectively․ This resource is invaluable for building exam confidence and achieving success․

How to Use the Revision Guide Effectively

To use the CGP Revision Guide effectively, create a structured study plan, utilize the free online edition for flexible learning, and engage in active learning techniques like self-quizzing and summarizing key concepts․

6․1 Creating a Study Plan with the Guide

Start by breaking down the syllabus into manageable sections․ Set clear goals and deadlines for each topic․ Utilize the guide’s structured format to allocate time for both revision and practice․ Review progress regularly and adjust the plan as needed․ Incorporate active learning techniques, such as self-quizzing and summarizing key concepts, to maximize retention and understanding․ Stay consistent and flexible to ensure steady progress toward exam success․

6․2 Tips for Active Learning and Retention

Engage with the guide by self-quizzing, summarizing key points, and teaching concepts to others․ Use the included practice questions to test understanding and reinforce memory․ Focus on weak areas with targeted exercises․ Regularly review and organize notes to solidify knowledge․ Active learning techniques, like solving problems aloud and using visual aids, enhance retention and prepare you confidently for exam success․

Availability and Compatibility

The CGP GCSE Maths Revision Guide is available in both Higher and Foundation levels, covering AQA, Edexcel, OCR, and more․ It includes a free online edition, ensuring compatibility with the Grade 9-1 curriculum and supporting flexible learning for all students․

7․1 Formats and Editions (Higher and Foundation Levels)

The CGP GCSE Maths Revision Guide is available in both Higher and Foundation editions, catering to different student needs․ The Higher Level guide covers advanced topics, while the Foundation Level focuses on core skills․ Both editions are designed to align with the Grade 9-1 curriculum, ensuring comprehensive coverage for all learners․ Additionally, the guides are available in print and digital formats, offering flexibility for students to study anywhere, anytime․ This dual accessibility ensures that every student can access the resources they need to succeed, whether they prefer traditional books or modern digital tools․ The inclusion of an online edition further enhances accessibility, making it easier for students to revise on-the-go․ With clear organization and user-friendly layouts, both formats provide an optimal learning experience tailored to individual preferences and learning styles․ This versatility makes CGP’s revision guides a top choice for GCSE Maths preparation․

7․2 Compatibility with Grade 9-1 Curriculum

The CGP GCSE Maths Revision Guide is fully aligned with the Grade 9-1 curriculum, ensuring comprehensive coverage of all topics․ It supports both Higher and Foundation tiers, with content tailored to meet the demands of the updated syllabus․ The guide includes detailed explanations, examples, and practice questions, all designed to help students master the skills and knowledge required for success in the reformed GCSE exams․

Benefits for Different Learning Styles

The CGP GCSE Maths Revision Guide caters to various learning styles, offering clear explanations for visual learners and practical exercises for hands-on practice, ensuring comprehensive understanding․

8․1 Visual and Textual Learning Aids

The CGP GCSE Maths Revision Guide incorporates visual and textual learning aids to enhance understanding․ Clear diagrams, charts, and highlighted key points cater to visual learners, while concise explanations and step-by-step examples support textual learners․ This dual approach ensures that students can grasp complex concepts in a way that suits their learning preferences, fostering clarity and engagement throughout their revision journey․

8․2 Practical Exercises for Hands-On Practice

The CGP GCSE Maths Revision Guide offers a wealth of practical exercises, including exam-style questions and practice papers․ These hands-on resources allow students to apply their knowledge and skills directly․ Step-by-step solutions and worked examples further enhance understanding․ The guide also includes access to online quizzes and workbooks, providing varied opportunities for practice and reinforcing concepts through active engagement and real-world problem-solving․

Supporting Resources from CGP

CGP offers additional resources such as online tutorials and interactive quizzes, aligned with the latest curriculum, providing flexible and engaging support for diverse learning needs․

9․1 Workbooks and Practice Papers

CGP provides comprehensive workbooks and practice papers tailored to both Higher and Foundation levels, covering all major exam boards․ These resources include step-by-step examples, exam-style questions, and answers, ensuring targeted practice and reinforcement of key concepts․ They align with the Grade 9-1 curriculum, helping students build confidence and master exam techniques effectively․

9․2 Revision Cards and Online Quizzes

CGP offers handy revision cards and online quizzes to reinforce learning․ The cards provide concise summaries of key topics, ideal for quick reference․ Online quizzes add interactivity, testing knowledge and identifying weak areas․ These tools complement the revision guide and workbooks, offering a dynamic way to engage with the material and build confidence for exams․

The CGP GCSE Maths Revision Guide is an essential tool for achieving exam success․ By providing comprehensive coverage, concise explanations, and interactive resources, it helps students build confidence and mastery․ With final tips for focused practice and strategic revision, CGP equips learners with the skills and mindset needed to excel in their GCSE Maths exams․

10․1 Final Tips for GCSE Maths Success

For GCSE Maths success, use the CGP Revision Guide effectively by focusing on weak areas and practicing exam-style questions regularly; Utilize the free online edition for flexible learning and review step-by-step examples to reinforce understanding․ Prioritize active learning, set realistic goals, and stay consistent with your study plan․ The guide’s concise explanations and practical exercises will help build confidence and reduce exam stress, ensuring you’re fully prepared for your exams․

10․2 CGP’s Role in Achieving Exam Confidence

CGP plays a vital role in building exam confidence by providing comprehensive and student-friendly resources․ Their revision guides offer clear explanations, step-by-step examples, and exam-style questions, helping students master each topic․ With resources like workbooks, revision cards, and online quizzes, CGP equips students with the tools needed to succeed, ensuring they feel prepared and confident for their GCSE Maths exams․


  • 0

hani and ishu’s guide to fake dating

Category : United Kingdom

Hani and Ishu’s Guide to Fake Dating by Adiba Jaigirdar is a heartwarming, sapphic romantic comedy that explores themes of identity, friendship, and cultural expectations.

Overview of the Book

Hani and Ishu’s Guide to Fake Dating is a young adult romance by Adiba Jaigirdar, published on May 25, 2021. The story follows Hani and Ishu, two Bengali girls navigating identity, friendship, and cultural expectations. Hani proposes a fake relationship to prove her bisexuality to her friends, while Ishu seeks popularity to win the school’s head girl election. Their alliance evolves into a heartfelt journey of self-discovery and belonging, blending humor, sapphic romance, and poignant societal critiques.

Author and Publication Details

Adiba Jaigirdar is the author of Hani and Ishu’s Guide to Fake Dating, a young adult romance published by Hodder & Stoughton on May 25, 2021. Jaigirdar’s work often explores themes of identity, belonging, and cultural representation, particularly within Muslim and South Asian communities. This novel blends sapphic romance with witty humor, making it a standout in the genre. Its release has been celebrated for its authentic portrayal of queer relationships and its relatable, engaging storytelling style.

Plot Summary

Hani and Ishu’s Guide to Fake Dating follows the story of two teenagers who form a fake dating arrangement to navigate social expectations and personal goals, blending humor with heartfelt moments of self-discovery and cultural exploration.

Hani and Ishu are two vibrant, dynamic characters who find themselves navigating life’s challenges in their own unique ways. Hani, the outgoing and creative one, often feels misunderstood, while Ishu, the academically driven and sharp-witted individual, struggles with societal expectations. Both Bengali Muslim teenagers, they bring distinct perspectives to their relationship, creating a magnetic yet complex bond. Their contrasting personalities and shared experiences form the foundation of their story, making them relatable and endearing to readers.

The Fake Dating Agreement

Hani and Ishu’s fake dating agreement is born out of necessity and mutual benefit. Hani, wanting to prove her bisexuality to her friends, proposes the idea to Ishu, who agrees under one condition: Hani must help her gain popularity to win the school’s Head Girl election. They craft a guide to navigate their pretend relationship, setting clear rules to avoid emotional entanglements. Their plan initially succeeds, blending humor and heart as they balance their goals and growing bond, even as complications arise from maintaining the facade.

Character Analysis

Hani and Ishu are vibrant characters with distinct personalities. Hani is confident and outgoing, while Ishu is more reserved and academically driven, creating a dynamic that fuels their relationship.

Hani’s Motivations and Personality

Hani is a confident and outgoing character who navigates her identity and friendships. Her primary motivation is to prove her bisexuality to her friends, leading her to propose the fake dating arrangement. Hani’s personality is a mix of charm and insecurity, as she seeks validation while trying to stay true to herself. Her dynamic with Ishu highlights her loyalty and determination, as well as her eventual realization of deeper feelings. Hani’s journey is one of self-discovery and growth, making her a relatable and endearing character.

Ishu’s Goals and Personality Traits

Ishu is academically focused and driven, with a sharp wit and acerbic nature. Her primary goal is to become head girl, which motivates her to agree to the fake dating arrangement. Ishu’s personality is marked by determination and practicality, as she negotiates with Hani to gain popularity. Her reserved demeanor contrasts with Hani’s outgoing nature, yet her strategic thinking and loyalty shine through. Ishu’s journey highlights her growth as she navigates identity, friendship, and ambition, making her a compelling and relatable character.

Themes in the Book

Hani and Ishu’s Guide to Fake Dating delves into themes of identity, belonging, and navigating social expectations, blending humor with heartfelt exploration of self-discovery and relationships.

Exploring Identity and Belonging

Hani and Ishu’s Guide to Fake Dating beautifully explores themes of identity and belonging, particularly through the lens of two Muslim, South Asian girls navigating societal expectations. Hani struggles with proving her bisexuality to her friends, while Ishu seeks popularity to win the school election. Their fake relationship becomes a catalyst for self-discovery, as they confront internal biases, cultural pressures, and the complexity of their own identities. The story highlights the challenges of balancing personal authenticity with societal demands, offering a relatable and heartfelt journey of growth.

Navigating Social Pressures and Expectations

Hani and Ishu’s Guide to Fake Dating delves into the challenges of societal expectations, as both characters navigate pressures from friends, family, and cultural norms. Hani’s need to prove her bisexuality and Ishu’s ambition to become head girl drive their fake relationship. Their agreement highlights the struggle to balance personal desires with external demands, showcasing how societal expectations can shape decisions and relationships.

The story vividly portrays the emotional toll of maintaining a facade and the tension between authenticity and conformity, offering a nuanced exploration of adolescent life.

The Concept of Fake Dating

Fake dating in Hani and Ishu’s Guide to Fake Dating serves as a strategic game, blending deception with self-discovery. The duo crafts a guide to navigate societal expectations and personal goals, using their fake relationship as a tool to achieve validation and acceptance, while exploring the fine line between pretense and reality.

Why Fake Dating?

Hani and Ishu turn to fake dating as a strategic solution to their individual dilemmas. Hani aims to prove her bisexuality to her friends, while Ishu seeks popularity to win the school’s head girl election. Their arrangement offers mutual benefits, allowing them to navigate societal expectations and personal challenges. The fake relationship becomes a tool to gain validation, blending deception with self-discovery. It’s a calculated move to balance their goals while maintaining boundaries, reflecting the pressures of identity and acceptance in their lives.

The Rules of Their Fake Relationship

Hani and Ishu establish clear boundaries to maintain their fake relationship. Hani agrees to help Ishu gain popularity for the head girl election, while Ishu supports Hani in convincing her friends of her bisexuality. They define rules to avoid emotional entanglements, ensuring their arrangement remains superficial. Public displays of affection and consistent storytelling are key, but personal feelings are strictly off-limits. These guidelines help them navigate their ruse without complicating their lives, blending deception with practicality in their shared goal.

The Hani and Ishu Guide to Fake Dating

Hani and Ishu’s Guide to Fake Dating is a collaborative effort, blending humor and practical advice. It outlines their strategies for maintaining a believable fake relationship while addressing personal growth and societal expectations.

Creating the Guide

Hani and Ishu’s Guide to Fake Dating was born from necessity, blending humor and practical advice. It outlines strategies for maintaining a believable fake relationship, from public displays of affection to crafting convincing stories. The guide reflects their contrasting personalities, with Hani’s spontaneity balancing Ishu’s meticulous planning. Over time, it evolves, incorporating lessons learned from their experiences. This collaborative project becomes a cornerstone of their journey, offering insight into their growth and the challenges they face together.

Key Principles of the Guide

The key principles of Hani and Ishu’s guide emphasize mutual respect, clear communication, and maintaining boundaries. Hani’s spontaneity and Ishu’s meticulousness create a balanced strategy. These principles help them navigate social pressures and expectations effectively, ensuring their fake relationship remains believable. The guide evolves over time, reflecting lessons learned and their personal growth.

Supporting Characters and Relationships

Ishu’s sister and Hani’s friends play pivotal roles in shaping their lives. Ishu’s sister offers wisdom, while Hani’s friends provide comedic relief and emotional support, enriching the story.

Ishu’s Sister and Family Dynamics

Ishu’s sister offers unwavering support and wisdom, playing a key role in her life. Their bond reflects the strength of sibling relationships and cultural ties. Ishu’s family dynamics highlight the pressures of expectations and tradition, especially within their Bengali Muslim heritage. These interactions add depth to Ishu’s character and her motivations, showcasing how family influences her decisions and growth throughout the story.

Hani’s Friends and Their Influence

Hani’s friends play a significant role in shaping her decisions, particularly her choice to fake date Ishu. Their presence pushes her to prove her bisexuality, reflecting societal pressures. The dynamic among her peers highlights the challenges of navigating identity and acceptance in a close-knit social circle. Their influence underscores themes of belonging and the complexities of friendships, adding layers to Hani’s journey of self-discovery and growth.

Genre and Tone

Hani and Ishu’s Guide to Fake Dating blends romantic comedy with sapphic elements, offering a warm, humorous, and emotionally resonant exploration of love and identity, enriched by Muslim and South Asian cultural nuances.

Romantic Comedy Elements

Hani and Ishu’s Guide to Fake Dating captivates with its witty dialogue, humorous misunderstandings, and the undeniable chemistry between the leads. The fake dating premise, a classic rom-com trope, is elevated by Adiba Jaigirdar’s fresh voice and authentic characters. Light-hearted moments, coupled with relatable awkwardness, create a charming narrative that keeps readers engaged. The blend of humor and heart makes this story a delightful read, perfect for fans of romantic comedies with a sapphic twist.

Sapphic Representation

Hani and Ishu’s Guide to Fake Dating shines with its authentic sapphic representation, offering a tender and realistic portrayal of a romantic relationship between two women. The story beautifully explores themes of love, identity, and acceptance, particularly within Muslim and South Asian communities. Adiba Jaigirdar’s thoughtful storytelling highlights the challenges and joys of queer relationships, making it a meaningful and uplifting read for sapphic audiences seeking relatable and heartfelt stories.

Cultural and Social Representation

Hani and Ishu’s Guide to Fake Dating beautifully weaves cultural identity with social dynamics, exploring traditions, expectations, and belonging. The book is a celebration of diversity and inclusivity, offering a meaningful portrayal of Muslim and South Asian experiences intertwined with universal themes of love and self-discovery.

Muslim and South Asian Representation

Hani and Ishu’s Guide to Fake Dating shines with its authentic portrayal of Muslim and South Asian identities, blending cultural traditions with modern-day struggles. The novel highlights the complexities of navigating family expectations, cultural norms, and personal identity. Adiba Jaigirdar’s own voice brings depth to the characters’ experiences, offering a heartfelt exploration of faith, heritage, and belonging. The story seamlessly weaves in cultural nuances, making it a powerful celebration of diverse backgrounds and the universal quest for self-acceptance.

Addressing Homophobia and Biphobia

Hani and Ishu’s Guide to Fake Dating tackles homophobia and biphobia with sensitivity, exploring the challenges of navigating identity in unsupportive environments. Hani’s journey to assert her bisexuality highlights societal pressures and misconceptions. The novel sheds light on the struggles of being openly queer, particularly within Muslim and South Asian communities, offering a poignant yet hopeful perspective on overcoming prejudice and embracing authenticity. Jaigirdar’s portrayal resonates deeply, making it a vital read for queer representation.

Hani and Ishu’s Guide to Fake Dating is a heartwarming exploration of identity, friendship, and love, blending humor with poignant reflections on belonging and acceptance.

Impact of the Book

Hani and Ishu’s Guide to Fake Dating resonates deeply with readers, offering a fresh perspective on identity, love, and societal expectations. Its exploration of Muslim and South Asian representation, coupled with its sapphic romance, fills a vital gap in young adult literature. The book sparks meaningful conversations about homophobia, biphobia, and self-acceptance, leaving a lasting impact on its audience and fostering a sense of belonging for marginalized voices.

Final Thoughts on Fake Dating

Fake dating, as portrayed in the book, serves as both a catalyst for growth and a reflection of societal pressures. While it offers temporary solutions to Hani and Ishu’s challenges, it also highlights the complexities of trust and vulnerability. Ultimately, their journey shows that true connections thrive when authenticity prevails, making the concept of fake dating a poignant yet fleeting phase in their path to self-discovery and love.


  • 0

self build garden room guide pdf

Category : United Kingdom

Discover the versatility of self-build garden rooms, perfect for creating additional living or working spaces. This guide provides step-by-step advice, from planning to completion, helping you achieve your dream outdoor retreat efficiently and cost-effectively.

Benefits of Building Your Own Garden Room

Building your own garden room offers numerous benefits, including significant cost savings, customization to suit your needs, and the opportunity to create a space tailored to your lifestyle. It allows you to increase your property’s value while enjoying the satisfaction of a DIY project. Additionally, you can incorporate eco-friendly materials and energy-efficient designs, making it a sustainable option. With proper planning, a self-build garden room can serve as a versatile space, whether for work, leisure, or storage, enhancing both functionality and aesthetics of your outdoor area.

Understanding the Purpose and Scope of Your Project

Clearly defining the purpose and scope of your garden room project is essential for success. Determine how the space will be used, whether as a home office, storage area, or leisure room. Assess your needs, budget, and available resources to set realistic goals. Consider the size and layout required to meet these objectives. Aligning your vision with practical constraints ensures a well-planned and functional space. This step also helps in creating a detailed plan, avoiding costly adjustments later. A clear scope guarantees your garden room meets your expectations and enhances your property effectively.

Planning and Designing Your Garden Room

Design your garden room to maximize functionality and style, ensuring it complements your property while meeting your specific needs. Consider space, layout, and aesthetic preferences carefully.

Assessing Your Site and Budget

Evaluate your site’s conditions, measuring available space and checking for obstacles. Determine your budget, accounting for materials, tools, and labor costs. Consider the purpose and size of your garden room to allocate resources effectively. Research local building regulations to ensure compliance. Use downloadable plans and guides to help estimate expenses accurately. Prioritize essential features while allowing flexibility for adjustments. A well-planned budget ensures your project remains feasible and stress-free, delivering a functional and beautiful garden room tailored to your needs.

Choosing the Right Design and Layout

Selecting the ideal design and layout for your garden room is crucial for functionality and aesthetics. Consider how you plan to use the space, whether as a home office, hobby room, or relaxation area, to determine the layout. Measure your site to ensure the design fits seamlessly; Choose a style that complements your property and garden, balancing modern or traditional aesthetics. Incorporate natural light and ventilation for comfort. Use design guides or software to visualize your layout. Ensure flexibility to adapt the space for future needs, making it a versatile and enduring addition to your home.

Obtaining Necessary Permissions and Compliance

Before starting your garden room project, ensure you comply with local planning and building regulations. Check if your project falls under permitted development or requires formal planning permission. Verify size, height, and boundary restrictions to avoid legal issues. Consult with local authorities to confirm compliance and obtain any necessary approvals. Ensure your design adheres to building codes and safety standards. Proper compliance guarantees a smooth construction process and avoids potential fines or removal of the structure. Plan ahead to handle permits and inspections efficiently, safeguarding your investment and peace of mind.

Preparing the Site and Base

Preparing the site involves clearing the land and marking the area. Leveling the ground ensures a stable base for your garden room, laying a solid foundation for construction.

Clearing the Land and Marking the Area

Begin by clearing the land of debris, vegetation, and obstructions. Use tools like shovels and rakes to remove plants and level the ground. Mark the area with stakes and string, ensuring the space aligns with your design and local regulations. Proper site preparation ensures a smooth construction process.

Leveling the Ground and Laying the Base

Ensure the site is level by assessing the ground and removing uneven soil or debris. Use a spirit level and digging tools to create a flat surface. For the base, opt for concrete, gravel, or paving slabs, depending on your budget and design. Lay the base carefully, ensuring it aligns with your garden room’s footprint. A well-prepared base is crucial for structural stability and longevity, providing a solid foundation for your build.

Constructing the Frame and Structure

Build a sturdy wall frame using wood or steel, ensuring it aligns with your design. Install roof rafters securely for structural integrity and weather protection.

Building the Wall Frame and Installing Roof Rafters

Construct the wall frame using durable materials like wood or steel, ensuring it is square and level. Secure the frame to the base for stability. Install roof rafters at recommended spacing, typically 600mm apart, to support the roof structure. Use sturdy beams and ensure proper alignment for even weight distribution. Check for squareness and tighten all connections. Consider adding insulation between rafters for energy efficiency. Properly secure roofing materials to the rafters for weatherproofing. Follow safety guidelines when working at heights and consult professionals if unsure.

Fitting Doors and Windows for Functionality

Choose doors and windows that suit your garden room’s purpose, ensuring durability and energy efficiency. UPVC options are popular for their low maintenance. Position doors and windows to maximize natural light and ventilation. Install doors securely, ensuring proper alignment and sealing. Add locking mechanisms for security. Fit windows at appropriate heights for functionality and aesthetics. Use weatherproof seals to prevent leaks. Consider double glazing for thermal insulation. Ensure all installations comply with local building regulations. Properly insulate around frames to maintain energy efficiency. Test functionality post-installation for smooth operation and security.

External Finishes and Insulation

Enhance your garden room’s exterior with durable finishes like timber cladding or low-maintenance boards. Proper insulation ensures energy efficiency, making your space usable year-round.

Cladding the Walls and Installing Roofing Materials

Choosing the right cladding and roofing materials is crucial for both aesthetics and durability. Popular options include timber cladding for a natural look and low-maintenance manufactured boards for longevity. Ensure materials are weather-resistant and align with your garden room’s style. When installing, follow manufacturer guidelines to secure a tight fit and prevent water ingress. Proper installation of roofing materials, such as tiles or metal sheets, ensures structural integrity and protection from the elements. This step is vital for creating a stable and visually appealing exterior.

Adding Insulation for Year-Round Use

Insulation is essential for creating a comfortable and energy-efficient garden room. Use materials like fiberglass batts, rigid foam, or reflective insulation to maintain consistent temperatures. Properly insulate walls, floor, and ceiling to minimize heat loss in winter and heat gain in summer. Ensure gaps are sealed to prevent drafts and moisture buildup. Consider adding a vapor barrier to protect against condensation. Well-installed insulation allows year-round use, making your garden room a cozy home office, gym, or relaxation space. This step ensures long-term comfort and energy savings, enhancing the overall functionality of your outdoor retreat.

Internal Finishes and Final Touches

Add the perfect finishing touches to your garden room with flooring, walls, and ceiling installations. Enhance comfort and aesthetic appeal with interior design elements, ensuring functionality and style.

Installing Flooring, Walls, and Ceiling

Begin by laying durable, moisture-resistant flooring, such as engineered wood or laminate, ensuring a stable base. Walls can be finished with plasterboard and painted for a clean look. Install a ceiling using similar materials, providing insulation and a polished appearance. These elements transform the space into a cozy, functional area, ready for interior design touches that reflect personal style and purpose, whether for a home office, gym, or relaxation room.

Designing the Interior Space for Comfort

Designing the interior of your self-build garden room focuses on creating a comfortable and functional space. Consider natural light by strategically placing windows to maximize sunlight. Choose a balanced color scheme with lighter tones to enhance the sense of space and warmth for coziness. Plan furniture arrangement based on the room’s purpose, ensuring ergonomic chairs for offices or plush seating for lounging. Install appropriate heating, cooling, and ventilation systems, and use insulation for temperature regulation. Incorporate layered lighting—task lighting for work areas and ambient lighting for relaxation. Personalize the space with artwork and plants for a welcoming feel. Address acoustics with soundproofing materials or soft furnishings like rugs and curtains. Include storage solutions such as shelves or cabinets to maintain organization and prevent clutter. Ensure a smooth flow with ample space between furniture for easy movement. By thoughtfully integrating these elements, your garden room will become a comfortable, inviting retreat tailored to your needs.

Final Checks and Maintenance

Ensure structural integrity by inspecting the frame and roof for damage. Check electrical and plumbing systems for safety and functionality. Regularly maintain insulation, cladding, and doors to ensure longevity and optimal performance.

Ensuring Safety and Structural Integrity

Conduct a thorough inspection of your garden room to ensure all components are secure and functioning properly. Check the roof for leaks, walls for stability, and doors and windows for proper alignment. Verify that electrical installations meet safety standards and plumbing systems are leak-free. Regularly inspect the foundation and frame for any signs of damage or deterioration. Address any issues promptly to maintain structural integrity and ensure the space remains safe and habitable year-round. Prioritize durable materials and adherence to local building codes for long-term reliability.

Maintenance Tips for Longevity

Regularly inspect your garden room to ensure its longevity. Clean gutters and downspouts to prevent water damage, and trim nearby trees to avoid branch-related issues. Check walls, windows, and doors for signs of wear or damage, addressing them promptly. Insulate pipes during winter to prevent freezing, and maintain proper ventilation to avoid moisture buildup. Schedule annual professional inspections for electrical and plumbing systems. Keep the exterior cladding clean and sealed to protect against weathering. By following these maintenance tips, you can extend the lifespan of your garden room and ensure it remains a comfortable and functional space year-round.


hotpoint aquarius dishwasher user manual

Category : United Kingdom

Hotpoint Aquarius Dishwasher User Manual Guide

The Hotpoint Aquarius dishwasher user manual provides comprehensive guidance on installation, operation, and maintenance. It includes safety tips, feature overviews, and troubleshooting advice for optimal performance.

Welcome to the Hotpoint Aquarius dishwasher guide! This manual ensures safe and efficient use, highlighting key features, benefits, and essential tips for getting started with your appliance.

Welcome and Safety Information

Welcome to the Hotpoint Aquarius dishwasher user manual! This guide provides essential safety information and usage instructions to ensure optimal performance and longevity of your appliance. Always read this manual carefully before installation or operation. Safety precautions include proper installation by a qualified technician, adult supervision during use, and avoiding improper loading or usage. Follow all guidelines to ensure safe and efficient operation, while also protecting the environment through energy-efficient practices.

Key Features and Benefits

The Hotpoint Aquarius dishwasher offers advanced features like multiple wash cycles, eco-mode, and quiet operation, ensuring efficient cleaning with minimal noise. Its smart sensors adapt to load size and soil level, optimizing water and energy use. The dishwasher also includes advanced drying options for sparkling dishes. These features provide superior cleaning performance while promoting energy efficiency and user convenience, making it an ideal choice for modern kitchens.

Navigating the User Manual

The Hotpoint Aquarius dishwasher user manual is designed to be user-friendly, with clear sections for installation, operation, and troubleshooting. It begins with safety information and key features, followed by detailed instructions for daily use and maintenance. The manual is organized logically, making it easy to find specific information quickly. This structure ensures users can navigate effortlessly and make the most of their appliance’s capabilities.

Downloading and Accessing the User Manual

Access the Hotpoint Aquarius dishwasher manual online in PDF format for detailed instructions on installation, operation, and troubleshooting, ensuring optimal appliance performance and maintenance.

Where to Find the Hotpoint Aquarius Dishwasher Manual

The Hotpoint Aquarius dishwasher manual can be found on the official Hotpoint website or through trusted third-party sites like ManualsLib. Specific models such as the SIAL11010G and HFC 2B19 are available in PDF format, ensuring easy access to instructions for installation, operation, and troubleshooting. These resources are free and readily accessible, providing detailed guidance for optimal appliance performance and maintenance.

How to Download the Manual in PDF Format

To download the Hotpoint Aquarius dishwasher manual in PDF format, visit the Hotpoint website or third-party platforms like ManualsLib. Enter your model number, such as SIAL11010G or HFC 2B19, and select the PDF option; Ensure your device has a PDF reader installed for seamless viewing. This process provides quick access to essential operating and maintenance instructions.

System Requirements for Viewing the Manual

To view the Hotpoint Aquarius dishwasher manual, ensure your device has a PDF reader like Adobe Acrobat Reader. A stable internet connection is required for downloading. The manual is compatible with desktops, tablets, and smartphones. For optimal viewing, use a screen resolution of 1024×768 pixels or higher and ensure your browser is up-to-date. This ensures easy navigation and clear readability of the guide.

Installation and Setup Guidelines

Ensure proper installation by following the manual’s steps, including levelling, aligning, and connecting water supply and drainage hoses. Refer to the guide for detailed instructions and safety precautions.

Pre-Installation Checks

Before installing your Hotpoint Aquarius dishwasher, ensure the site is level and meets electrical requirements. Verify water supply and drainage connections are accessible and compatible. Check for any damage or defects in the appliance or hoses. Ensure the area is clear and suitable for installation to avoid future operational issues.

Step-by-Step Installation Instructions

Position the dishwasher in its designated space, ensuring it is level and aligned. Connect the water supply hoses to the appropriate inlets, tightening securely. Plug in the appliance, ensuring the electrical connection meets safety standards. Secure the dishwasher to adjacent surfaces to prevent movement. Test the appliance by running a short cycle to ensure proper function and leak-free operation.

Levelling and Aligning the Dishwasher

Ensure the dishwasher is placed on a level surface using the adjustable feet. Check alignment with the surrounding cabinetry or counters. Adjust the feet gently to achieve balance and prevent tilting. Secure the appliance to nearby surfaces using brackets provided to prevent movement during operation. Proper levelling ensures efficient water drainage, stability, and optimal performance of the dishwasher.

Operating the Dishwasher

Operate your Hotpoint Aquarius dishwasher by selecting the appropriate cycle, loading dishes correctly, and starting the wash program. Monitor progress and adjust settings as needed for optimal results.

Understanding the Control Panel

The Hotpoint Aquarius dishwasher’s control panel features intuitive buttons and indicators for selecting wash cycles, adjusting settings, and monitoring progress. The panel includes program selection buttons, indicators for options like heat drying or eco-mode, and a display showing the selected cycle and remaining time. Familiarize yourself with the layout to easily navigate and customize your wash settings for optimal cleaning results.

Loading the Dishwasher Effectively

Loading the Dishwasher Effectively

Load dishes facing the center, ensuring dirty surfaces are exposed. Place large items like plates and bowls on the bottom rack, utensils in designated holders, and glasses on the top rack. Avoid overcrowding to allow water circulation. Secure fragile items and keep sharp objects separate. Use the cutlery rack for utensils and arrange items to maximize space for optimal cleaning results and efficiency.

Selecting the Right Wash Cycle

Selecting the right wash cycle ensures optimal cleaning and energy efficiency. Choose from options like Eco, Intense, or Quick Wash based on soil level and load type. The Eco mode is ideal for lightly soiled dishes, while Intense tackles heavy-duty cleaning. Refer to the user manual for specific cycle details and adjust settings according to dish type and load size for the best results.

Starting and Monitoring the Wash Cycle

To start the wash cycle, press the Start button on the control panel. The dishwasher will begin operation, and the display will show the progress. Monitor the cycle using the indicator lights or digital display. Ensure the door is fully closed before starting. The dishwasher will automatically adjust settings based on load size and selected cycle, ensuring efficient and effective cleaning throughout the process.

Maintenance and Troubleshooting

Regular maintenance and troubleshooting ensure optimal performance. Clean the filter, check for blockages, and refer to the manual for error codes and solutions to common issues.

Cleaning the Dishwasher Filter

Regularly cleaning the dishwasher filter is essential for optimal performance. Remove the filter, rinse under warm water, and ensure all debris is cleared. Check for blockages and damage. A clean filter prevents poor wash results and unpleasant odors. Refer to the manual for specific instructions tailored to your model. Regular maintenance ensures efficiency and extends appliance lifespan.

Regular Maintenance Tips

Regular maintenance ensures your Hotpoint Aquarius dishwasher runs efficiently. Check and clean filters monthly to remove food particles. Run a cleaning cycle with dishwasher cleaner to eliminate grease and odors. Ensure detergent dosage is correct to avoid residue buildup. Inspect hoses for kinks or blockages and replace worn seals. Regular checks prevent issues and maintain performance, ensuring sparkling clean dishes every cycle.

Common Error Codes and Solutions

The Hotpoint Aquarius dishwasher may display error codes like E1, E2, or E3, indicating issues such as water supply problems, drainage faults, or heating errors. Refer to the manual for specific solutions. For E1, check water supply hoses for kinks or blockages. For E2, ensure the drain hose is clear and properly installed. For E3, verify the heating element is functioning. Regular checks can prevent these issues and maintain optimal performance.

Energy Efficiency and Eco-Friendly Features

The Hotpoint Aquarius dishwasher offers eco-friendly features like energy-saving modes and smart sensors, optimizing water and energy use while maintaining performance. Eco-mode ensures efficient, environmentally conscious cleaning.

Understanding Energy Ratings

Energy ratings for the Hotpoint Aquarius dishwasher are classified on a scale from A+++ to D, with A+++ being the most efficient. These ratings indicate energy consumption and environmental impact. A higher-rated dishwasher uses less energy, reducing utility bills and carbon footprint. The manual explains how to interpret these ratings, helping users make eco-conscious decisions.

Using Eco-Mode for Optimal Efficiency

Eco-Mode on the Hotpoint Aquarius dishwasher optimizes energy and water usage for eco-friendly performance. It adjusts water temperature and cycle duration to minimize consumption while maintaining effectiveness. This mode is ideal for lightly soiled dishes and helps reduce utility bills. Activate Eco-Mode via the control panel for a more sustainable washing experience that balances efficiency with cleaning results.

Additional Features and Settings

The Hotpoint Aquarius dishwasher offers Quiet Operation Mode for reduced noise, Advanced Drying Options for spotless results, and Smart Sensors for adaptive washing efficiency, enhancing performance.

Quiet Operation Mode

The Quiet Operation Mode reduces noise during cycles, ideal for homes valuing a peaceful environment. Activate this feature via the control panel for minimized noise levels without compromising cleaning efficiency, ensuring optimal performance while maintaining convenience and user comfort.

Advanced Drying Options

The Hotpoint Aquarius dishwasher features advanced drying options, including fan drying and automatic humidity sensors. These settings ensure dishes are thoroughly dry, reducing water spots and improving efficiency. The fan drying mode circulates air to evaporate moisture, while humidity sensors optimize drying time. These features provide superior drying performance, making unloading easier and ensuring sparkling clean dishes every cycle.

Smart Sensors and Adaptive Washing

The Hotpoint Aquarius dishwasher features smart sensors that detect load size and soil levels, adapting wash cycles for optimal cleaning. These sensors adjust water temperature and detergent allocation, ensuring efficient and gentle cleaning. Adaptive washing technology minimizes energy and water usage while maintaining superior performance, making it ideal for various dishwashing needs and promoting eco-friendly operation.

Warranty and Customer Support

Hotpoint offers a comprehensive warranty for the Aquarius dishwasher, covering parts and labor for defective components. Customer support is available for inquiries, repairs, and troubleshooting.

Warranty Information and Coverage

Your Hotpoint Aquarius dishwasher is backed by a comprehensive warranty, ensuring protection against manufacturing defects. The warranty typically covers parts and labor for a specified period, offering peace of mind. Extended warranties may be available for additional coverage. Always review the terms and conditions to understand what is included and any exclusions that may apply.

Contacting Hotpoint Customer Service

For assistance with your Hotpoint Aquarius dishwasher, contact customer service via phone, email, or through the official website. Representatives are available to address inquiries, provide troubleshooting support, and guide you through warranty claims. Visit the Hotpoint website for contact details and additional resources to ensure prompt resolution of any issues or concerns.

Repair and Service Options

For repairs, contact authorized Hotpoint service technicians to ensure genuine parts and warranty compliance. Schedule service online or via phone for convenience. Regular maintenance can prevent issues, but if problems arise, refer to the troubleshooting guide in the manual. Extended service plans are available for added protection. Always use certified technicians to maintain your dishwasher’s performance and validity of the warranty.

By following this guide, you can optimize your Hotpoint Aquarius dishwasher’s performance and longevity. Refer to the manual for troubleshooting and maintenance tips to ensure efficiency.

Final Tips for Optimal Performance

For the best results, clean the dishwasher filter regularly and ensure proper loading. Use eco-mode for energy efficiency and check detergent dosage. Avoid overloading racks and run cleaning cycles periodically. Always refer to the manual for specific guidance on maintenance and troubleshooting to keep your Hotpoint Aquarius dishwasher running smoothly and efficiently over time.

  • Regularly clean the filter for better performance.
  • Load dishes correctly to ensure optimal washing.
  • Use recommended detergent for effective cleaning.
  • Refer to the manual for troubleshooting common issues.

Staying Updated with Product Information

To ensure you have the latest features and improvements, regularly check the Hotpoint website for updates. Software updates may enhance performance, and new user manuals or guides could provide additional insights. Always visit the official support section for the most accurate and up-to-date information on your Hotpoint Aquarius dishwasher. This helps maintain optimal functionality and longevity of your appliance.

  • Visit the official Hotpoint website for updates.
  • Check for software improvements and new features.
  • Refer to updated manuals for the latest guidelines.

love to dream temperature guide

Category : United Kingdom

Understanding the Love to Dream Temperature Guide

The Love to Dream Temperature Guide helps parents choose the right sleepwear for their baby based on TOG ratings and room temperature.

A TOG (Thermal Overall Grade) rating measures the warmth of sleepwear‚ helping parents choose the right garment for their baby’s comfort. It indicates how well a product retains heat‚ with higher ratings meaning more warmth. Love to Dream offers sleepwear with TOG ratings of 0.2‚ 1.0‚ 2.5‚ and 3.5‚ catering to different room temperatures. Understanding TOG ratings ensures parents can dress their baby appropriately‚ preventing overheating or chilling. This system simplifies selecting sleepwear based on ambient temperature‚ promoting safe and comfortable sleep environments. By aligning TOG ratings with room conditions‚ parents can create optimal sleeping conditions for their baby‚ ensuring their little one stays cozy and secure throughout the night.

Why Room Temperature Matters for Baby’s Comfort

Room temperature plays a crucial role in ensuring your baby’s comfort and safety. A room that is too hot or too cold can disrupt your baby’s sleep and potentially pose health risks. The Lullaby Trust recommends maintaining a room temperature between 16-20°C to reduce the risk of SIDS. A room thermometer is essential for accurate measurement. Monitoring your baby’s comfort is key; check their chest or the back of their neck to ensure they are not too hot or cold. Overheating can lead to sweating‚ flushed cheeks‚ and rapid breathing‚ while being too cold may cause shivering or fussiness. Maintaining an optimal room temperature ensures your baby sleeps soundly and stays comfortable‚ which is vital for their overall well-being and development.

Choosing the Right TOG for Your Baby

TOG ratings help you select sleepwear that matches your baby’s needs based on room temperature. Higher TOG means more warmth‚ ensuring comfort and safety for your baby.

0;2 TOG: Suitable for Room Temperatures Above 75°F

The 0.2 TOG rating is designed for warm environments‚ making it ideal for room temperatures above 75°F. This lightweight option ensures your baby stays cool without overheating‚ perfect for summer months or well-heated spaces. It provides minimal thermal insulation‚ allowing for breathability and comfort. For temperatures above 75°F‚ pair the 0.2 TOG sleepwear with a lightweight onesie to maintain the perfect balance. Always monitor your baby for signs of overheating‚ such as sweating or flushed cheeks‚ and adjust their clothing or room temperature as needed. This TOG rating is essential for keeping your baby comfortable in warmer conditions while promoting safe and restful sleep.

1.0 TOG: Ideal for Room Temperatures Between 68-75°F

The 1.0 TOG rating is a popular choice for moderate room temperatures‚ making it ideal for rooms between 68-75°F. This mid-range TOG provides the perfect balance of warmth and breathability‚ ensuring your baby remains comfortable without overheating. It is versatile and suitable for spring‚ fall‚ and mild winter nights. For temperatures in this range‚ consider layering a lightweight onesie under the sleepwear to maintain optimal comfort. The 1.0 TOG is lightweight yet warm enough to keep your baby cozy in cooler environments. Always check for signs of overheating‚ such as sweating or flushed cheeks‚ and adjust clothing as needed. This TOG rating is a practical and adaptable option for maintaining your baby’s comfort in moderate climates.

2.5 TOG: Best for Room Temperatures Between 61-68°F

The 2.5 TOG rating is designed for cooler room temperatures‚ making it ideal for rooms between 61-68°F. This higher TOG provides extra warmth and insulation‚ ensuring your baby stays cozy in chilly environments. It is perfect for colder seasons or homes with lower heating levels. For temperatures in this range‚ consider layering a long-sleeve onesie or footed pajamas under the sleepwear to maintain comfort. The 2.5 TOG is a reliable choice for keeping your baby warm without risking overheating. Always monitor your baby for signs of being too cold‚ such as shivering or cool skin‚ and adjust their clothing as needed. This TOG rating is a great option for maintaining your baby’s comfort in cooler climates.

3.5 TOG: Recommended for Room Temperatures Below 61°F

The 3.5 TOG is the warmest option in the Love to Dream range‚ designed for room temperatures below 61°F. This high TOG rating ensures your baby stays snug and comfortable in very cold environments. It is ideal for colder climates or homes with limited heating. For temperatures this low‚ layering thermal underwear or thick‚ insulating pajamas beneath the sleepwear is recommended. Always check for signs of your baby being too cold‚ such as shivering or cool skin‚ and adjust their clothing accordingly. The 3.5 TOG provides maximum warmth without overheating‚ making it a reliable choice for harsh winter conditions. Use a room thermometer to ensure accuracy and maintain your baby’s comfort and safety.

Dressing Your Baby for Different Seasons

Dress your baby according to the season using the Love to Dream TOG guide. Summer calls for lower TOG‚ winter for higher TOG‚ and spring/fall for mid-range TOG.

Summer: Opting for Lower TOG Ratings

During summer‚ keeping your baby cool and comfortable is essential. The Love to Dream Temperature Guide recommends using lower TOG-rated sleepwear to prevent overheating. Opt for a 0.2 TOG for room temperatures above 75°F‚ as it provides light coverage and breathability. Layering with a lightweight onesie or diaper is often sufficient in warmer weather. Avoid higher TOG ratings‚ as they can trap excessive heat and lead to discomfort. Always monitor your baby’s temperature by checking for signs of sweating or flushed cheeks. Ensuring the room stays within a comfortable range and using breathable fabrics will help your baby sleep soundly. Adjust clothing as needed to maintain thermal balance and safety.

Winter: Selecting Higher TOG Ratings for Warmth

In winter‚ keeping your baby warm and cozy is crucial. The Love to Dream Temperature Guide suggests using higher TOG-rated sleepwear to ensure your baby stays comfortable in colder temperatures. Opt for a 2.5 TOG for room temperatures between 61-68°F or a 3.5 TOG for rooms below 61°F. These higher ratings provide extra insulation and warmth‚ perfect for colder environments. Layering with thermal underwear or footed pajamas can also help regulate your baby’s temperature. Always check for signs of cold‚ such as cool skin or shivering‚ and adjust clothing accordingly. Using a room thermometer ensures accuracy‚ and breathable fabrics help maintain comfort. Higher TOG ratings are designed to keep your baby snug and safe during the chilly winter months.

Spring and Fall: Mid-Range TOG for Transitional Weather

During spring and fall‚ when temperatures fluctuate‚ mid-range TOG ratings are ideal for keeping your baby comfortable. The Love to Dream Temperature Guide recommends using a 1.0 TOG for rooms between 68-75°F or a 1.5 TOG for cooler transitional periods. These ratings provide balanced warmth without overheating‚ making them perfect for seasonal changes. Layering with breathable fabrics like a lightweight onesie or adding a thin blanket can help adjust to varying temperatures. Always monitor your baby’s comfort‚ using a room thermometer for accuracy. Mid-range TOGs offer flexibility‚ ensuring your baby stays cozy as the weather transitions between warmer and cooler days. This approach helps maintain a consistent sleep environment‚ promoting better rest for your little one.

Monitoring Your Baby’s Comfort

Check for signs of overheating (flushed cheeks‚ sweating) or being too cold (shivering‚ cool skin). Use a room thermometer to ensure accurate temperature readings and adjust layers accordingly;

Signs Your Baby Might Be Too Hot

Monitoring your baby’s comfort is crucial for their safety and well-being. Signs that your baby might be too hot include sweating‚ flushed cheeks‚ or damp hair. You may also notice rapid breathing or restlessness. If your baby feels overly warm to the touch‚ especially on their chest or back‚ it could indicate they are overheating. Remove layers gradually and ensure the room temperature is within the recommended range. Using a room thermometer provides accurate readings to help adjust their clothing and sleep environment accordingly. Always prioritize lightweight‚ breathable fabrics in warmer conditions to prevent discomfort and potential health risks.

Signs Your Baby Might Be Too Cold

If your baby feels too cold‚ they may exhibit specific behaviors or physical signs. Look for cool skin‚ particularly on their hands‚ feet‚ or ears‚ as this can indicate inadequate warmth. Shivering‚ though subtle in infants‚ is another clear sign. Your baby might also appear fussier than usual or have trouble settling down to sleep. Additionally‚ their lips or face may take on a pale appearance. To address this‚ ensure their sleepwear has an appropriate TOG rating for the room temperature. Layering breathable clothing underneath can provide extra warmth without risking overheating. Always check the room temperature and adjust their clothing or bedding as needed to maintain comfort and safety.

Additional Considerations

Consider using a room thermometer for accurate temperature measurement and layering clothing based on your baby’s needs and health. Avoid overdressing to prevent overheating risks.

Layering Clothing Under Sleepwear

Layering clothing under sleepwear is essential for regulating your baby’s temperature. In warmer environments‚ a light onesie may suffice under a low TOG garment. For cooler rooms‚ consider adding a long-sleeve onesie or footed pajamas beneath a higher TOG sleepwear. The number of layers can vary based on your baby’s health and physiology. Always monitor your baby’s comfort‚ adjusting layers as needed to prevent overheating or chilling. Ensure the clothing is breathable and moisture-wicking to maintain comfort. Remember‚ the care-giver must determine what is suitable‚ balancing the room temperature with the baby’s natural warmth. Layering correctly ensures your baby stays comfortable and safe throughout the night‚ adapting to seasonal changes and individual needs;

Using a Room Thermometer for Accuracy

A room thermometer is crucial for ensuring your baby’s sleep environment is safe and comfortable. It provides accurate measurements‚ helping you maintain the optimal room temperature between 16-20°C‚ as recommended by The Lullaby Trust. This range reduces the risk of SIDS and ensures your baby isn’t too hot or cold. By using a thermometer‚ you can avoid overheating or underheating‚ which are common concerns for parents. It also helps you select the right TOG-rated sleepwear for the current temperature‚ ensuring your baby stays comfortable. Regularly checking the thermometer allows you to adjust clothing layers or sleepwear as needed‚ promoting a restful and secure sleep for your little one.

The Love to Dream Temperature Guide empowers parents with clear TOG choices‚ ensuring baby’s comfort and safety by recommending room temperatures between 16-20°C and using a thermometer for accuracy.

Final Tips for Using the Love to Dream Temperature Guide

Understanding TOG ratings and room temperatures is key to ensuring your baby’s comfort. Always use a room thermometer for accurate measurements and adjust clothing layers accordingly. Monitor your baby’s comfort by checking for signs of overheating‚ such as sweating or flushed cheeks‚ and adjust their sleepwear if needed. Layering clothing under sleepwear can help regulate your baby’s temperature‚ especially in transitional weather. Regularly consult the Love to Dream Temperature Guide to ensure your choices align with your baby’s needs as they grow and seasons change. This guide is a valuable tool to help your baby sleep soundly and safely year-round.


marcy and the riddle of the sphinx pdf

Category : United Kingdom

Marcy and the Riddle of the Sphinx is a captivating graphic novel by Joe Todd-Stanton‚ part of the Brownstone’s Mythical Collection series. The story follows Marcy‚ a reluctant adventurer‚ as she embarks on a thrilling journey to Egypt to rescue her father‚ Arthur‚ from the enigmatic Sphinx. Packed with puzzles‚ hieroglyphs‚ and ancient mythology‚ this book offers a unique blend of adventure and education for young readers.

1.1 Overview of the Book

Marcy and the Riddle of the Sphinx is a thrilling graphic novel that follows Marcy‚ the daughter of renowned adventurer Arthur‚ as she embarks on a journey to Egypt. Unlike her father‚ Marcy is hesitant to embrace adventure‚ but when Arthur goes missing‚ she must step into his footsteps. The story unfolds as Marcy deciphers hieroglyphs‚ solves intricate puzzles‚ and uncovers the secrets of the Sphinx. Along the way‚ she discovers her own courage and connection to her family’s legacy. The book blends action‚ mystery‚ and ancient Egyptian mythology‚ making it an engaging read for children and young adults.

1.2 Author and Publication Details

Marcy and the Riddle of the Sphinx is authored by Joe Todd-Stanton‚ a British illustrator and writer known for his imaginative storytelling and detailed artwork. Published by Flying Eye Books in 2017‚ the book is the second installment in the Brownstone’s Mythical Collection series‚ following Arthur and the Golden Rope. The graphic novel has been well-received for its unique blend of adventure‚ education‚ and visual appeal. It is available in various formats‚ including paperback‚ hardcover‚ and digital editions‚ making it accessible to readers worldwide. Joe Todd-Stanton’s work continues to captivate audiences with its rich narratives and stunning illustrations.

Plot Summary

Marcy and the Riddle of the Sphinx follows Marcy as she ventures to Egypt to rescue her father‚ Arthur‚ from the Sphinx‚ decoding hieroglyphs and solving ancient puzzles.

2.1 Marcy’s Journey to Egypt

Marcy reluctantly leaves her mundane life to follow her father‚ Arthur‚ into the mysterious land of Egypt. With a magical artifact in hand‚ she navigates ancient landscapes‚ encountering hidden temples and cryptic symbols. Her journey sparks a transformation from hesitation to determination‚ as she uncovers her own connection to the Brownstone legacy. This chapter sets the stage for her adventures‚ blending historical elements with fantasy‚ creating an immersive experience for readers.

2.2 The Quest to Rescue Arthur

Marcy’s journey intensifies as she discovers her father‚ Arthur‚ has been captured by the Sphinx. Determined to save him‚ she ventures into the heart of Egypt‚ deciphering ancient hieroglyphs and solving riddles left behind by the gods. With the help of a magical artifact‚ Marcy navigates treacherous traps and puzzles‚ showcasing her growing courage and wit. The quest not only tests her resolve but also deepens her connection to her family’s adventurous legacy. As she draws closer to the Sphinx‚ Marcy must confront her fears and prove herself worthy of the Brownstone name.

2.3 Decoding Hieroglyphs and Solving Puzzles

Central to Marcy’s adventure is her ability to decode ancient hieroglyphs and solve intricate puzzles. Guided by a magical artifact from her father‚ she uncovers hidden secrets tied to Egyptian mythology. Each riddle brings her closer to rescuing Arthur‚ while also revealing more about her family’s adventurous past. The puzzles not only test her intellect but also deepen her understanding of her heritage. This element of the story highlights the blend of mystery‚ education‚ and personal growth‚ making Marcy’s journey both thrilling and enriching for young readers.

Themes and Motifs

3.1 Family Legacy and Adventure

Family legacy drives Marcy’s adventure as she uncovers her heritage through solving puzzles and deciphering hieroglyphs‚ connecting her journey to her father’s past.

Marcy and the Riddle of the Sphinx explores the theme of family legacy through Marcy’s journey to Egypt‚ driven by her father Arthur’s adventurous past. As Marcy deciphers hieroglyphs and solves puzzles‚ she uncovers her family’s historical connections‚ revealing a legacy of bravery and exploration. The story highlights the tension between Marcy’s reluctance to embrace adventure and her eventual acceptance of her heritage. This motif underscores the importance of understanding one’s roots while forging a unique path‚ blending action with emotional depth. The novel seamlessly intertwines personal growth with thrilling escapades‚ appealing to readers who love both adventure and heartwarming character development.

3.2 Ancient Egyptian Mythology

The novel delves into Ancient Egyptian mythology‚ weaving tales of gods‚ hieroglyphs‚ and legendary artifacts like the Book of Thoth. Marcy’s quest to rescue her father involves deciphering ancient symbols and facing mythological challenges‚ bringing the rich history of Egypt to life. The story highlights iconic figures such as Anubis and the Sphinx‚ blending myth with adventure. This thematic focus not only entertains but also educates readers about Egypt’s cultural heritage‚ making it a compelling blend of history‚ mystery‚ and fantasy. The integration of mythology adds depth to Marcy’s journey‚ enriching her character development and the plot’s suspense.

Educational Value

The book enriches language arts by introducing hieroglyphs and puzzles‚ while fostering cultural and historical connections to Ancient Egypt‚ making it a valuable educational resource for young readers.

4.1 Language Arts and Vocabulary Development

The book enhances language arts by introducing young readers to hieroglyphs and puzzles‚ fostering vocabulary development through exposure to ancient Egyptian terminology. The narrative encourages critical thinking and problem-solving‚ while the descriptive language and dialogue promote comprehension and storytelling skills. The inclusion of mythological references and cultural terms expands vocabulary‚ making it a valuable tool for language learning and literacy growth. This engaging approach helps students connect with the story while improving their command of language in a fun and interactive way.

4.2 Historical and Cultural Connections

The book “Marcy and the Riddle of the Sphinx” offers a rich exploration of Egyptian mythology and history‚ making it a valuable resource for cultural education. By incorporating elements like hieroglyphs and the Book of Thoth‚ the story provides readers with insights into ancient Egyptian traditions and beliefs. The central role of the Sphinx not only drives the plot but also highlights its cultural significance in Egyptian history. This blend of adventure and education helps young readers develop a deeper understanding and appreciation of Egyptian culture.

Author and Series Background

Joe Todd-Stanton is the creator of the acclaimed Brownstone’s Mythical Collection series‚ which seamlessly blends mythology‚ adventure‚ and family legacy. His work is celebrated for its imaginative storytelling and rich historical references.

5.1 Joe Todd-Stanton’s Work

Joe Todd-Stanton is a celebrated author and illustrator‚ best known for the Brownstone’s Mythical Collection series. His work seamlessly blends mythology‚ adventure‚ and family legacy‚ captivating readers of all ages. With a unique storytelling style‚ Todd-Stanton brings ancient myths to life through vibrant visuals and engaging narratives. His books‚ including Marcy and the Riddle of the Sphinx‚ are praised for their ability to educate and entertain‚ making complex historical and cultural themes accessible to young audiences. Todd-Stanton’s artistic approach and imaginative storytelling have solidified his place in children’s literature.

5.2 The Brownstone’s Mythical Collection Series

The Brownstone’s Mythical Collection series is a captivating collection of stories that delve into mythology‚ adventure‚ and family legacy. Each book‚ including Marcy and the Riddle of the Sphinx‚ is inspired by the treasures found in Professor Brownstone’s vault. The series is known for its rich narratives‚ vibrant illustrations‚ and educational value‚ making it a favorite among both children and parents. By blending historical and cultural elements with thrilling plots‚ the series not only entertains but also sparks a curiosity about the world’s myths and legends.

Availability and Formats

Marcy and the Riddle of the Sphinx is available in various formats‚ including PDF‚ ePub‚ and MOBI for digital readers‚ as well as paperback and hardcover editions.

6.1 PDF and Digital Editions

The book is widely available in digital formats‚ including PDF‚ ePub‚ and MOBI‚ ensuring compatibility with various devices. Readers can access the story through platforms like Epic‚ offering a seamless reading experience. The PDF version‚ such as marcyriddleofsph0000todd.pdf‚ is downloadable and ranges in size from 147.2 KB to 190.64 KB‚ making it easily accessible. Enhanced eBook features and compatibility with devices like tablets and e-readers make it convenient for young readers to engage with Marcy’s adventures. This format is ideal for classrooms and personal reading‚ providing an interactive way to explore ancient Egyptian mythology and puzzles.

6.2 Paperback and Hardcover Options

The book is available in both paperback and hardcover formats‚ offering readers a choice based on their preference. The paperback edition is lightweight and portable‚ making it ideal for schools‚ libraries‚ and home reading. Meanwhile‚ the hardcover version provides a durable and collectible option‚ perfect for fans of the series or those who appreciate a sturdy book. Both formats feature vibrant illustrations and clear text‚ ensuring an engaging reading experience. The hardcover’s superior binding and paper quality make it a lasting addition to any book collection‚ while the paperback remains an affordable and accessible choice for young adventurers.

Marcy and the Riddle of the Sphinx is a delightful and educational graphic novel that captivates young readers with its blend of adventure‚ mystery‚ and ancient Egyptian mythology. Marcy’s journey not only highlights her growth as a character but also sparks curiosity about history and culture. The book’s engaging storytelling‚ paired with its visually appealing illustrations‚ makes it a standout choice for both casual readers and collectors. Whether in paperback or hardcover‚ this tale promises to inspire a love for exploration and learning‚ leaving readers eager for more from the Brownstone’s Mythical Collection series.


uk mens jacket size guide

Category : United Kingdom

Understanding UK men’s jacket sizing is essential for ensuring a perfect fit. Sizes are based on chest measurements, ranging from Small to 4XL, to accommodate various body types and fit preferences. This guide helps you navigate the differences between slim, regular, and tailored fits, ensuring you make an informed choice for your ideal jacket size.

Understanding UK Jacket Size Basics

UK men’s jacket sizes are primarily determined by chest measurements, ensuring a comfortable and tailored fit. Sizes range from Small (S) to 4XL, catering to diverse body types. The measurements are typically provided in both inches and centimeters, offering flexibility for international shoppers. UK men’s jacket sizes are used in the UK, Ireland, and other countries, while European sizes differ slightly. Understanding these basics helps in selecting the right fit, whether you prefer slim, regular, or tailored styles. Always refer to the specific size chart for accurate measurements to ensure your jacket fits perfectly, regardless of the brand or style you choose.

How UK Jacket Sizing Works

UK jacket sizing is based on chest measurements, with sizes from Small to 4XL. Each size corresponds to specific chest dimensions, ensuring a precise fit for various builds and preferences.

Chest Measurements as the Primary Indicator

Chest measurements are the cornerstone of UK men’s jacket sizing. To determine your size, measure around the widest part of your chest, typically just under the armpits. This ensures the jacket will fit comfortably without being too tight or loose. For example, a chest measurement of 38-40 inches corresponds to a Medium size, while 42-44 inches aligns with a Large. These measurements are universal across UK brands, making it easier to find your perfect fit. Always opt for a jacket that allows a small amount of room for movement and layering, especially if you plan to wear it over thicker clothing like sweaters or fleeces. Accurate chest measurements ensure a tailored look and optimal comfort, making them the most reliable indicator for jacket sizing.

Inch vs. Centimeter Measurements

UK men’s jacket sizing is typically expressed in both inches and centimeters, catering to a global audience. Inches are traditionally used in the UK, while centimeters provide a more precise measurement for international customers. Chest measurements, the primary indicator for jacket sizing, are universally applied in both systems. For example, a Medium size might be listed as 38-40 inches or 97-102 centimeters. Understanding both systems ensures clarity when shopping from UK or international brands. Always check the measurement system used by the retailer to avoid confusion. This dual approach simplifies size selection, making it easier to find your perfect fit regardless of your familiarity with either unit of measurement.

UK Men’s Jacket Size Chart

UK men’s jacket sizes range from Small to 4XL, based on chest measurements. Standard sizes (S, M, L, XL, XXL) are available, with variations for slim, regular, and tailored fits. Use the chart to match your chest size in inches or centimeters to the corresponding jacket size for an ideal fit.

Standard UK Jacket Sizes (S, M, L, XL, XXL)

Standard UK jacket sizes for men are categorized as Small (S), Medium (M), Large (L), Extra Large (XL), and Double Extra Large (XXL). These sizes are determined based on chest measurements, ensuring a comfortable and tailored fit. Each size corresponds to a specific chest measurement range in inches or centimeters. For example, a Small typically fits a chest measurement of 36-38 inches (91-97 cm), while an XXL accommodates 44-47 inches (112-119 cm). These standard sizes are widely used across UK, US, and other English-speaking countries, making it easier for consumers to find their ideal fit. Always refer to the specific size chart for accurate measurements, as slight variations may occur between brands. Proper sizing ensures optimal comfort and style, whether for casual or formal wear.

Special Sizes (Slim Fit, Regular Fit, Tailored Fit)

UK men’s jackets also come in special fits to cater to different body types and style preferences. Slim Fit jackets are designed for a narrower silhouette, offering a more contemporary look with reduced chest and sleeve measurements. Regular Fit provides a classic, comfortable cut, suitable for most body types. Tailored Fit combines a sleek appearance with a slightly relaxed design, offering a balance between style and comfort. These special sizes ensure a personalized fit, addressing individual preferences. When choosing between Slim, Regular, or Tailored Fit, consider your body type, lifestyle, and the occasion. Always refer to the brand’s size chart for precise measurements to ensure the best fit for your needs and desired look.

How to Measure for Your Jacket Size

Accurate measurement is key to selecting the right UK jacket size. Measure your chest, shoulders, and sleeve length to ensure a precise fit. Use a flexible tape measure, wrapping it around the widest part of your chest, just under your armpits, and keeping the tape level. For sleeves, measure from the back of your neck, over your shoulder, and down to your wrist. Ensure the jacket allows for layering if needed, and consider your stance to achieve the most comfortable and flattering fit. Proper measurement ensures a tailored look and optimal comfort in your chosen jacket size.

Step-by-Step Measurement Guide

To determine your UK jacket size, follow these steps:
Chest Measurement: Wrap a tape measure around the widest part of your chest, just under your armpits. Ensure the tape is level and not too tight.
Shoulder Measurement: Measure across your shoulders, from one shoulder tip to the other, keeping the tape straight.
Sleeve Length: Start at the back of your neck, measure over your shoulder, and down to your wrist.
Body Length: Measure from the base of your neck, down the center of your torso, to your desired jacket length.
Compare with the Size Chart: Match your measurements to the UK size chart to find your perfect fit. Ensure to consider any ease for layering. Accurate measurements guarantee a comfortable and flattering jacket fit.

How to Choose the Right Size Based on Measurements

Once you have your measurements, compare them to the UK jacket size chart. Chest size is the primary indicator, so match your chest measurement to the corresponding size. Consider whether you prefer a slim, regular, or tailored fit, as this affects ease. For example, if your chest measures 102cm, you may opt for a size L in a regular fit or M in a slim fit. Sleeve length and body length should align with your preferences for style and comfort; If layering is important, choose a size that allows extra room. Always refer to the specific brand’s size guide, as fits can vary slightly between brands. Accurate measurements ensure the best fit for your jacket.

UK vs. European vs. US Jacket Size Comparison

UK, European, and US jacket sizes differ significantly. UK sizes align closely with US measurements, while European sizes are typically one to two sizes larger, requiring conversion for accuracy.

Converting UK Sizes to European Sizes

Converting UK jacket sizes to European sizes requires careful consideration, as European sizes are typically one to two sizes larger than UK sizes. For example, a UK size 40 corresponds to an EU size 48 or 50, depending on the brand. This difference arises because European sizing systems often use a different measurement scale. To ensure accuracy, it’s essential to refer to a detailed size chart that aligns UK and EU measurements. Many retailers provide conversion guides to help customers select the correct size. Always double-check the specific brand’s sizing chart, as variations can occur. This ensures a proper fit when shopping across international markets.

Converting UK Sizes to US Sizes

Converting UK jacket sizes to US sizes involves understanding their respective measurement systems. UK sizes are generally one to two sizes smaller than US sizes, so a UK size 40 corresponds to a US size 42. This difference stems from variations in regional sizing standards. To ensure accuracy, refer to a detailed size conversion chart that aligns UK and US measurements. Many retailers provide these guides to help customers select the correct size. Keep in mind that fit preferences may differ, so it’s wise to check specific brand sizing charts for the most accurate conversion. This approach helps avoid sizing discrepancies and ensures a comfortable fit when shopping internationally.

Tips for Ensuring the Perfect Fit

Consider fabric type, personal style, and intended use when selecting a jacket. Ensure proper chest and shoulder measurements. Try jackets on with layered clothing for accuracy.

Considering Fabric and Style

Fabric and style play a crucial role in achieving the perfect fit for your UK-sized men’s jacket. Different fabrics, such as wool, cotton, or synthetic materials, have varying degrees of stretch and drape, which can affect how the jacket sits on your body. For instance, a wool jacket might offer a more structured fit, while a cotton jacket could provide a relaxed, casual look. Additionally, the style of the jacket, whether it’s slim-fit, regular, or tailored, will influence the overall silhouette. It’s important to consider your lifestyle and preferences when selecting both the fabric and style to ensure the jacket not only fits well but also aligns with your personal aesthetic and needs. This dual consideration of fabric and style ensures a harmonious balance between comfort and appearance, making your jacket a wardrobe staple.

How to Avoid Common Sizing Mistakes

To avoid common sizing mistakes, ensure accurate chest measurements and understand your fit preference. Many errors occur from assuming sizes are universal across brands or not accounting for fabric type. Always refer to the specific size chart provided by the retailer, as sizes can vary. Consider whether you prefer a slim, regular, or tailored fit, as this impacts the overall silhouette; If possible, try the jacket on or compare measurements to a similar garment you already own. Ignoring these steps can lead to a poor fit, so taking the time to measure and compare is crucial for a flattering and comfortable result.

Additional Considerations

Layering, sleeve length, and body fit adjustments are crucial for comfort and style. Fabric type and personal style preferences also influence size choices, ensuring the perfect fit.

Layering and Fit Adjustments

When considering layering, your jacket size may need to accommodate additional clothing underneath. For instance, if you plan to wear a thick sweater or multiple layers, opt for a slightly larger size to ensure comfort and ease of movement. Fit adjustments are also important; some jackets may require tailoring to achieve the perfect silhouette. Adjustable cuffs, hem, and waist toggles can help customize the fit. Additionally, sleeve length should be checked to ensure it extends to the wrist bone for optimal proportions. These adjustments ensure your jacket not only fits well but also meets your personal style preferences, whether it’s slim-fit, regular, or tailored.

Sleeve and Body Length Adjustments

Sleeve length is a critical factor in achieving the perfect fit for a UK men’s jacket. Sleeves should extend to the base of the thumb for optimal proportions, ensuring functionality and style. Body length adjustments are equally important, with shorter lengths ideal for petite frames and longer lengths suiting taller individuals. Consider the intended use of the jacket, as active styles may require slightly longer sleeves for mobility. When layering, ensure the jacket’s length complements your torso size, avoiding overly boxy or restrictive fits. Checking size charts and trying on jackets can help determine the best sleeve and body length for your specific needs, ensuring a tailored look without compromising comfort.

Mastering UK men’s jacket sizing ensures a tailored fit. Measure accurately, consider fabric, and style to find your perfect jacket size for comfort and confidence.

Final Tips for Choosing the Right UK Jacket Size

When selecting your UK jacket size, prioritize accurate chest measurements and consider your body type. Opt for slim fit if you prefer a tailored look or regular fit for comfort. Ensure fabric choice aligns with your needs—wool for warmth, leather for durability. Check sleeve length to ensure shirt cuffs are visible for a polished appearance. If layering, choose a size that accommodates additional clothing without feeling restrictive. Consult specific brand size guides, as fits may vary. Read reviews or seek recommendations to gauge how a jacket fits others with a similar build. Ultimately, balance style, comfort, and practicality to find your perfect jacket.


vaillant ecotec pro 24 user guide

Category : United Kingdom

The Vaillant Ecotec Pro 24 is a gas-fired combination boiler designed for small to medium-sized homes․ Its compact design and modern aesthetic enhance efficiency and convenience․

1․1 Overview of the Boiler

The Vaillant Ecotec Pro 24 is a gas-fired combination boiler designed for small to medium-sized homes․ It provides both central heating and hot water, making it a versatile and efficient solution․ With a compact design, it can be installed in tight spaces, such as kitchen cupboards, while maintaining a sleek and modern appearance․ The boiler is known for its reliability and energy efficiency, making it a popular choice for homeowners seeking a cost-effective heating system․ Its user-friendly interface and advanced controls simplify operation, ensuring optimal performance and comfort․

1․2 Key Features and Benefits

The Vaillant Ecotec Pro 24 offers advanced controls for precise temperature management and energy efficiency․ Its user-friendly interface allows homeowners to easily adjust settings and monitor performance․ The boiler is compact, making it ideal for installation in small spaces․ It provides reliable heating and hot water, ensuring comfort while minimizing energy consumption․ Additionally, the Ecotec Pro 24 is ErP compliant, meeting high energy efficiency standards․ Its sleek design blends seamlessly with modern interiors, combining functionality with aesthetics to offer a practical and efficient heating solution for residential use․

Safety Considerations

Ensure proper installation by certified professionals and follow safety guidelines to avoid hazards․ Improper use can lead to unsafe conditions, so always adhere to the manufacturer’s instructions․

2․1 Safety Precautions for Installation and Use

Installation must be performed by a certified professional to ensure compliance with safety standards․ Always follow the manufacturer’s instructions and local regulations․ Before use, check the flue system for proper installation and ensure all gas connections are secure․ Never operate the boiler if any components are damaged or malfunctioning․ Keep the area around the boiler clear of flammable materials․ Regularly inspect the appliance to maintain safe operation․ Failure to adhere to these precautions may result in hazards, including gas leaks or carbon monoxide poisoning․ Proper maintenance and annual servicing by a qualified technician are essential for safe and efficient performance․

2․2 Emergency Procedures

In case of an emergency, switch off the boiler and isolate the gas supply immediately․ Open windows for ventilation if gas leakage is suspected․ Do not use electrical switches or devices near the boiler․ Evacuate the premises and contact emergency services or a qualified technician․ If the boiler shuts down unexpectedly, refer to the troubleshooting guide before restarting․ Never attempt repairs yourself, as this could lead to further hazards․ Always follow the manufacturer’s guidelines for safe operation and maintenance to prevent emergencies․

Installation and Maintenance Instructions

Professional installation by approved specialists is essential․ Annual servicing ensures optimal performance․ Regularly check flues and components for damage or blockages to maintain efficiency and safety․

3․1 General Installation Requirements

The Vaillant Ecotec Pro 24 must be installed by a qualified heating specialist․ Ensure compliance with Gas Safe regulations and local building codes․ The boiler requires a suitable flue system, meeting EN 544 standards, and proper ventilation․ Electrical connections must be in accordance with IEE regulations․ Adequate clearance around the boiler is essential for maintenance and safety․ The cold water stop valve is not included and must be fitted by the installer․ Always refer to the installation manual for specific requirements and guidelines to ensure correct and safe setup․

3․2 Maintenance Tips for Optimal Performance

Regular maintenance is crucial for the Vaillant Ecotec Pro 24 to ensure efficiency and longevity․ Check the system pressure annually and top it up if necessary․ Bleed radiators to remove airlocks, which can reduce heating performance․ Inspect the flue for damage or blockages and clean it as needed․ Schedule an annual service by a qualified engineer to inspect internal components, such as the heat exchanger and combustion chamber․ Clean or replace the filter to maintain optimal water flow․ Always follow the manufacturer’s guidelines for maintenance to prevent issues and ensure the boiler operates at its best․

Operating the Vaillant Ecotec Pro 24

The Vaillant Ecotec Pro 24 features a user-friendly interface for clear operation․ It offers precise temperature control and energy management, allowing homeowners to adjust settings and monitor performance efficiently․

4․1 Understanding the Controls and Interface

The Vaillant Ecotec Pro 24 features an intuitive interface designed for easy operation․ The controls include a clear display showing temperature settings, system status, and operating modes․ Users can adjust heating and hot water temperatures using simple buttons, while the interface provides real-time feedback․ The boiler also includes a basic display mode for straightforward operation․ The interface is designed to be user-friendly, allowing homeowners to monitor performance and adjust settings efficiently․ This ensures optimal comfort and energy management without unnecessary complexity․

4․2 Adjusting Settings for Efficiency

The Vaillant Ecotec Pro 24 allows users to optimize energy use by adjusting temperature settings and operating modes․ The boiler features a heating curve adjustment, enabling customization based on home size and insulation․ Users can set a schedule for heating and hot water, ensuring energy is only used when needed․ Additionally, the boiler supports weather compensation, automatically adjusting output based on outdoor temperatures․ These features help maximize efficiency and reduce energy consumption, ensuring a balance between comfort and cost-effectiveness․

4․3 Troubleshooting Common Issues

Identifying and addressing issues early ensures optimal performance․ Common problems include error codes, low pressure, ignition faults, and condensate blockages․ Check the user manual for error code meanings and follow reset procedures․ Low pressure can be resolved by repressurizing the system․ Ignition issues may require checking the gas supply or cleaning the burner․ Condensate pipe blockages should be cleared professionally․ Regular maintenance and annual servicing by a qualified technician can prevent many issues․ Always refer to the manual or contact Vaillant support for assistance, ensuring safety and efficiency are maintained․

Technical Specifications

The Vaillant Ecotec Pro 24 is a 24kW gas-fired combination boiler, suitable for small to medium-sized homes․ It features ErP compliance and high energy efficiency ratings․

5․1 Boiler Power and Compatibility

The Vaillant Ecotec Pro 24 is a 24kW gas-fired combination boiler, designed for small to medium-sized homes․ It operates on natural gas and is compatible with standard heating systems․ The boiler’s compact, wall-hung design allows for easy installation in tight spaces․ It is ErP compliant, ensuring high energy efficiency and meeting EU regulations․ The Ecotec Pro 24 is part of a series that includes the 28kW model, offering flexibility for varying household needs․ Its power output is sufficient for homes up to 200 square meters, providing reliable heating and hot water․

5․2 Energy Efficiency and ErP Compliance

The Vaillant Ecotec Pro 24 is ErP compliant, meeting EU energy efficiency standards․ It features high-efficiency condensing technology, optimizing energy use and reducing emissions․ With a Class A efficiency rating for both heating and hot water, it minimizes energy consumption while maintaining performance․ This boiler is designed to reduce carbon footprint and lower utility bills, making it an eco-friendly choice for homeowners․ Its advanced design ensures reliable and efficient operation, aligning with modern energy-saving demands․

Warranty and Support

Vaillant offers a one-year guarantee for the Ecotec Pro 24, covering manufacturing defects within 12 months of installation․ Registration within 30 days is required for validity․

6․1 Guarantee Terms and Conditions

The Vaillant Ecotec Pro 24 comes with a one-year guarantee, covering manufacturing defects within 12 months of installation․ Registration within 30 days is required․ Vaillant undertakes to repair or replace defective parts during this period, ensuring reliability and peace of mind․ Terms exclude damage from improper installation or maintenance․ The guarantee is non-transferable and applies only to the original purchaser․ Proper registration and adherence to maintenance guidelines are essential for validity․ This comprehensive coverage underscores Vaillant’s commitment to quality and customer satisfaction․

6․2 Registering Your Boiler

Registering your Vaillant Ecotec Pro 24 is straightforward․ Complete the Guarantee Registration Card and return it to Vaillant within 30 days of installation․ Online registration is also available for convenience․ Ensure all details are accurate to validate the guarantee․ Failure to register may invalidate the warranty․ Keep a copy of your registration confirmation for records․ This process ensures your boiler is officially recognized and eligible for support․ Vaillant’s registration system is designed to protect your investment and provide peace of mind․ Contact Vaillant support if you encounter any issues during the process․

Additional Resources

Vaillant provides comprehensive manuals, user guides, and online support for the Ecotec Pro 24․ Access these resources on their official website for troubleshooting and maintenance tips․

7․1 Accessing Manuals and Guides

The Vaillant Ecotec Pro 24 user guide and manuals are readily available online․ Visit Vaillant’s official website or platforms like ManualsLib to download free PDF versions․ These include installation, maintenance, and operation instructions․ The manuals provide detailed guidance on safety, troubleshooting, and optimal performance․ Ensure to register your boiler for warranty benefits․ Additional resources like FAQs and technical specifications can also be found on Vaillant’s support page, helping you make the most of your boiler’s features and functionality․

7․2 Online Support and FAQs

Vaillant offers comprehensive online support for the Ecotec Pro 24․ Visit their official website to access a dedicated FAQ section, troubleshooting guides, and interactive tools․ ManualsLib and other platforms also host downloadable resources․ Users can find answers to common queries, such as installation tips and error codes․ Additionally, Vaillant’s customer support team is available for direct assistance․ Online forums and technical documents provide further guidance, ensuring optimal boiler performance and addressing any operational concerns effectively․ These resources empower users to resolve issues independently or seek professional help when needed․


xnx xnx transmitter installation manual 2022

Category : United Kingdom

The XNX Universal Transmitter is a cutting-edge gas detection system designed for hazardous locations. Utilizing catalytic bead‚ electrochemical‚ or infrared sensors‚ it ensures reliable gas detection. Its flexible design allows for seamless integration‚ easy installation‚ and maintenance‚ making it ideal for various industrial applications.

System Overview

The XNX Universal Transmitter is a state-of-the-art gas detection system designed for use in hazardous environments. It supports multiple sensor technologies‚ including catalytic bead‚ electrochemical (EC)‚ and infrared (IR)‚ enabling detection of toxic gases‚ flammable gases‚ and oxygen depletion. The system is highly flexible‚ with five threaded ports available in metric or NPT versions‚ and ruggedized mounting options for ultimate installation flexibility.

The transmitter is built to operate reliably in challenging conditions‚ with a robust enclosure designed to withstand harsh industrial environments. It is compatible with a wide range of sensors from Honeywell Analytics‚ ensuring versatility for various gas detection needs. The XNX Universal Transmitter also features a user-friendly interface and seamless integration capabilities‚ making it an ideal solution for industrial gas detection systems.

Its design emphasizes scalability‚ allowing for easy addition of optional features such as remote monitoring or advanced communication protocols. The system is also designed with safety in mind‚ ensuring intrinsic safety in hazardous areas. Overall‚ the XNX Universal Transmitter is a reliable and adaptable solution for gas detection applications;

Safety Precautions

Before installing or operating the XNX Universal Transmitter‚ it is essential to follow all safety precautions to ensure safe and reliable operation. Always read and understand this manual thoroughly before proceeding with any installation or maintenance tasks. Pay special attention to warnings and cautions highlighted throughout the document.

The transmitter is designed for use in hazardous locations‚ so it must be installed and operated in accordance with all applicable local and international safety standards. Never open the transmitter enclosure while it is under power unless the area is confirmed to be non-hazardous. Ensure the sensor is properly earthed or grounded to maintain intrinsic safety and prevent electrical hazards.

When handling the transmitter‚ avoid touching electrical components or sensors to prevent damage or contamination. Use appropriate tools and protective equipment‚ such as gloves and safety glasses‚ when working with the device. Additionally‚ coat threads with anti-seize compound before replacing covers to prevent corrosion buildup and ensure proper sealing.

Failure to adhere to these safety precautions may result in equipment damage‚ personal injury‚ or system malfunction. Always prioritize safety when working with the XNX Universal Transmitter to ensure reliable performance in hazardous environments.

Installation Requirements

Ensure the XNX Universal Transmitter is installed in accordance with local regulations and safety standards. Use compatible fasteners and ensure the device is properly grounded. Verify environmental conditions match the transmitter’s specifications. Apply anti-seize compound to threaded connections before installation to prevent corrosion.

Mounting the Transmitter

The XNX Universal Transmitter can be mounted using its integral mounting tabs‚ providing flexibility in installation. It supports wall or pole mounting configurations‚ ensuring adaptability to various industrial settings. For secure installation‚ use compatible fasteners and ensure the transmitter is properly aligned. Before mounting‚ verify that the area is non-hazardous and the device is powered down to prevent accidental activation. The transmitter’s rugged design allows it to withstand harsh environments‚ but proper mounting is essential for optimal performance and safety. Ensure all connections are secure and follow the manufacturer’s guidelines for torque specifications. Applying a thin layer of anti-seize compound to threaded ports can help prevent corrosion. After mounting‚ double-check the device’s grounding to maintain intrinsic safety standards. Always refer to the manual for specific instructions tailored to your installation environment. Proper mounting ensures reliable operation and longevity of the XNX Universal Transmitter in gas detection applications.

Housing and Enclosure

The XNX Universal Transmitter is housed in a durable‚ explosion-proof enclosure designed to withstand harsh industrial environments. Constructed from high-quality materials‚ such as 316 stainless steel‚ the housing provides excellent resistance to corrosion and ensures long-term reliability. The enclosure is rated for hazardous locations and meets stringent safety standards‚ including IP66 and IP67 ratings for dust and water ingress protection. For added flexibility‚ the transmitter can also be installed in a UL-rated explosion-proof housing‚ depending on the application requirements.

The enclosure features five threaded ports‚ available in metric or NPT versions‚ providing versatility for sensor and cable connections. Before replacing the cover‚ apply a thin layer of anti-seize compound to the threads to prevent corrosion buildup. The housing is designed to securely accommodate the main board and POD (Plug-in Option Daughterboard)‚ ensuring all internal components are protected from environmental factors. Proper grounding of the enclosure is essential to maintain intrinsic safety standards and prevent electrical interference. Always ensure the enclosure is tightly sealed after any maintenance or installation to preserve its protective ratings. This robust design ensures the XNX Universal Transmitter operates reliably in even the most demanding conditions.

Configuration Process

The XNX Universal Transmitter configuration involves setting up the device to meet specific application requirements. This includes selecting sensor types‚ defining gas detection parameters‚ and enabling communication protocols. The process is streamlined for ease of use‚ ensuring accurate and reliable gas detection in various industrial settings.

Initial Setup and Calibration

Initial setup and calibration are critical steps to ensure the XNX Universal Transmitter operates accurately. Begin by powering the device and following the on-screen prompts to select the sensor type and configure basic settings. Calibration must be performed using approved gas cylinders to ensure accurate readings. The transmitter’s intuitive interface guides users through this process‚ minimizing errors. Proper calibration is essential for reliable gas detection‚ especially in hazardous environments. Always refer to the manual for specific calibration procedures tailored to your sensor type.

Integrating Sensors

Integrating sensors into the XNX Universal Transmitter is a seamless process due to its flexible design. The transmitter supports a wide range of sensor technologies‚ including catalytic bead‚ electrochemical (EC)‚ and infrared (IR) sensors‚ each optimized for detecting specific gas hazards. This versatility allows users to tailor the system to their unique requirements‚ ensuring accurate and reliable gas detection. When integrating sensors‚ ensure compatibility with the transmitter’s firmware and follow the manufacturer’s guidelines for proper connection and configuration. The transmitter’s advanced compatibility ensures smooth integration‚ reducing installation time and potential errors. Proper sensor integration is crucial for maintaining the system’s accuracy and reliability in hazardous environments. Always refer to the manual for specific instructions on connecting and configuring sensors for optimal performance.

Maintenance and Upkeep

Regular maintenance is essential to ensure the XNX Universal Transmitter operates at peak performance and provides accurate gas detection. Start by performing routine inspections of the transmitter and its components‚ such as sensors‚ wiring‚ and connections. Clean the exterior and interior of the housing to prevent dust or debris buildup‚ which could interfere with functionality. Additionally‚ check the sensors periodically and replace them as recommended by the manufacturer to maintain detection accuracy. Calibration should be performed at specified intervals to ensure the transmitter remains sensitive to target gases. For systems with battery power‚ monitor battery levels and replace them as needed to avoid unexpected shutdowns. Always refer to the manual for detailed maintenance schedules and procedures. Proper upkeep not only extends the lifespan of the transmitter but also ensures reliable operation in hazardous environments. Regular maintenance is a critical step in maintaining the safety and efficiency of the XNX Universal Transmitter system.

Troubleshooting Common Issues

Troubleshooting the XNX Universal Transmitter involves identifying and resolving issues promptly to ensure reliable operation. Common problems include sensor malfunctions‚ communication errors‚ and power-related issues. If the transmitter fails to detect gas accurately‚ check the sensor for contamination or damage and perform calibration if necessary. Communication issues can arise from faulty wiring or incorrect configuration; verify all connections and settings to resolve this. Power problems‚ such as low battery or voltage fluctuations‚ should be addressed by checking the power source and ensuring it meets the transmitter’s requirements. Additionally‚ ensure the transmitter housing is clean and free from corrosion‚ as this can interfere with performance. Refer to the manual for detailed troubleshooting steps and solutions. Regular maintenance and adherence to calibration schedules can help prevent many of these issues. By addressing problems systematically‚ users can ensure the XNX Universal Transmitter operates efficiently and provides accurate gas detection in hazardous environments. Always follow safety guidelines when performing troubleshooting to avoid risks. Consulting the manual or contacting technical support for complex issues is recommended.

The XNX Universal Transmitter is a robust and versatile gas detection system designed to meet the demands of hazardous environments. Its flexibility in sensor integration‚ ease of installation‚ and user-friendly operation make it an ideal solution for various industrial applications. By following the installation manual and adhering to safety precautions‚ users can ensure optimal performance and longevity of the device. Regular maintenance and timely troubleshooting are essential to uphold its reliability. With its advanced features and comprehensive support resources‚ the XNX Universal Transmitter stands as a reliable choice for ensuring safety and efficiency in gas detection systems. Always refer to the manual for detailed guidance and best practices to maximize its capabilities and maintain operational excellence over time.