
nikon d3100 instruction manual
Category : Manuals
Welcome to the Nikon D3100 user manual, your comprehensive guide to unlocking the potential of this versatile DSLR camera. Designed for beginners, it offers intuitive controls, a 14.2 MP CMOS sensor, and Full HD video recording. With its Guide Mode, the D3100 simplifies photography, making it ideal for learners seeking to enhance their skills.
1.1 Overview of the Nikon D3100 Camera
The Nikon D3100 is an entry-level DSLR camera designed for beginners and photography enthusiasts. It features a 14.2-megapixel CMOS sensor, EXPEED 2 image-processing engine, and Full HD video recording. Lightweight and compact, the D3100 is easy to handle, making it ideal for everyday use. Its intuitive interface, including the Guide Mode, helps users understand and apply various camera settings. The camera supports a wide range of NIKKOR lenses, offering flexibility for different shooting scenarios. With its robust build and user-friendly design, the D3100 is a great tool for capturing high-quality images and videos. It’s perfect for those looking to transition from point-and-shoot cameras to a more advanced DSLR experience.
1.2 Key Features of the Nikon D3100
The Nikon D3100 boasts a 14.2-megapixel CMOS sensor, delivering sharp and detailed images. It features the EXPEED 2 image-processing engine for enhanced performance and color accuracy. The camera supports Full HD video recording at 1080p, making it ideal for capturing high-quality movies. A 3-inch LCD screen provides a clear view for previewing and reviewing shots. The D3100 also includes Live View mode for easier composition and an 11-point autofocus system for precise subject tracking. With an ISO range of 100-3200, it performs well in various lighting conditions. The camera’s Guide Mode simplifies complex settings, helping beginners improve their photography skills. Additionally, it supports a wide range of NIKKOR lenses, offering versatility for different shooting styles. Built-in pop-up flash and compatibility with external flash units further expand its capabilities, making it a versatile tool for both stills and video.

Camera Overview
The Nikon D3100 is an entry-level DSLR designed for photography enthusiasts, offering a balance of performance and simplicity. It features intuitive controls and Guide Mode for easy learning, ensuring high-quality images across various shooting conditions.
2.1 Physical Features of the Nikon D3100
The Nikon D3100 is a compact and lightweight DSLR camera, designed for ease of use and portability. Its durable plastic body provides a comfortable grip, making it easy to handle during extended shooting sessions. The camera features a 3-inch TFT LCD screen with 230,000 dots, offering a clear view of images and settings. The optical viewfinder, while not as large as higher-end models, provides a decent preview of the scene. The D3100 also includes a built-in pop-up flash, ideal for casual photography and fill lighting. Its physical controls are intuitively laid out, with a mode dial on top for quick access to shooting modes. Overall, its ergonomics and design make it an excellent choice for beginners and casual photographers.
2.2 Technical Specifications of the Nikon D3100
The Nikon D3100 features a 14.2-megapixel CMOS sensor, delivering crisp and detailed images. It supports a wide ISO range of 100 to 12,800, enabling excellent low-light performance. The camera is equipped with an 11-point autofocus system, ensuring precise and rapid subject tracking. Video recording is available in Full HD (1080p) at 24 frames per second, with the option to capture HD (720p) at 30 or 24 frames per second. The D3100 uses SD, SDHC, and SDXC memory cards for storage. It also includes a rechargeable EN-EL8 lithium-ion battery, providing up to 550 shots per charge. The camera’s EXPEED 2 image processor enhances image quality and processing speed, making it a reliable choice for both still photography and video recording.

Getting Started with the Nikon D3100
Welcome to the Nikon D3100 setup guide. This section covers unboxing, initial setup, battery charging, lens mounting, and basic configurations to help you start capturing stunning photos effortlessly.
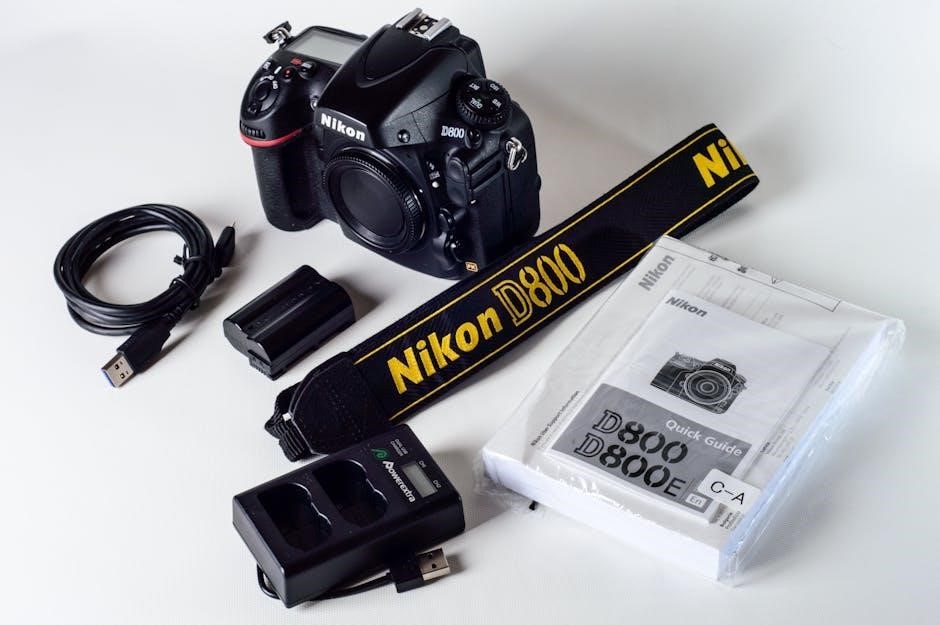
3.1 Unboxing and Initial Setup
Welcome to the unboxing and initial setup section of your Nikon D3100 instruction manual. Carefully unpack your camera, ensuring all accessories are included, such as the battery, charger, strap, and lens. Begin by charging the battery fully before first use. Next, attach the strap for secure handling. Mount the provided lens by aligning the mounting index on the lens with the white dot on the camera body, then twist gently to secure. Power on the camera and follow the on-screen prompts to set your language, date, and time. Familiarize yourself with the camera’s controls and modes. This guide will walk you through each step, ensuring a smooth transition into capturing stunning photographs with your Nikon D3100.
3.2 Charging the Battery
To ensure optimal performance, charge the Nikon D3100’s battery before first use. Locate the provided MH-24 charger and plug it into a power source. Insert the battery into the charger, aligning the terminals correctly. The charging indicator will turn red, switching to green when fully charged, which typically takes about 2 hours. Avoid overcharging, as it may reduce battery longevity. Once charged, remove the battery from the charger and insert it into the camera’s battery compartment, located at the base. Close the compartment securely. For best results, use only Nikon-approved batteries and chargers to maintain performance and safety. If using the camera for the first time, allow the battery to charge completely before capturing images.
3.3 Mounting the Lens
Mounting the lens on your Nikon D3100 is a straightforward process that requires attention to detail to ensure proper alignment and secure attachment. Begin by turning off the camera to prevent any accidental power issues. Locate the lens mount on the camera body, which is the circular metal part where the lens will attach. On the lens, you’ll find a similar mount with a white dot or alignment marker. Align this marker with the corresponding marker on the camera body to ensure proper positioning.
Hold the lens by its ridge and support it from underneath to prevent dropping. Gently align the lens with the camera mount, making sure the white dots match up. Once aligned, twist the lens clockwise until it clicks into place, ensuring it is snug and secure. Avoid touching the camera’s mirror or sensor to prevent damage. After mounting, check the lens by gently tugging on it to ensure it is properly secured. If it feels loose, tighten it slightly until it feels firm.
Finally, turn the camera back on and you’re ready to start shooting. Remember to handle the lens with care, avoiding contact with the glass elements and keeping the area clean to prevent dust from entering the camera. Regular cleaning with a lens cloth can help maintain image quality by preventing dust spots. With practice, lens mounting will become a quick and confident process, allowing you to focus on capturing your best shots.

Shooting Modes
The Nikon D3100 offers various shooting modes to suit different photography needs, ranging from automatic settings for ease to manual controls for creative freedom. Scene modes further enhance versatility for specific genres like portraits, landscapes, and sports, allowing photographers to capture stunning images with precision and artistry.
4.1 Understanding Auto Mode
Auto Mode on the Nikon D3100 is designed for hassle-free photography, automatically adjusting settings like aperture, shutter speed, and ISO to capture well-balanced images in various lighting conditions. The camera analyzes the scene and selects optimal settings, making it ideal for beginners or quick shots. In Auto Mode, the D3100 also enables the Scene Auto Selector, which detects the type of scene (e.g., portrait, landscape, or close-up) and adjusts settings accordingly. Users have limited manual control in this mode, but it ensures consistent results without requiring technical knowledge. This mode is perfect for those who want to focus on composition and creativity while letting the camera handle the technicalities.
4.2 Exploring Manual Mode
Manual Mode on the Nikon D3100 offers full creative control, allowing photographers to independently adjust aperture, shutter speed, and ISO sensitivity. This mode is ideal for experienced users who want precise control over their images; By using the command dial, you can adjust aperture and shutter speed to achieve desired effects, such as motion blur or depth of field. Manual Mode also enables bracketing for capturing multiple exposures of the same scene at different settings. While it requires a good understanding of photography basics, Manual Mode provides the flexibility to tailor settings to specific creative goals. It’s perfect for advanced photographers seeking customization and artistic expression in their work.
4.3 Using Scene Modes
Scene Modes on the Nikon D3100 allow you to capture photos tailored to specific situations by automatically adjusting camera settings. Modes like Portrait, Landscape, Night Portrait, Close-up, and Sports optimize settings for ideal results. For example, Portrait mode softens backgrounds to emphasize subjects, while Landscape mode enhances detail and color in wide scenes. Night Portrait combines flash with longer shutter speeds to capture both subject and background. Close-up mode minimizes depth of field for macro shots, and Sports mode freezes fast-moving subjects. These modes simplify photography by letting the camera handle complex adjustments, ensuring professional-looking results without manual tweaking. Refer to the user manual for a full list of Scene Modes and their applications.
Camera Settings
The Nikon D3100 offers customizable settings to refine your photography experience. Adjust aperture, shutter speed, and ISO to control exposure. White balance and file formats can also be modified to suit your needs.
5.1 Adjusting Aperture
Aperture is a critical camera setting that controls the amount of light entering the lens. On the Nikon D3100, aperture is adjusted using the aperture button (marked with an “f”) and the command dial. Aperture values, or f-stops, are measured in numbers like f/2.8 or f/16. A lower f-stop (e.g., f/2.8) means a larger aperture, allowing more light and a shallower depth of field, while a higher f-stop (e.g., f/16) results in a smaller aperture, less light, and a deeper depth of field. Aperture priority mode (A) allows you to set the aperture manually, with the camera adjusting the shutter speed accordingly. Experimenting with aperture settings helps achieve desired effects, such as blurred backgrounds or sharp landscapes.
5.2 Setting Shutter Speed
Shutter speed determines how long the camera’s shutter remains open, measured in seconds or fractions of a second. On the Nikon D3100, you can adjust the shutter speed using the shutter-release button and the command dial. Faster shutter speeds (e.g., 1/1000th of a second) are ideal for freezing fast-moving subjects, while slower speeds (e.g., 1 second) create motion blur. In Manual (M) mode, you can set the shutter speed independently, while in Shutter Priority (S) mode, the camera adjusts the aperture automatically. Experimenting with different shutter speeds allows you to capture dynamic effects, such as sharp action shots or artistic blurring of water or clouds. Understanding shutter speed is essential for achieving the desired visual impact in your photography.
5.3 Managing ISO Sensitivity
ISO sensitivity controls the camera’s light sensitivity, with lower values (ISO 100-400) suitable for bright conditions and higher values (ISO 1600-6400) for low light. On the Nikon D3100, you can adjust ISO via the menu or using the ISO button and command dial. Lower ISOs provide sharper images with less noise, while higher ISOs introduce grain but allow shooting in darker environments. For best results, use the lowest ISO necessary for your lighting conditions to minimize noise. In Auto ISO mode, the camera adjusts sensitivity automatically, but manual control offers more creative flexibility. Experiment with ISO settings to balance image quality and low-light performance effectively.
5.4 White Balance Settings
White balance adjusts the color temperature of your images to ensure accurate color representation under various lighting conditions. The Nikon D3100 offers multiple white balance modes, including Auto, Daylight, Incandescent, Fluorescent, Cloudy, and Shade. Each mode compensates for the color cast of different light sources. For example, Daylight mode is ideal for outdoor shooting, while Incandescent is suited for indoor lighting. Fluorescent mode includes seven sub-settings to accommodate different types of fluorescent lights. You can also set a custom white balance using the PRESET option by capturing a reference image of a neutral object. This ensures precise color accuracy in tricky lighting situations. Experiment with these settings to achieve natural-looking colors in your photos.
Accessories for the Nikon D3100
Accessories like lenses, tripods, and memory cards enhance functionality. Additional gear includes remote shutters and camera bags for convenience and improved photography experiences.
6.1 Compatible Lenses
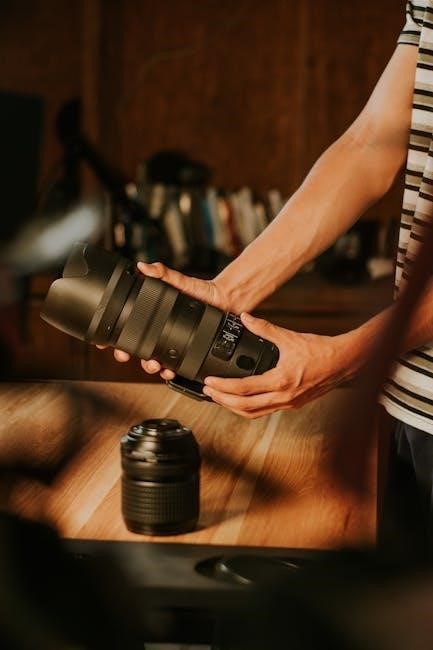
The Nikon D3100 is compatible with a wide range of Nikon F-mount lenses, offering flexibility for various photography needs. The AF-S DX NIKKOR 18-55mm f/3.5-5.6 VR is a popular kit lens. Additionally, photographers can opt for prime lenses like the AF-S DX NIKKOR 35mm f/1.8G for portraits or zoom lenses like the AF-S DX NIKKOR 55-200mm f/4-5.6 VR for telephoto shots. Wide-angle lenses, such as the AF-S DX NIKKOR 10-24mm f/3.5-4.5G, are ideal for landscapes. Nikon lenses ensure optimal image quality and compatibility with the D3100’s features. Third-party lenses from brands like Sigma and Tamron are also available but require compatibility verification. Choosing the right lens enhances creativity and performance, making it essential to explore options based on photographic goals.
6.2 Using a Tripod
A tripod is an essential accessory for the Nikon D3100, providing stability and reducing camera shake, especially in low-light conditions or when using slower shutter speeds. To use a tripod, locate the 1/4-inch tripod mount on the camera’s base and secure it to the tripod head. Ensure the tripod is level and stable for optimal results. Using a tripod enables sharper images, allows for better composition, and minimizes blur caused by hand movement. It is particularly useful for long exposures, time-lapse photography, or when using telephoto lenses. For additional stability, consider using the camera’s timer or remote shutter release. Always choose a sturdy tripod that supports the weight of your camera and lens setup. This accessory is a must-have for serious photographers aiming to improve image quality and creativity.
6.3 Memory Cards and Storage
The Nikon D3100 supports SD, SDHC, and SDXC memory cards, offering flexible storage options for your photos. When selecting a memory card, choose a high-speed Class 6 or higher for optimal performance, especially when using burst mode or recording video. Insert the memory card into the camera’s card slot, located on the bottom near the battery compartment. Always format the memory card in the camera menu before use to ensure compatibility and prevent data corruption. For organization, consider using multiple smaller-capacity cards rather than a single large one to minimize data loss in case of card failure. Regularly back up your images to a computer or external storage device to safeguard your work. Proper storage and management of memory cards are crucial for maintaining the integrity and accessibility of your photos.
6.4 Remote Shutter Release
The Nikon D3100 is compatible with the MC-DC2 remote cord, allowing for remote shutter release. This accessory reduces camera shake and is ideal for tripod-based photography or self-portraits. Connect the remote to the camera’s accessory terminal, located on the side of the body. Once connected, press the remote’s shutter button to capture images. Using a remote ensures sharp photos by eliminating vibrations caused by manual shutter pressing. It’s particularly useful in low-light conditions or when using long exposures. For added convenience, the remote also supports the camera’s self-timer function. Always store the remote securely to avoid damage or misplacement. This feature enhances precision and flexibility, making it a valuable tool for photographers seeking professional results.

Maintenance and Care
Regularly clean the camera and lens to prevent dust and smudges. Store the D3100 in a dry, cool place and avoid extreme temperatures. Check for firmware updates to ensure optimal performance and security.
7.1 Cleaning the Camera and Lens
Cleaning the Nikon D3100 and its lens is essential for maintaining image quality. Use a soft, dry cloth to wipe the camera body, avoiding harsh chemicals. For the lens, gently remove dust with a blower or soft brush. Dampen a microfiber cloth with distilled water, but avoid touching the lens surface excessively. Never use tissues or paper towels, as they may scratch the lens. For stubborn smudges, apply a small amount of lens cleaning solution to the cloth, not the lens. Avoid touching the camera’s sensor; if cleaning is necessary, enable the camera’s cleaning mode; Regular cleaning prevents dust buildup and ensures sharp, clear photos. Always handle the camera and lens with care to avoid damage.
7.2 Updating Firmware

Updating the firmware of your Nikon D3100 ensures optimal performance and unlocks new features. Visit Nikon’s official website to check for the latest firmware version. Download the update to your computer, then transfer it to a memory card using a card reader. Insert the card into the camera, go to the setup menu, and select Firmware Version to begin the update. Use a fully charged battery or connect the camera to an AC adapter to prevent interruptions. Do not turn off the camera during the process, as this could cause permanent damage. After completion, verify the firmware version in the menu to confirm success. Regularly checking for updates ensures your camera operates at its best.

Troubleshooting Common Issues
Troubleshooting the Nikon D3100 involves identifying and resolving issues like battery drain, blurry images, or card errors. Check power sources, memory cards, and settings to ensure proper functionality. If problems persist, consult the user manual or contact Nikon support for assistance. Regular maintenance and updates can prevent many common issues. Always refer to the troubleshooting guide in the manual for specific solutions to ensure your camera operates smoothly.
8.1 Resolving Battery Issues
If you encounter battery issues with your Nikon D3100, start by ensuring the battery is fully charged using the provided charger. Avoid overcharging, as it can reduce battery life. If the battery doesn’t charge, clean the contacts on both the battery and camera to remove dirt or corrosion. Use only Nikon-approved chargers and batteries to prevent compatibility problems. If the issue persists, try resetting the camera by removing the battery and memory card for 30 seconds. In some cases, updating the camera firmware may resolve battery-related errors. If none of these steps work, the battery may need replacement. Always refer to the manual for specific troubleshooting steps to ensure optimal performance and longevity of your Nikon D3100’s battery.
8.2 Fixing Autofocus Problems
If your Nikon D3100 is experiencing autofocus issues, start by ensuring the AF-mode is set correctly. Select AF-C for moving subjects or AF-S for stationary ones. Check the AF-area mode and ensure it matches your shooting scenario. Clean the lens and camera sensor, as dirt or smudges can interfere with autofocus. Verify that the lens is properly mounted and compatible with the D3100. If issues persist, reset the camera to its default settings or update the firmware. In low-light conditions, use the built-in AF-assist light to improve focus accuracy. Avoid using third-party lenses that may not fully support Nikon’s autofocus system. If the problem remains unresolved, contact a Nikon service center for professional assistance.

Advanced Techniques
- Bracketing: Capture multiple exposures of the same scene to merge later for HDR images.
- Focus Stacking: Combine shots with different focus points for extended depth of field.
- Panning: Track moving subjects to create sharp images with blurred backgrounds.
- RAW Format: Shoot in RAW for better post-processing flexibility.
- Manual Focus: Use manual focus for precise control over your images.
9.1 Mastering Autofocus
The Nikon D3100 features an 11-point autofocus system, offering precise control over focus acquisition. Use the AF mode selector to choose between AF-A (auto-servo AF), AF-S (single-servo AF), and AF-C (continuous-servo AF). AF-A automatically switches between AF-S and AF-C based on subject movement, while AF-S is ideal for stationary subjects and AF-C for moving ones. The camera also includes AF-area modes: Single Point, Dynamic Area, and Auto Area. Single Point allows manual selection of one AF point, Dynamic Area uses a group of points, and Auto Area lets the camera automatically select. For improved accuracy, use the Multi-CAM 1000 autofocus module and ensure the lens is compatible with AF-S or AF-I. Clean the lens regularly to maintain optimal autofocus performance.
9.2 Understanding Bracketing
Bracketing on the Nikon D3100 allows you to capture a series of images at different exposures, ideal for high-contrast scenes. The camera offers Auto Bracketing (BKT) via the Shooting Menu. Set the number of frames (3) and exposure increments (up to 2 EV) based on your needs. This feature is useful for HDR (High Dynamic Range) photography. After enabling, the camera takes three shots: one at the current setting, one underexposed, and one overexposed. Use the Multi Selector to choose the BKT option and adjust settings. Review the images using the playback menu. Bracketing ensures you capture a wider tonal range, enhancing dynamic range in challenging lighting conditions. For best results, use a tripod to maintain camera stability during the process.
The Nikon D3100 is a versatile and user-friendly DSLR, offering advanced features for entry-level photographers. Its intuitive design and comprehensive guides ensure mastery and confidence in photography.
10.1 Summary of Key Features
The Nikon D3100 is an entry-level DSLR camera designed for photography enthusiasts. It features a 14.2-megapixel CMOS sensor, EXPEED 2 image-processing engine, and ISO sensitivity up to 3200. The camera offers an 11-point autofocus system, 3-inch LCD screen, and HD video recording capabilities. Its Guide Mode simplifies complex settings, making it ideal for beginners. The D3100 supports a wide range of AF-S Nikkor lenses, ensuring versatility in various shooting scenarios. With its compact design and user-friendly interface, the D3100 is a great tool for capturing high-quality images and learning photography fundamentals. Its features balance simplicity and functionality, catering to both new and intermediate photographers.
10.2 Resources for Further Learning
To deepen your understanding of the Nikon D3100, explore official Nikon resources, including the Nikon website and the downloadable user manual. Online forums like Nikonians and DPReview offer valuable insights and user experiences. YouTube channels such as Tony Northrup and CameraRecycle provide tutorials and tips tailored for the D3100. Additionally, consider enrolling in online photography courses on platforms like Udemy or Coursera, which cover DSLR basics and advanced techniques. For hands-on learning, join local photography workshops or clubs. Lastly, eBooks and guides specific to the Nikon D3100, such as “Nikon D3100: From Snapshots to Great Shots,” offer in-depth guidance. These resources will help you master your camera and enhance your photography skills.