
maytag mvwc565fw1 repair manual
Category : Manuals
Welcome to the Maytag MVWC565FW1 repair manual, your comprehensive guide for troubleshooting, diagnosing, and repairing issues with your washing machine. This manual provides detailed instructions, safety precautions, and diagnostic procedures to help you maintain and fix your appliance effectively. Designed for both novice and experienced users, it covers everything from basic maintenance to complex repairs, ensuring your washer operates efficiently for years to come.
1.1 Overview of the Maytag MVWC565FW1 Washing Machine
The Maytag MVWC565FW1 is a high-efficiency, top-loading washing machine designed for durability and performance. It features a stainless steel drum, 11 wash cycles, and a rotary control interface. With its compact design and upward-opening door hinge, it offers convenient loading and unloading. The cold water fill option enhances energy efficiency, making it a practical choice for everyday laundry needs. Built to last, it includes a 10-year limited parts warranty for added peace of mind.
1.2 Importance of Using the Repair Manual
Using the Maytag MVWC565FW1 repair manual is essential for safe and effective repairs. It provides detailed instructions, diagrams, and troubleshooting guides, helping you diagnose and fix issues accurately. The manual ensures compliance with safety standards, prevents costly mistakes, and empowers you to maintain your washer efficiently, extending its lifespan and performance.
Safety Precautions and Essential Tools
Always unplug the washer before repairs. Use screwdrivers, pliers, and wrenches for disassembly. Wear protective gloves and eyewear to ensure safety during maintenance and repairs.
2.1 Safety Guidelines for Repairing the Maytag MVWC565FW1
Always unplug the washer from the power source before starting repairs. Wear protective gloves and eyewear to avoid injury. Use appropriate tools like screwdrivers, pliers, and wrenches. Avoid working in damp environments to prevent electric shocks. Follow the manufacturer’s instructions and safety warnings in the manual. Ensure proper ventilation and keep children away during repairs. Familiarize yourself with safety guidelines to prevent accidents and ensure a smooth repair process.
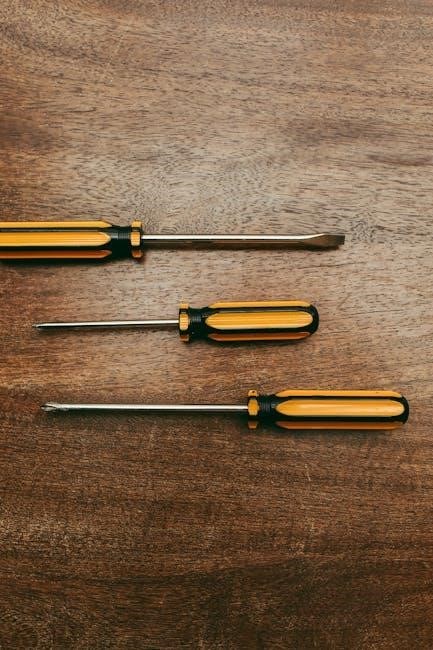
2.2 Recommended Tools and Equipment for the Repair
For repairing the Maytag MVWC565FW1, essential tools include flathead and Phillips screwdrivers, adjustable pliers, and an adjustable wrench for handling various fasteners. Hex keys or Allen wrenches may be needed for specific bolts. Needle-nose pliers can assist with reaching tight spaces, and a bucket or drip pan is useful for water drainage. Safety gear like gloves and safety glasses is crucial. A multimeter can aid in diagnosing electrical issues. Ensure you have these tools ready to facilitate a smooth and safe repair process.
Diagnostic Guide and Error Codes
This section provides a diagnostic guide and error codes to help identify and troubleshoot issues with your Maytag MVWC565FW1 washer effectively and accurately.
3.1 Understanding Error Codes on the Maytag MVWC565FW1
Understanding error codes is crucial for diagnosing issues with your Maytag MVWC565FW1 washer. Error codes like “Lid” or “F” indicate specific problems, such as a faulty lid switch or pump failure. Refer to the manual for code definitions, which guide you through troubleshooting steps. This helps identify the root cause efficiently, ensuring timely repairs and minimizing downtime for your appliance.
3.2 Common Issues and Their Diagnostic Procedures
Common issues with the Maytag MVWC565FW1 include poor washing performance, excessive noise, or the washer not draining. Diagnostic procedures involve checking error codes, inspecting the drain pump, and testing the lid switch. Low spin speed may indicate a faulty belt, while unusual noises could signal worn bearings. Always consult the manual for specific troubleshooting steps and recommended tools to ensure accurate diagnoses and effective repairs.

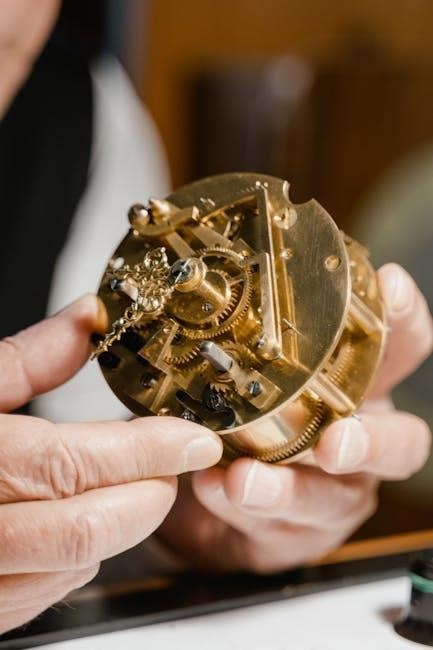
Disassembly and Accessing Internal Components
Step-by-step disassembly instructions guide you through safely accessing internal components like the gearcase, motor, and drain pump. Follow safety guidelines to avoid damage or injury.
4.1 Step-by-Step Disassembly Instructions
Begin by disconnecting power and water supplies. Remove the top panel by taking out the screws at the back. Disconnect electrical connectors carefully. Next, remove the control panel and detergent dispenser. Take out the tub screws and lift the tub to access internal components. Refer to the diagrams for clarity. Ensure all parts are labeled for easy reassembly. Proceed with caution to avoid damaging critical systems.
4.2 Accessing the Gearcase, Motor, and Drain Pump
After disassembling the exterior, remove the tub to access internal components. Disconnect the gearcase mounting bolts and electrical connectors. Carefully lift the gearcase to expose the motor. For the drain pump, locate it at the bottom of the tub and disconnect the hoses and electrical connections. Document each step for easy reassembly. Use diagrams to ensure proper alignment and secure all parts firmly.

Common Repair Procedures
Common repairs include replacing worn belts, fixing faulty lid switches, and addressing drain pump issues. These procedures restore functionality and ensure optimal performance of the washing machine.
5.1 Replacing the Belt and Pulley System
To replace the belt and pulley system on your Maytag MVWC565FW1, start by gathering the necessary tools and materials, including a compatible replacement belt and screwdrivers. Ensure the washer is unplugged and the water supply is turned off for safety. Access the belt by removing the top or back panel. Loosen the belt tensioner to remove the old belt, then install the new one, ensuring proper alignment and tension. Reassemble the panels and test the washer to confirm the repair.
5.2 Fixing the Lid Switch and Strike
To fix the lid switch and strike on your Maytag MVWC565FW1, start by disconnecting power and water supply. Access the lid switch by removing the top panel using a screwdriver. Disconnect the wires from the old switch and replace it with a new one, ensuring proper alignment. For the lid strike, adjust or replace it if bent or broken, securing it firmly. Reassemble and test the washer to confirm the repair.
5.3 Replacing the Water Pump and Hoses
To replace the water pump and hoses on your Maytag MVWC565FW1, start by disconnecting power and draining the washer. Access the pump by removing the bottom panel or tipping the unit. Disconnect hoses from the pump, taking care to catch any residual water. Remove the old pump, ensuring all connections are free. Install the new pump, securing it firmly. Replace the hoses, making sure they are tightly connected to avoid leaks. Reassemble the washer, restore power, and test the system to ensure proper function.

Parts and Diagrams
This section provides detailed diagrams and part identification for the Maytag MVWC565FW1, helping you locate components easily. Use these diagrams to find and order genuine Maytag parts.
6.1 Identifying Parts Using the Maytag MVWC565FW1 Diagram
Use the Maytag MVWC565FW1 diagram to identify components like the gearcase, motor, and tub. Locate parts by referencing numbered sections in the diagram, ensuring accurate identification. This visual guide helps you recognize and name each part, making it easier to diagnose issues and order the correct replacements. Always refer to the official Maytag parts list for compatibility and authenticity.
6.2 Ordering Genuine Maytag Replacement Parts
To ensure optimal performance, order genuine Maytag parts for your MVWC565FW1. Use the model number to find compatible components on official sites like Sears Parts Direct or Repair Clinic. Genuine parts guarantee quality and fit, preventing future issues. Always verify compatibility and consult the parts diagram before purchasing. This ensures you get the correct items for your specific repair needs.

Reassembly and Testing
Reassemble the washer carefully, ensuring all components are properly aligned and secured. Test the machine by running a full cycle to verify functionality and safety.
7.1 Reassembling the Washer After Repair
Reassemble the washer by reversing the disassembly steps, ensuring all parts are properly aligned and secured. Consult the parts diagram for precise placement of components. Tighten screws and bolts firmly but avoid over-tightening. Reconnect hoses, electrical connectors, and belts carefully. Double-check the lid switch, drain pump, and motor connections. Ensure the tub is balanced and the machine is level before proceeding to testing.
7.2 Testing the Washer to Ensure Proper Functionality
After reassembly, run a diagnostic test cycle to ensure all functions operate correctly. Check for leaks, proper spin speed, and drainage efficiency. Verify that the lid switch, water level sensor, and temperature settings are functioning. If error codes appear, refer to the troubleshooting guide. Ensure balanced operation and quiet performance. A successful test confirms the repair’s effectiveness and readiness for regular use.

Maintenance Tips to Prevent Future Repairs
Regularly clean the gasket, check hoses for leaks, and ensure proper ventilation. Use HE detergent to prevent excessive sudsing and maintain optimal washing performance.
8.1 Regular Maintenance Routines for the Maytag MVWC565FW1
Perform routine checks on hoses for signs of wear and cracks. Regularly clean the detergent dispenser and gasket to prevent mold buildup. Ensure the drain pump filter is clear of debris to maintain proper water flow. Leaving the lid open after use allows the interior to dry, reducing mildew growth. Schedule annual professional maintenance if needed.
8.2 Tips for Extending the Life of the Washing Machine
Use High Efficiency (HE) detergents exclusively to avoid excessive sudsing. Regularly clean the detergent dispenser and gasket to prevent mold buildup. Balance loads evenly to reduce strain on the motor and tub. Avoid overloading the washer, as this can damage internal components. Ensure proper installation and leveling to maintain stability during operation. Regularly inspect and replace worn hoses to prevent leaks and water damage.

Manufacturer Support and Resources
Maytag offers comprehensive support through official repair manuals, customer service, and genuine parts. Visit their website for troubleshooting guides, warranty information, and authorized repair assistance to ensure optimal performance and safety.
9.1 Accessing Official Maytag Repair Manuals and Guides
To access official Maytag repair manuals and guides for the MVWC565FW1, visit the Maytag website or authorized retailers like Sears Parts Direct. These resources provide detailed instructions, diagrams, and troubleshooting tips specific to your model. You can download PDF manuals free of charge, ensuring you have accurate information for repairs and maintenance. Utilize these official guides to ensure compliance with manufacturer standards and safety protocols.
9.2 Contacting Maytag Customer Service for Assistance
For assistance with your Maytag MVWC565FW1, contact Maytag customer service through their official website or support hotline. Visit the Maytag Owners Center for service information, troubleshooting guides, and repair resources. You can also reach Maytag support by phone or email for personalized help with repairs, parts, and warranty inquiries, ensuring you receive genuine assistance tailored to your needs.

Troubleshooting Common Problems
This section helps identify and resolve common issues with the Maytag MVWC565FW1, such as error codes, lid switch problems, or drain issues, using diagnostic guides and repair tips.
10.1 Troubleshooting the Maytag MVWC565FW1 Washer
This section guides you through identifying and resolving common issues with the Maytag MVWC565FW1. Start by checking error codes displayed on the control panel, which often indicate specific problems like lid switch malfunctions or drain pump issues. Refer to the manual for accurate diagnostics and step-by-step solutions to restore your washer’s functionality efficiently.
10.2 Advanced Troubleshooting Techniques
For experienced users, advanced troubleshooting involves diagnostic modes and in-depth error code analysis. Check the motor and electrical systems for hidden faults. Use specialized tools for precise diagnostics, ensuring accurate repairs. Refer to the repair manual for detailed guidance on complex issues, optimizing your troubleshooting process for efficient resolution.
Ensure all repairs are completed safely and correctly. Verify proper operation and compliance with safety standards. Final checks confirm your washer functions efficiently and remains under warranty.
11.1 Final Inspection Before Using the Washer
After completing repairs, perform a thorough inspection to ensure all components are securely reassembled. Check for leaks around hoses and connections, verify proper electrical connections, and confirm the drain pump is functioning. Test a short cycle to ensure the washer operates quietly, drains correctly, and spins efficiently. This final check ensures safety, functionality, and prevents future issues, giving you confidence in your repair work.
11.2 Ensuring Compliance with Warranty and Safety Standards
After repairs, ensure all work aligns with Maytag’s warranty and safety guidelines. Verify that genuine parts were used and document all repairs for warranty validation. Double-check compliance with safety standards to prevent hazards. Proper adherence ensures your washer meets manufacturer specifications and maintains warranty coverage, providing peace of mind and protecting your investment in the appliance;