
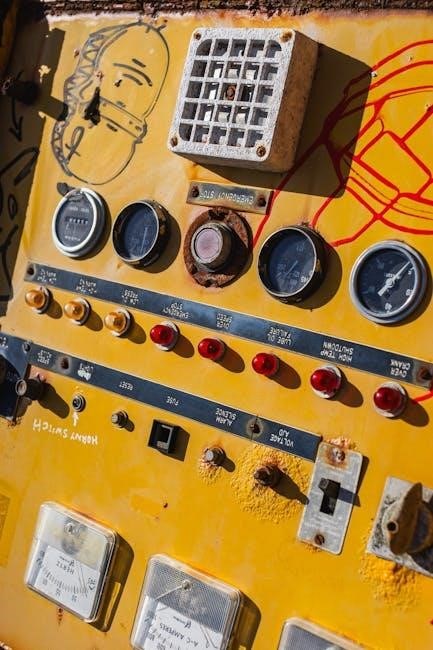
manual transfer switch wiring diagram
Category : Manuals
A manual transfer switch wiring diagram is a visual representation of electrical connections for safely integrating a generator with your home’s electrical system, ensuring power continuity during outages.

Understanding the Manual Transfer Switch Wiring Diagram
This diagram illustrates the electrical connections between a generator, main power source, and household circuits, using symbols and labels to clarify components and their relationships for safe installation.
2.1 Purpose of the Diagram
The purpose of a manual transfer switch wiring diagram is to provide a clear, visual guide for safely connecting a portable generator to a home’s electrical system during power outages. It illustrates the proper connections between the generator, main electrical panel, and transfer switch, ensuring a seamless transition of power. The diagram serves as a blueprint for electricians and homeowners to follow, detailing how to integrate the generator into the existing wiring system without risking damage or safety hazards. By using labels and symbols, it simplifies the understanding of complex electrical pathways, making installation more accessible. This visual aid is crucial for ensuring compliance with electrical codes and preventing dangerous shortcuts, such as illegal generator connections directly to the electrical panel. Ultimately, the diagram ensures reliable backup power supply while maintaining safety and efficiency.
2.2 Components Involved
The manual transfer switch wiring diagram involves several key components essential for a safe and functional installation. These include the manual transfer switch itself, which acts as the bridge between the utility power and the generator. The generator, typically portable, provides backup power during outages. The main electrical panel is where the transfer switch is connected, allowing it to control the flow of power to various circuits. Additional components such as circuit breakers, wiring, and connectors are necessary to complete the connections. A grounding rod is also required to ensure proper grounding of the generator, enhancing safety. Each component plays a critical role in the system, and their correct installation, as per the diagram, is vital for reliable operation and compliance with electrical codes. Understanding these components is the first step toward a successful installation.
Safety Precautions and Best Practices
Always turn off the main power supply before starting any work. Use proper tools and follow local electrical codes to ensure compliance. Proper grounding is essential for safety.
3.1 Essential Safety Measures
When working with a manual transfer switch wiring diagram, safety is paramount to avoid electrical hazards. Always disconnect the main power supply before starting any installation or maintenance. Use a multimeter to verify that no voltage is present at the work area. Proper grounding is critical; ensure the generator and transfer switch are connected to a grounding rod to prevent shocks. Wear protective gear, such as insulated gloves and safety goggles, to safeguard against electrical arcs or sparks. Follow the National Electric Code (NEC) guidelines to ensure compliance with safety standards. Never overload circuits, as this can lead to overheating and fires. Use appropriately rated wires and connectors to handle the current safely. Keep the work area well-ventilated, especially when using generators, to avoid carbon monoxide buildup. Always test the system after installation to ensure proper functionality. If unsure, consult a licensed electrician. Prioritize safety to prevent accidents and ensure reliable power transfer;
3.2 Legal and Compliance Considerations
When installing a manual transfer switch, adhering to legal and compliance standards is crucial to ensure safety and avoid legal issues. Always follow the National Electric Code (NEC) guidelines, as non-compliance can lead to fines or system rejection during inspections. Local electrical codes may vary, so consult your area’s specific regulations before proceeding. A permit is typically required for such installations, and work must be inspected by a certified authority. Ensure the transfer switch and generator are rated appropriately for the load they will handle, as specified by the manufacturer. Proper documentation, including wiring diagrams and installation manuals, must be maintained for future reference. Hire a licensed electrician if you are unsure about compliance requirements. Failure to meet legal standards can result in unsafe conditions, legal penalties, or invalidated insurance claims. Compliance ensures the system operates safely and efficiently, protecting both people and property. Always verify that components are UL-listed or meet equivalent standards.

Step-by-Step Wiring Diagram Explanation
The manual transfer switch wiring diagram guides you through connecting the generator to your home’s electrical system safely. Start by identifying the main components: the transfer switch, generator, and main electrical panel. Connect the generator’s output to the transfer switch’s “generator” terminals, ensuring correct polarity. Next, link the transfer switch to the main electrical panel, typically at a designated subpanel or circuit. The neutral wire may or may not be switched, depending on your system; verify this with your generator’s specifications. Grounding is critical for safety—connect the generator’s grounding terminal to a grounding rod. Use appropriately sized wires to prevent overheating and ensure reliable power transfer. Follow the wiring diagram’s labels and symbols, such as “Line,” “Load,” and “Generator,” to avoid confusion. Double-check all connections before energizing the system. Always refer to the manufacturer’s instructions for specific wiring requirements. Properly securing wires and ensuring tight connections are essential for safe and efficient operation. If unsure, consult a licensed electrician to avoid potential hazards. This step-by-step approach ensures a seamless and safe power transfer during outages.

Tools and Materials Needed for Installation
To install a manual transfer switch, you’ll need specific tools and materials. Essential tools include a voltage tester, wire strippers, pliers, screwdrivers, and a multimeter. For materials, you’ll require the transfer switch, appropriately sized wires, connectors, grounding rod, and circuit breakers or fuses. Mounting hardware like screws and brackets is also necessary. Ensure all components are compatible with your generator and electrical panel. Proper tools and materials are crucial for a safe and efficient installation. Always refer to the wiring diagram for specific requirements.

Installation Guide for Manual Transfer Switch
The installation of a manual transfer switch involves several critical steps to ensure safe and proper functionality. First, turn off the main power supply to your home or business. Locate the main electrical panel and install the transfer switch nearby. Connect the grounding rod to the generator and ensure all wires are securely attached to the correct terminals on the switch. Follow the wiring diagram to connect the utility power, generator power, and main service panel. Test the switch by manually toggling it to ensure smooth power transition. Proper installation requires adherence to electrical codes and safety standards. Always consult a licensed electrician if unsure about any step. This guide ensures a reliable connection between your primary power source and backup generator, providing peace of mind during power outages.

Troubleshooting Common Issues
When working with a manual transfer switch, several common issues may arise during installation or operation. One of the most frequent problems is no power from the generator, which can occur due to incorrect wiring or a tripped circuit breaker. Always refer to the wiring diagram to ensure connections are accurate. Another issue is the switch not activating properly, which may be caused by a faulty lever or improper installation. Additionally, overloaded circuits can prevent the switch from functioning correctly, so it’s essential to prioritize essential appliances. Lastly, grounding issues can lead to safety hazards, so verifying proper grounding connections is crucial. By addressing these common problems systematically, you can ensure reliable performance and safety. Regular maintenance and adherence to electrical codes will also help minimize potential issues.

Tips for DIY Enthusiasts
For DIY enthusiasts tackling a manual transfer switch installation, proper planning and preparation are key to success. Always follow the wiring diagram precisely to avoid errors. Turn off the main power supply before starting work to ensure safety. Use high-quality tools and materials to maintain reliability. Test the system after installation to confirm it works as intended. Consider labeling wires to simplify future maintenance. If unsure about any step, consult a licensed electrician to prevent potential hazards. Grounding the system correctly is non-negotiable for safety. Lastly, keep the manual handy for quick reference during the process. By adhering to these tips, DIY enthusiasts can achieve a safe and efficient installation. Remember, patience and attention to detail are essential for a successful project.

Differences Between Manual and Automatic Transfer Switches
Manual and automatic transfer switches serve the same purpose but differ in operation. A manual transfer switch requires an operator to physically switch between power sources, making it more cost-effective and straightforward for DIY installations. In contrast, an automatic transfer switch (ATS) detects power loss and switches to the backup generator without human intervention. ATS systems are more convenient and ideal for critical applications where uninterrupted power is essential. While manual switches are simpler and less expensive, automatic switches offer enhanced reliability and speed in emergency situations. Both types ensure safe power transitions, but the choice depends on specific needs and preferences. Understanding these differences helps in selecting the appropriate system for your backup power requirements.

Maintenance Tips for Longevity
Regular maintenance is crucial to ensure the longevity and reliability of a manual transfer switch. Start by inspecting the switch and its connections for wear, corrosion, or loose wires. Clean dust and debris from the switch to prevent malfunctions. Lubricate moving parts if necessary, as per the manufacturer’s instructions. Check the wiring connections to ensure they are secure and properly tightened. Test the switch periodically by simulating a power outage and verifying smooth transitions between power sources. Keep a maintenance log to track inspections and repairs. Finally, consider hiring a licensed electrician for an annual professional inspection to ensure compliance with safety standards and address any potential issues before they escalate. Proper care will extend the lifespan of your manual transfer switch and ensure reliable performance during power outages.
A manual transfer switch wiring diagram is an essential tool for ensuring safe and efficient power transfer during outages. By following the outlined steps and safety guidelines, homeowners and electricians can install and maintain these systems effectively. Proper wiring and regular maintenance are key to longevity and reliability. Understanding the components and their roles, adhering to legal standards, and troubleshooting common issues can prevent hazards and ensure uninterrupted power supply. Whether for a portable generator or a standby system, a manual transfer switch offers a practical solution for backup power needs. Always consult professional resources and follow local electrical codes to guarantee a safe and successful installation. This guide has provided a comprehensive overview, empowering users to confidently handle their manual transfer switch wiring projects.