canon ae 1 manual program
Category : Manuals
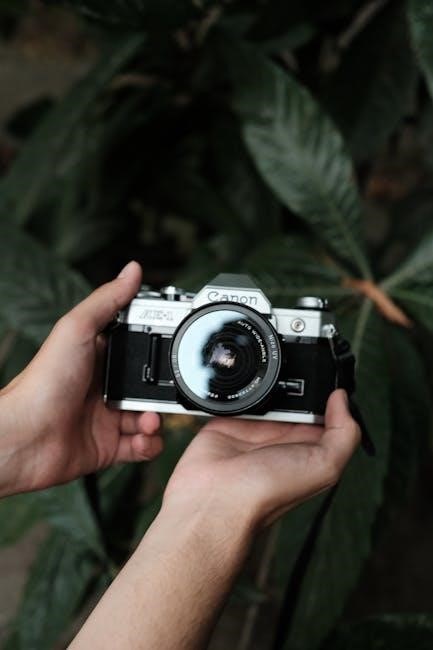
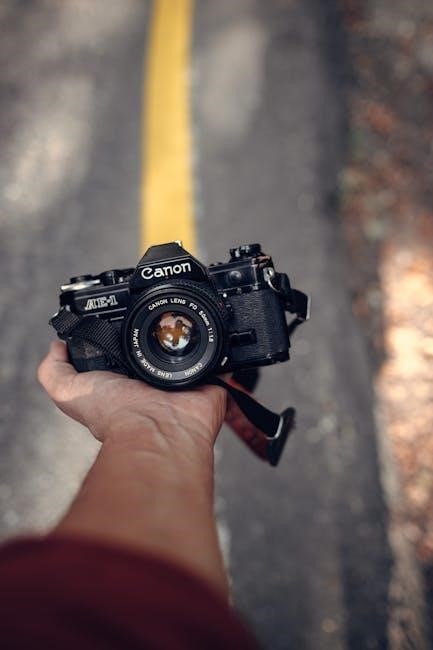
The Canon AE-1 Program, introduced in 1981, is a legendary 35mm SLR camera known for its durability, ergonomic design, and versatility. It combines manual control with advanced Program mode, making it a favorite among photographers for its simplicity and effectiveness in capturing high-quality images.
1.1 Overview of the Camera
The Canon AE-1 Program is a 35mm SLR camera introduced in 1981, offering a blend of manual control and advanced Program mode. It features a durable build, ergonomic design, and compatibility with Canon’s FD and New FD lenses. The camera includes modes like Program, Shutter Priority, and Manual, catering to both professionals and newcomers. Its bright viewfinder, split-image rangefinder, and microprism focusing aids enhance usability. With a reputation for reliability and versatility, the AE-1 Program remains a favorite among film photography enthusiasts, balancing simplicity with creative control.
1.2 Importance in Film Photography
The Canon AE-1 Program holds a significant place in film photography history, offering unparalleled accessibility and creative control. Its introduction of the Program mode made advanced photography techniques available to newcomers while retaining manual capabilities for professionals. This balance helped democratize high-quality film photography, making it a cornerstone in many photographers’ arsenals. Its influence is evident in its enduring popularity and the inspiration it provided for future camera designs, solidifying its legacy as a timeless tool for capturing exceptional images.

Historical Background and Development
The Canon AE-1 Program, released in 1981, built on the success of the original AE-1, introducing the innovative Program mode for enhanced automatic shooting capabilities while retaining manual control options.
2.1 Release and Impact
The Canon AE-1 Program was released in 1981, building on the success of the original AE-1. It introduced the Program mode, allowing automatic setting of both shutter speed and aperture, making it more accessible to photographers of all skill levels. This innovation significantly impacted the photography world, offering a balance between automation and manual control. Its release solidified Canon’s reputation in the SLR market, and it remains a beloved choice for both professionals and enthusiasts, influencing future camera designs with its user-friendly approach.
2.2 Evolution from the AE-1
The Canon AE-1 Program evolved from the original AE-1, introduced in 1976, by adding the Program mode, which automatically sets both shutter speed and aperture. This enhancement made the camera more user-friendly while retaining manual capabilities. The AE-1 Program also improved upon its predecessor with a more refined design and expanded compatibility with Canon’s FD lenses. These advancements ensured the AE-1 Program remained a top choice for photographers seeking a balance between automation and creative control, further cementing its legacy in film photography.
Design and Build Quality
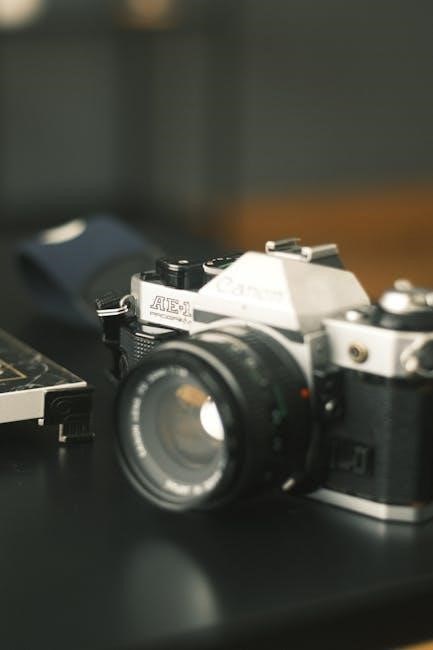
The Canon AE-1 Program features a robust, ergonomic design with a durable metal body and high-quality materials, ensuring long-lasting performance and a comfortable user experience.
3.1 Construction and Durability
The Canon AE-1 Program is built with a sturdy metal body, ensuring exceptional durability and resistance to wear. Its robust construction withstands heavy use, making it a reliable choice for photographers. The camera’s mechanical components are precisely engineered, providing smooth operation and longevity. Over time, some users have reported minor issues like shutter squeal, but overall, the AE-1 Program remains a testament to timeless craftsmanship and reliability in film photography.
3.2 Ergonomics and User Experience
The Canon AE-1 Program boasts an intuitive design that prioritizes ease of use. Its single mode dial simplifies operation, while the bright, large viewfinder enhances composition and focus. The camera’s ergonomic layout ensures comfortable handling, with controls like the film advance and frame counter designed for quick access. This seamless user experience makes it accessible to both beginners and experienced photographers, allowing them to focus on creativity without being hindered by complex settings.
Key Features of the Canon AE-1 Program
The Canon AE-1 Program features the FD lens mount, manual focus with split-image rangefinder, Program, Shutter Priority, and Manual modes, plus a bright viewfinder with metering.
4.1 FD Mount and Lens Compatibility
The Canon AE-1 Program uses the FD mount, offering compatibility with a wide range of FD and New FD lenses. This system provides access to lenses like the FD 50mm f/1.8 and FD 24mm f/2.8, ensuring versatility for various photography needs. Older FL lenses are also compatible, though they require stop-down metering. The FD mount system is renowned for its affordability and high-quality optics, making it a favorite among photographers seeking value and performance without compromising on image quality.
4.2 Manual Focus and Focusing Aids

The Canon AE-1 Program features manual focus with a split-image rangefinder and microprism focusing aids, ensuring precise control over sharpness. The split-image rangefinder divides the subject, aligning when in focus, while the microprism grid provides a textured surface for quicker focusing. These aids, combined with the camera’s bright viewfinder, make manual focusing intuitive and efficient, allowing photographers to achieve sharp images consistently. This system is particularly effective with the FD lenses, enhancing the overall shooting experience.
4.3 Exposure Modes: Program, Shutter Priority, Manual
The Canon AE-1 Program offers three exposure modes: Program, Shutter Priority, and Manual. Program mode automatically sets both shutter speed and aperture for effortless shooting. Shutter Priority allows users to set the shutter speed, with the camera adjusting the aperture. Manual mode provides full control over both settings for precise adjustments. The viewfinder features LED indicators, showing the selected aperture and shutter speed, aiding photographers in achieving their desired exposure. This versatility makes the AE-1 Program adaptable to various shooting scenarios.
4.4 Viewfinder and Metering System
The Canon AE-1 Program features a large, bright viewfinder with red LED aperture indicators, providing clear visibility and precise exposure control. The metering system uses a center-weighted approach, ensuring balanced exposures. The viewfinder displays shutter speed, aperture, and exposure compensation, while the AE Lock button allows users to lock exposure settings for creative control. This system is intuitive, enabling photographers to focus on composition and capture sharp, well-exposed images effortlessly.
Exposure Modes Explained
The Canon AE-1 Program offers three exposure modes: Program, Shutter Priority, and Manual. Program mode automates settings for ease, while Shutter Priority and Manual provide creative control, catering to both beginners and experienced photographers.
5.1 Program Mode Operation
The Program mode on the Canon AE-1 Program automatically sets both aperture and shutter speed, simplifying photography for users of all skill levels. By focusing on your subject and framing the shot, the camera handles exposure calculations, ensuring balanced results. This mode is ideal for quick shooting scenarios, offering ease of use while maintaining high image quality. It’s a versatile feature that bridges the gap between automation and creative control, making it a standout option for both beginners and experienced photographers alike.
5.2 Shutter Priority Mode
In Shutter Priority mode, photographers control the shutter speed while the camera automatically adjusts the aperture. This mode is perfect for capturing motion effects, such as freezing fast-moving subjects or creating artistic blur. By setting the desired shutter speed, users can experiment with creative techniques while relying on the camera to maintain proper exposure. It offers a balance between manual control and automation, making it a versatile option for various shooting scenarios and lighting conditions.
5.3 Manual Mode
Manual Mode on the Canon AE-1 Program offers full control over both aperture and shutter speed, allowing photographers to fine-tune their settings for precise results. This mode is ideal for experienced shooters who prefer hands-on adjustment. By setting the aperture on the lens and shutter speed on the camera, users can achieve exacting control over exposure. The camera’s light meter provides guidance, but the photographer has complete creative freedom, making Manual Mode a powerful tool for achieving specific artistic or technical effects in various lighting conditions.

The Viewfinder and Focusing System
The Canon AE-1 Program features a bright, clear viewfinder with a split-image rangefinder and microprism for precise manual focusing. Its large, sharp display enhances composition and accuracy, making it a joy to use for photographers seeking control and clarity in their work.
6.1 Brightness and Clarity
The Canon AE-1 Program boasts an exceptionally bright and clear viewfinder, renowned for its size and sharpness. Its large, illuminated display provides excellent visibility, even in low-light conditions, making composition and focusing effortless. The viewfinder’s clarity is comparable to high-end modern DSLRs, such as the Canon 5D Mark II, offering a distraction-free shooting experience. This feature, combined with its focusing aids, ensures precise control and enhances the overall photography process, making it a standout choice for both professionals and enthusiasts.
6.2 Split-Image Rangefinder
The Canon AE-1 Program features a split-image rangefinder, a sophisticated focusing aid that simplifies manual focusing. This system divides the viewfinder image into two parts, allowing precise alignment for sharp focus. Unlike other cameras, the AE-1 Program’s rangefinder remains functional even with slower lenses, ensuring accuracy across various focal lengths. This feature, combined with the microprism and matte field, provides a seamless and intuitive focusing experience, making it a favorite among photographers who value manual control and optical precision.
6.3 Microprism and Matte Field
The Canon AE-1 Program incorporates a microprism and matte field to enhance manual focusing precision. The microprism provides a textured, sparkling effect in sharp areas, while the matte field offers a flat, even surface for contrast. Together, these aids help photographers achieve accurate focus quickly. The microprism is particularly effective with faster lenses, and the matte field ensures consistent results across various lighting conditions. This combination makes manual focusing intuitive and efficient, even for photographers new to film photography.
Lens Compatibility and Options
The Canon AE-1 Program features the FD mount, offering compatibility with a wide range of FD and New FD lenses, providing flexibility for various photographic needs and styles.
7.1 FD and New FD Lenses
The Canon AE-1 Program is compatible with both FD and New FD lenses, offering a wide range of focal lengths and apertures. FD lenses, introduced earlier, feature chrome breech-lock rings, while New FD lenses are all-black with improved coatings. Both provide excellent optical quality and are available at affordable prices on the used market, making them a popular choice for photographers seeking versatility without compromising image quality.
7.2 Compatibility with Other Mounts
The Canon AE-1 Program primarily uses FD and New FD lenses, but older Canon FL and non-FD lenses can also be mounted, albeit with stop-down metering only. Adapters allow compatibility with other mounts, such as EF lenses, though metering and autofocus functionality may be limited. This flexibility makes the AE-1 Program adaptable for photographers experimenting with various lens types, while FD and New FD lenses remain the optimal choice for seamless performance and metering accuracy.
7.3 Recommended Lenses
For the Canon AE-1 Program, the FD 50mm f/1.8 and FD 24mm f/2.8 are highly recommended for their sharpness and versatility. The FD 85mm f/1.2 L and FD 24mm f/1.4 L offer exceptional optical quality for portraits and wide-angle shots. These lenses, available at affordable prices, provide excellent performance and value, making them ideal for photographers seeking high-quality results without the cost of modern EF lenses.

Using the Camera: Tips and Tricks
Load film, compose, and shoot with ease. Use the AE Lock button to lock exposure, test the light meter, and practice with cheap film to refine your skills.
8.1 Loading Film
Loading film into the Canon AE-1 Program is straightforward. Open the back by pulling the film rewind knob. Align the film leader with the spool, ensuring it seats properly. Close the back and advance the film using the rapid wind lever until it stops. The frame counter will reset, confirming the film is loaded. Always test with a roll of cheap film first to ensure proper function and avoid wasting valuable shots. This step ensures your camera is ready for capturing great images.
8.2 Metering and Exposure Lock
The Canon AE-1 Program features a center-weighted metering system for accurate exposure readings. To lock exposure, press the AE Lock button after metering your subject. This is especially useful for backlit scenes, ensuring proper exposure for your main subject. The camera’s metering system is reliable, but manual adjustments can refine results. Use the ASA dial for exposure compensation, allowing you to fine-tune settings without taking your eye from the viewfinder. This feature enhances control, making it ideal for both beginners and experienced photographers.
8.3 Shooting Techniques
Mastering the Canon AE-1 Program involves understanding its shooting techniques. For sharp images, use the split-image rangefinder and microprism focusing aids. When shooting in Program mode, focus on composition and lighting. For manual control, adjust aperture and shutter speed to achieve desired effects. Experiment with panning for motion shots or bracketing for optimal exposure. Use the AE Lock button for backlit subjects to ensure proper exposure. Practice with different film speeds and depths of field to enhance creativity and precision in your photography.
Common Issues and Maintenance
The Canon AE-1 Program may experience shutter squeal due to dried lubrication. Regular maintenance, such as cleaning and lubricating gears, can prevent this issue. Battery life is reliable, but testing is recommended. Proper upkeep ensures optimal performance and longevity of the camera.
9.1 Shutter Squeal and Lubrication
The Canon AE-1 Program may develop a shutter squeal due to dried lubrication on the curtain spindles. This is common in well-used cameras but not serious. To address it, clean and re-lubricate the gears with appropriate camera-specific lubricants. Regular maintenance can prevent this issue. Additionally, ensure the shutter is tested after servicing to confirm smooth operation. Proper care extends the camera’s lifespan and ensures reliable performance for years of photography.
9.2 Battery Life and Testing
The Canon AE-1 Program uses a 6V A544 battery, compatible with 4LR44, PX28, and similar types. Battery life is excellent, lasting up to a year with normal use. To test, press the battery check button near the rewind crank; six beeps indicate a good battery, while three beeps signal it’s low. Alkaline and lithium batteries perform well. Interestingly, leaving the camera in the “A” position doesn’t drain the battery quickly, ensuring it’s ready for instant use whenever needed.
9.3 Repair and Upkeep
Regular maintenance is crucial for the Canon AE-1 Program. Common issues include shutter squeal, caused by dried lubrication, and degraded film-door foam. Cleaning the aperture control gears with a soft cloth can resolve squeal. Replace the foam with modern alternatives to prevent dust and light leaks. Check for battery corrosion and clean contacts. For complex repairs, seek a professional. Replacement parts are still available, ensuring longevity. Proper upkeep keeps this iconic camera functioning flawlessly, ready for years of reliable service.

Comparison with Other Models
The Canon AE-1 Program stands out for its Program mode, offering ease of use while maintaining manual control. Its FD lens compatibility and robust build quality make it a timeless choice, surpassing many modern DSLRs in simplicity and reliability.
10.1 vs. Original AE-1
The Canon AE-1 Program, introduced in 1981, builds on the legacy of the original AE-1 (1976) with the addition of Program mode. This feature automatically sets both shutter speed and aperture, making it more accessible to inexperienced photographers. While the original AE-1 was praised for its manual controls and popularity among enthusiasts, the AE-1 Program offers enhanced convenience without sacrificing the durability and lens compatibility that made its predecessor iconic. Both models remain celebrated for their simplicity and photographic excellence.
10.2 vs. A-1
The Canon AE-1 Program and the A-1, released in 1978, share a similar design philosophy but differ in functionality. The A-1 introduced advanced features like multiple automatic modes, appealing to professionals, while the AE-1 Program simplified controls with its Program mode. Both cameras use the FD mount, ensuring lens compatibility. The AE-1 Program is more user-friendly, balancing simplicity with the versatility of manual controls, making it a preferred choice for photographers seeking ease without compromising on creative freedom.
10.3 vs. Modern DSLRs
The Canon AE-1 Program stands out for its simplicity and tactile experience compared to modern DSLRs. While DSLRs offer advanced features like autofocus, video, and digital controls, the AE-1 Program excels in manual operation and a distraction-free design. Its bright viewfinder and intuitive controls provide a pure photography experience, appealing to those who value craftsmanship and direct creative control. Both formats coexist, catering to different preferences: the AE-1 for purists and DSLRs for tech-savvy shooters.
The Canon AE-1 Program is a timeless classic, offering simplicity, durability, and creative control. Its legacy endures as a beloved tool for photographers seeking both artistry and precision.
11.1 Legacy and Popularity
The Canon AE-1 Program holds a revered place in photography history, celebrated for its simplicity and effectiveness. With over 3.3 million units sold, it remains a beloved choice for photographers. Its influence extends beyond film photography, inspiring the iconic shutter sounds of Apple devices. The camera’s enduring popularity stems from its intuitive design, versatility, and the exceptional quality of images it produces, making it a timeless favorite among both professionals and enthusiasts in the world of film photography.
11.2 Value for Photographers
The Canon AE-1 Program offers immense value to photographers, blending simplicity with advanced features. Its intuitive design and lack of modern complexities allow photographers to focus on creativity. The camera’s durability and compatibility with affordable FD lenses make it a cost-effective choice. Whether for beginners or seasoned professionals, the AE-1 Program delivers exceptional image quality, making it a timeless tool for capturing moments with precision and artistry, ensuring its relevance in the ever-evolving world of photography.