Category Archives: Instructions

  • 0

above ground swimming pool installation instructions

Category : Instructions

Planning and Preparation for Above Ground Pool Installation

Planning and preparation are critical for a successful above ground pool installation. Start by choosing the right pool type and size for your space and budget.

Budgeting is essential; consider pool costs, materials, and labor. Ensure you have all necessary permits and approvals before beginning the project.

Select a flat, stable site for the pool, ensuring proper drainage and accessibility for delivery. Measure the area to confirm the pool will fit comfortably.

Prepare a checklist of tools and materials, and review the manufacturer’s instructions thoroughly. Plan for at least 6-10 hours for the installation process.

Consider hiring professionals if you’re unsure about any step. Proper planning ensures a smooth and stress-free installation experience.

1.1 Choosing the Right Pool Type and Size

Choosing the right pool type and size is the first step in above ground pool installation. Consider your backyard space, budget, and family needs. Popular types include steel-walled, soft-sided, and hybrid pools, each offering durability and aesthetic appeal. Measure your yard to determine the maximum pool size that fits comfortably, leaving space for decking or surrounding features. Round, oval, and rectangular shapes are common, with sizes ranging from 12 to 30 feet in diameter. Ensure the pool type complements your yard’s layout and intended use, whether for recreation or relaxation. Proper selection ensures long-term satisfaction and functionality.

1.2 Budgeting and Cost Estimates

Budgeting is crucial for a stress-free above ground pool installation. The total cost ranges from $1,037 to $6,026, depending on pool size, type, and features. Include the pool kit, equipment, delivery, and installation fees in your budget. DIY installations can save money, but consider tool rental or purchase costs. Large or custom pools may exceed $10,000. Research local labor costs and factor in permits. Compare quotes from suppliers and contractors to ensure transparency. Proper budgeting helps avoid financial surprises and ensures the project stays on track. Plan wisely to enjoy your pool without overspending.

1.3 Site Selection and Permits

Selecting the right site for your above ground pool is essential. Choose a flat, stable area with proper drainage to prevent water accumulation. Ensure the site is accessible for delivery and installation. Check local building codes and obtain necessary permits before starting the project. Verify that the pool is at least 10 feet away from power lines and other obstacles. Secure approval from your homeowners’ association, if required. Proper site selection and permit compliance ensure safety and avoid legal issues. Mark the pool area with stakes and twine to visualize the space before installation begins.

Preparing the Ground for Installation

Clear the area of debris and sod to ensure a flat, stable surface. Level the ground carefully to prevent unevenness. Compact the soil thoroughly for stability.

2.1 Leveling the Ground

Leveling the ground is a crucial step for a stable above ground pool installation. Start by marking the pool area with stakes and string to define the space.

Use a shovel to remove high spots and fill in low areas with soil. Compact the ground using a hand tamper or plate compactor to ensure firmness.

Check the level repeatedly with a carpenter’s level or laser level, ensuring evenness across the entire area. Proper leveling prevents pool damage and ensures safe use.

A perfectly leveled surface guarantees the pool sits securely, avoiding structural issues and prolonging its lifespan. Take your time to achieve precise results for a flawless installation.

2.2 Removing Sod and Debris

Before leveling, remove all sod and debris from the marked pool area. Use a sod cutter or shovel to strip grass, ensuring the ground is clear of obstructions.

Dispose of sod and debris properly to prevent interference during installation. Clearing the area ensures a smooth, even surface for the pool base.

A clean site allows for accurate leveling and prevents future structural issues. Take care to remove all roots and rocks for optimal ground preparation.

After clearing, inspect the area to ensure no debris remains, ensuring a solid foundation for your above ground pool installation.

2.3 Laying the Sand or Concrete Base

Laying a sand or concrete base is essential for stabilizing your above ground pool. Compact the ground thoroughly before spreading a 2-inch layer of sand evenly across the site.

Use a hand tamper or plate compactor to ensure the sand is level and firm. For added durability, some installers prefer a concrete pad, which requires professional mixing and pouring.

Once the base is laid, double-check its levelness and roundness using a measuring tape and carpenter’s level. A properly prepared base ensures the pool sits evenly and prevents structural issues.

Allow the base to set completely before proceeding with pool assembly. A solid foundation is crucial for the longevity and safety of your above ground pool.

Assembling the Pool Frame and Base

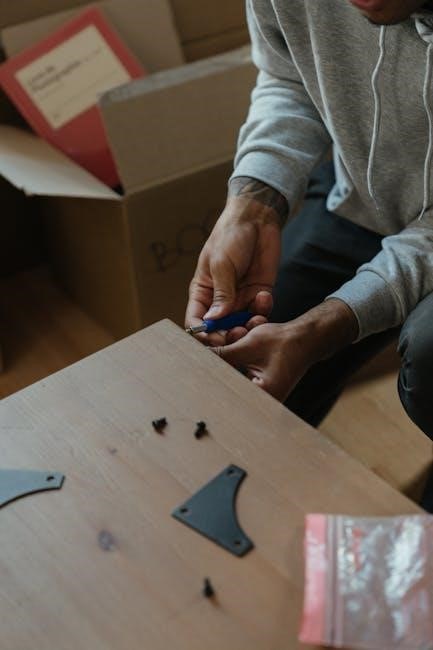
Begin by assembling the bottom rail and frame, following the manufacturer’s instructions. Secure the base plates firmly and ensure the frame is stable and round. Check for levelness and tighten all connections properly to support the pool walls effectively.

3.1 Laying Out the Pool Components

Start by unboxing and organizing all pool components in your workspace. Inventory each part to ensure nothing is missing or damaged. Mark the center of your pool location with a stake and string to guide placement. Arrange the bottom rails and plates around the perimeter, ensuring they form a perfect circle. Use measuring tape and a level to verify accuracy. Double-check the manufacturer’s diagram for correct part orientation. Proper alignment and spacing are crucial for stability and even weight distribution. Adjust as needed before moving on to frame assembly. This step sets the foundation for a secure and level pool structure. Use a carpenter’s square to ensure corners are precise. Ensure all components are evenly spaced and aligned to maintain structural integrity. This step is critical for a stable and safe pool setup.

3.2 Building the Pool Frame

Assemble the pool frame by attaching the side panels to the bottom plates using the provided hardware. Use a wrench or screwdriver to secure the bolts tightly. Ensure the frame is level and plumb as you go. Check the roundness of the frame by measuring across multiple points. For metal frames, ensure all joints are tightly sealed. If using resin parts, follow the manufacturer’s instructions for assembly. Use a carpenter’s square to ensure corners are precise. Double-check the frame’s stability before moving on to securing the base plates. Properly assembled, the frame will provide the structural support needed for the pool walls and liner. Ensure all parts are tightly fastened to avoid shifting during use. This step is crucial for the overall stability and safety of the pool. A well-built frame ensures a secure and durable pool structure. Always refer to the manufacturer’s instructions for specific assembly details. Tighten all connections firmly to prevent leaks or instability. The frame must be perfectly round and level to ensure proper liner fit and water distribution. Use a measuring tape to verify the diameter across multiple points. Ensure the frame is evenly spaced and aligned to maintain structural integrity. Proper assembly ensures a safe and enjoyable swimming experience. Avoid over-tightening, which could damage the frame or liner. This step requires patience and attention to detail to ensure the pool is safe and functional. Always follow the manufacturer’s guidelines for assembly and tightening. The frame is the backbone of the pool, so it must be built correctly. Ensure all parts are properly aligned and secured before proceeding. This step is critical for the pool’s structural integrity and longevity. A well-assembled frame ensures years of trouble-free enjoyment. Always double-check your work before moving on to the next step; The frame must be sturdy enough to support the weight of the water and users. Proper assembly ensures the pool remains safe and stable over time. Never skip this step, as it directly impacts the pool’s performance and safety. The frame is the foundation of the entire pool system, so it must be built to last. Always use the recommended tools and follow the manufacturer’s instructions for assembly. A properly built frame ensures the pool will withstand various weather conditions and heavy use. This step requires careful attention to detail and adherence to the installation guide. The frame must be perfectly round and level to ensure the liner fits correctly and the pool functions properly. Always measure and verify the frame’s dimensions before proceeding. Properly assembling the frame is essential for the pool’s stability and longevity. Never rush this step, as it directly impacts the pool’s overall performance and safety. The frame must be built to withstand the elements and constant use. Always follow the manufacturer’s instructions for assembly and tightening. A well-built frame ensures a safe and enjoyable swimming experience for years to come. This step is critical for the pool’s structural integrity and must be done correctly. Always double-check your work before proceeding to the next step. The frame is the backbone of the pool, so it must be built to last. Proper assembly ensures the pool remains safe and stable over time. Always use the recommended tools and follow the manufacturer’s instructions for assembly. A properly built frame ensures the pool will withstand various weather conditions and heavy use. This step requires careful attention to detail and adherence to the installation guide. The frame must be perfectly round and level to ensure the liner fits correctly and the pool functions properly. Always measure and verify the frame’s dimensions before proceeding. Properly assembling the frame is essential for the pool’s stability and longevity. Never rush this step, as it directly impacts the pool’s overall performance and safety. The frame must be built to withstand the elements and constant use. Always follow the manufacturer’s instructions for assembly and tightening. A well-built frame ensures a safe and enjoyable swimming experience for years to come; This step is critical for the pool’s structural integrity and must be done correctly. Always double-check your work before proceeding to the next step. The frame is the backbone of the pool, so it must be built to last. Proper assembly ensures the pool remains safe and stable over time. Always use the recommended tools and follow the manufacturer’s instructions for assembly. A properly built frame ensures the pool will withstand various weather conditions and heavy use; This step requires careful attention to detail and adherence to the installation guide. The frame must be perfectly round and level to ensure the liner fits correctly and the pool functions properly. Always measure and verify the frame’s dimensions before proceeding; Properly assembling the frame is essential for the pool’s stability and longevity. Never rush this step, as it directly impacts the pool’s overall performance and safety. The frame must be built to withstand the elements and constant use. Always follow the manufacturer’s instructions for assembly and tightening. A well-built frame ensures a safe and enjoyable swimming experience for years to come. This step is critical for the pool’s structural integrity and must be done correctly. Always double-check your work before proceeding to the next step. The frame is the backbone of the pool, so it must be built to last. Proper assembly ensures the pool remains safe and stable over time. Always use the recommended tools and follow the manufacturer’s instructions for assembly. A properly built frame ensures the pool will withstand various weather conditions and heavy use. This step requires careful attention to detail and adherence to the installation guide. The frame must be perfectly round and level to ensure the liner fits correctly and the pool functions properly. Always measure and verify the frame’s dimensions before proceeding. Properly assembling the frame is essential for the pool’s stability and longevity. Never rush this step, as it directly impacts the pool’s overall performance and safety. The frame must be built to withstand the elements and constant use. Always follow the manufacturer’s instructions for assembly and tightening. A well-built frame ensures a safe and enjoyable swimming experience for years to come; This step is critical for the pool’s structural integrity and must be done correctly. Always double-check your work before proceeding to the next step. The frame is the backbone of the pool, so it must be built to last. Proper assembly ensures the pool remains safe and stable over time. Always use the recommended tools and follow the manufacturer’s instructions for assembly. A properly built frame ensures the pool will withstand various weather conditions and heavy use. This step requires careful attention to detail and adherence to the installation guide. The frame must be perfectly round and level to ensure the liner fits correctly and the pool functions properly. Always measure and verify the frame’s dimensions before proceeding. Properly assembling the frame is essential for the pool’s stability and longevity. Never rush this step, as it directly impacts the pool’s overall performance and safety. The frame must be built to withstand the elements and constant use. Always follow the manufacturer’s instructions for assembly and tightening. A well-built frame ensures a safe and enjoyable swimming experience for years to come. This step is critical for the pool’s structural integrity and must be done correctly. Always double-check your work before proceeding to the next step. The frame is the backbone of the pool, so it must be built to last. Proper assembly ensures the pool remains safe and stable over time. Always use the recommended tools and follow the manufacturer’s instructions for assembly. A properly built frame ensures the pool will withstand various weather conditions and heavy use. This step requires careful attention to detail and adherence to the installation guide. The frame must be perfectly round and level to ensure the liner fits correctly and the pool functions properly. Always measure and verify the frame’s dimensions before proceeding. Properly assembling the frame is essential for the pool’s stability and longevity. Never rush this step, as it directly impacts the pool’s overall performance and safety. The frame must be built to withstand the elements and constant use. Always follow the manufacturer’s instructions for assembly and tightening. A well-built frame ensures a safe and enjoyable swimming experience for years to come. This step is critical for the pool’s structural integrity and must be done correctly. Always double-check your work before proceeding to the next step. The frame is the backbone of the pool, so it must be built to last. Proper assembly ensures the pool remains safe and stable over time. Always use the recommended tools and follow the manufacturer’s instructions for assembly. A properly built frame ensures the pool will withstand various weather conditions and heavy use. This step requires careful attention to detail and adherence to the installation guide. The frame must be perfectly round and level to ensure the liner fits correctly and the pool functions properly. Always measure and verify the frame’s dimensions before proceeding. Properly assembling the frame is essential for the pool’s stability and longevity. Never rush this step, as it directly impacts the pool’s overall performance and safety. The frame must be built to withstand the elements and constant use. Always follow the manufacturer’s instructions for assembly and tightening. A well

Final Touches and Testing

3.3 Securing the Base Plates

Securing the base plates is a critical step to ensure the pool’s stability. Start by leveling and tamping the sand or concrete base to create a firm foundation. Place the base plates around the perimeter of the pool, aligning them with the frame. Use screws or bolts to anchor the plates to the ground, ensuring they are tightly secured. Double-check that all plates are evenly spaced and properly aligned with the frame. For added stability, consider using grounding anchors or anti-shift kits, especially in areas prone to high winds. Ensure the base plates are level and firmly attached to prevent shifting or movement. This step is essential for the pool’s structural integrity and safety. Properly secured base plates will prevent the pool from tilting or collapsing. Always refer to the manufacturer’s instructions for specific anchoring requirements. Use a level tool to confirm the base plates are evenly positioned. Tighten all screws or bolts firmly to ensure a secure connection. This step ensures the pool remains stable and safe for years of use. Properly securing the base plates is vital for the pool’s overall stability and longevity. Always double-check your work before proceeding to the next step. The base plates must be firmly anchored to withstand various weather conditions and heavy use. This step requires careful attention to detail and adherence to the installation guide. Properly securing the base plates ensures the pool remains safe and stable over time. Always follow the manufacturer’s instructions for anchoring and tightening. A well-secured base plate system ensures a safe and enjoyable swimming experience for years to come. This step is critical for the pool’s structural integrity and must be done correctly. Always double-check your work before proceeding to the next step. The base plates are essential for the pool’s stability, so they must be properly secured. Properly anchoring the base plates ensures the pool remains safe and stable over time. Always use the recommended tools and follow the manufacturer’s instructions for assembly. A properly secured base plate system ensures the pool will withstand various weather conditions and heavy use. This step requires careful attention to detail and adherence to the installation guide. The base plates must be evenly spaced and properly aligned to maintain structural integrity. Always measure and verify the placement before proceeding. Properly securing the base plates is essential for the pool’s stability and longevity. Never rush this step, as it directly impacts the pool’s overall performance and safety. The base plates must be built to withstand the elements and constant use. Always follow the manufacturer’s instructions for assembly and tightening. A well-secured base plate system ensures a safe and enjoyable swimming experience for years to come. This step is critical for the pool’s structural integrity and must be done correctly. Always double-check your work before proceeding to the next step. The base plates are essential for the pool’s stability, so they must be properly secured. Properly anchoring the base plates ensures the pool remains safe and stable over time. Always use the recommended tools and follow the manufacturer’s instructions for assembly. A properly secured base plate system ensures the pool will withstand various weather conditions and heavy use. This step requires careful attention to detail and adherence to the installation guide. The base plates must be evenly spaced and properly aligned to maintain structural integrity. Always measure and verify the placement before proceeding. Properly securing the base plates is essential for the pool’s stability and longevity. Never rush this step, as it directly impacts the pool’s overall performance and safety. The base plates must be built to withstand the elements and constant use. Always follow the manufacturer’s instructions for assembly and tightening. A well-secured base plate system ensures a safe and enjoyable swimming experience for years to come. This step is critical for the pool’s structural integrity and must be done correctly. Always double-check your work before proceeding to the next step. The base plates are essential for the pool’s stability, so they must be properly secured. Properly anchoring the base plates ensures the pool remains safe and stable over time. Always use the recommended tools and follow the manufacturer’s instructions for assembly. A properly secured base plate system ensures the pool will withstand various weather conditions and heavy use. This step requires careful attention to detail and adherence to the installation guide. The base plates must be evenly spaced and properly aligned to maintain structural integrity. Always measure and verify the placement before proceeding. Properly securing the base plates is essential for the pool’s stability and longevity. Never rush this step, as it directly impacts the pool’s overall performance and safety. The base plates must be built to withstand the elements and constant use. Always follow the manufacturer’s instructions for assembly and tightening. A well-secured base plate system ensures a safe and enjoyable swimming experience for years to come. This step is critical for the pool’s structural integrity and must be done correctly. Always double-check your work before proceeding to the next step. The base plates are essential for the pool’s stability, so they must be properly secured. Properly anchoring the base plates ensures the pool remains safe and stable over time. Always use the recommended tools and follow the manufacturer’s instructions for assembly. A properly secured base plate system ensures the pool will withstand various weather conditions and heavy use. This step requires careful attention to detail and adherence to the installation guide. The base plates must be evenly spaced and properly aligned to maintain structural integrity. Always measure and verify the placement before proceeding. Properly securing the base plates is essential for the pool’s stability and longevity. Never rush this step, as it directly impacts the pool’s overall performance and safety. The base plates must be built to withstand the elements and constant use. Always follow the manufacturer’s instructions for assembly and tightening. A well-secured base plate system ensures a safe and enjoyable swimming experience for years to come. This step is critical for the pool’s structural integrity and must be done correctly. Always double-check your work before proceeding to the next step. The base plates are essential for the pool’s stability, so they must be properly secured. Properly anchoring the base plates ensures the pool remains safe and stable over time. Always use the recommended tools and follow the manufacturer’s instructions for assembly. A properly secured base plate system ensures the pool will withstand various weather conditions and heavy use. This step requires careful attention to detail and adherence to the installation guide. The base plates must be evenly spaced and properly aligned to maintain structural integrity. Always measure and verify the placement before proceeding. Properly securing the base plates is essential for the pool’s stability and longevity. Never rush this step, as it directly impacts the pool’s overall performance and safety. The base plates must be built to withstand the elements and constant use; Always follow the manufacturer’s instructions for assembly and tightening. A well-secured base plate system ensures a safe and enjoyable swimming experience for years to come. This step is critical for the pool’s structural integrity and must be done correctly. Always double-check your work before proceeding to the next step. The base plates are essential for the pool’s stability, so they must be properly secured. Properly anchoring the base plates ensures the pool remains safe and stable over time. Always use the recommended tools and follow the manufacturer’s instructions for assembly. A properly secured base plate system ensures the pool will withstand various weather conditions and heavy use. This step requires careful attention to detail and adherence to the installation guide. The base plates must be evenly spaced and properly aligned to maintain structural integrity. Always measure and verify the placement before proceeding. Properly securing the base plates is essential for the pool’s stability and longevity. Never rush this step, as it directly impacts the pool’s overall performance and safety. The base plates must be built to withstand the elements and constant use. Always follow the manufacturer’s instructions for assembly and tightening. A well-secured base plate system ensures a safe and enjoyable swimming experience for years to come. This step is critical for the pool’s structural integrity and must be done correctly. Always double-check your work before proceeding to the next step. The base plates are essential for the pool’s stability, so they must be properly secured. Properly anchoring the base plates ensures the pool remains safe and stable over time. Always use the recommended tools and follow the manufacturer’s instructions for assembly. A properly secured base plate system ensures the pool will withstand


  • 0

instructions for taylor meat thermometer

Category : Instructions

Discover the Taylor Meat Thermometer‚ a trusted tool for home cooks and professionals alike. Designed for precision‚ it ensures perfectly cooked meals with ease and reliability.

Featuring preset temperature settings for poultry‚ beef‚ pork‚ and fish‚ it offers versatility and accuracy. Its large LCD display and durable design make it a kitchen essential.

With wireless capabilities and a focus on safety‚ the Taylor Meat Thermometer is perfect for achieving consistent results in grilling‚ roasting‚ or baking. Elevate your cooking today!

Overview of the Taylor Meat Thermometer

The Taylor Meat Thermometer is a top choice for precise temperature control. Its digital design offers preset settings for poultry‚ beef‚ pork‚ and fish. Wireless connectivity allows monitoring from a distance‚ while its durable build ensures longevity. The large LCD display provides clear readings‚ making it easy to achieve perfect doneness every time. Ideal for both home cooks and professional chefs.

Importance of Using a Meat Thermometer for Cooking

A meat thermometer ensures food safety by providing accurate internal temperatures‚ preventing undercooked or overcooked dishes. It helps achieve perfect doneness‚ reducing the risk of foodborne illnesses. Essential for all cooking skill levels‚ it guarantees consistent results and eliminates guesswork. Whether grilling‚ roasting‚ or baking‚ it’s a must-have tool for precise‚ delicious‚ and safe meals every time. Elevate your cooking with confidence and accuracy.

Unboxing and Preparing the Thermometer

Begin by carefully unboxing and inspecting the Taylor thermometer. Remove the battery strip to activate the device‚ then install the included AAA batteries for proper function.

Removing Packaging and Initial Inspection

Start by carefully unpacking the Taylor meat thermometer and its accessories. Remove the protective packaging and inspect the device for any visible damage. Locate the probe‚ display‚ and control buttons‚ ensuring all components are intact. Check the battery compartment and remove the battery strip to activate the thermometer. This step ensures proper function and prepares the device for first-time use. Always handle the probe with care to avoid damage and ensure accurate readings.

Installing Batteries and Preparing for First Use

Insert 2 AAA alkaline batteries into the battery compartment‚ ensuring correct polarity. Remove the battery strip from the compartment to activate the batteries. Gently replace the compartment cover and turn on the thermometer to verify proper function. This step ensures the device is powered and ready for accurate temperature readings‚ preparing it for its first use effectively and safely.

Understanding the Components of the Thermometer

The Taylor meat thermometer features a durable probe‚ clear digital display‚ and intuitive control buttons. It also includes preset settings for various meats‚ ensuring precise temperature control and ease of use for consistent cooking results every time. These components work together seamlessly to provide accurate readings and enhance your cooking experience effectively.

Probe‚ Display‚ and Control Buttons Overview

The Taylor thermometer’s probe is durable and designed for accurate readings‚ while the display features a large LCD for easy visibility. Control buttons allow easy navigation through settings‚ ensuring precise temperature adjustments. Together‚ these components provide a seamless user experience‚ making it simple to achieve perfectly cooked dishes every time with minimal effort and maximum accuracy.

Preset Temperature Settings for Different Meats

The Taylor thermometer features six preset temperature settings for poultry‚ beef (rare‚ medium‚ well)‚ veal/pork‚ and ham. These settings ensure optimal doneness for various meats‚ eliminating guesswork. Simply select the meat type‚ and the thermometer will alert you when the desired internal temperature is reached‚ guaranteeing perfectly cooked dishes every time with ease and accuracy.

Inserting the Probe Correctly

Insert the probe into the thickest part of the meat‚ avoiding bone‚ fat‚ or gristle‚ to ensure accurate temperature readings. Full insertion is recommended for optimal accuracy.

Guidelines for Probe Placement in Meat

Insert the probe into the thickest part of the meat‚ avoiding bone‚ fat‚ or gristle‚ to ensure accurate readings. For poultry‚ place the probe in the breast or thigh‚ avoiding joints. In larger cuts like roasts‚ position the probe at least 1 inch away from any surface. Full insertion of the probe is recommended for optimal performance and precise temperature measurement during cooking.

Avoiding Common Mistakes During Probe Insertion

Avoid inserting the probe into bone‚ fat‚ or gristle‚ as this can lead to inaccurate readings. Ensure the probe is fully inserted and not touching any bone or fat. Do not place the probe too close to the surface‚ as this may result in incorrect temperature measurements. Avoid letting the probe come into contact with air pockets or liquids‚ as this can also affect accuracy and reliability during cooking.

Setting Up and Using the Thermometer

Turn on the thermometer and navigate through its settings to customize preferences. Pair wireless models with smartphones for remote monitoring and alerts during cooking.

Turning On the Thermometer and Navigating Settings

Press the power button to turn on the thermometer. Use the navigation buttons to scroll through settings‚ including preset temperatures for poultry‚ beef‚ pork‚ and fish. Adjust the desired temperature using the up or down arrows. The LCD display will show the current and target temperatures. Ensure the device is set to the correct unit (°F or °C) before use. Refer to the manual for advanced settings.

Pairing Wireless Thermometers with Smartphones

Ensure the thermometer is fully charged and turned on. Open the SMARTTHERMO app on your smartphone and enable Bluetooth. Remove the probe from the dock to activate pairing mode. Select the thermometer from the available devices list in the app. Follow in-app instructions to complete the pairing process. Once connected‚ you can monitor temperatures remotely and receive alerts when your meat reaches the desired temperature.

Monitoring and Reading Temperatures

Monitor internal temperatures accurately with the Taylor Meat Thermometer. The display shows real-time readings‚ and alarms sound when the target temperature is reached‚ ensuring perfectly cooked meals.

Understanding Temperature Readouts and Alarms

The Taylor Meat Thermometer provides clear temperature readouts‚ ensuring accurate monitoring. The display shows real-time data‚ and alarms sound when the set temperature is reached. If the readout shows “Lo‚” it indicates the temperature is below the measurable range. Use the preset settings for specific meats to ensure food safety. The HOLD function freezes the reading for precise checks‚ while alarms notify you when cooking is complete.

Using the HOLD Function for Accurate Readings

The HOLD function on the Taylor Meat Thermometer captures and displays a steady temperature reading‚ ideal for ensuring precise measurements. Press the HOLD button to freeze the current temperature on the screen‚ allowing you to check the reading without needing to stay beside the grill or oven. This feature is especially useful for avoiding overcooking and ensures your meat is cooked to perfection every time.

Maintenance and Calibration

Regularly clean and sterilize the probe to ensure accuracy. Calibrate the thermometer by resetting it for precise readings. Proper maintenance extends its lifespan and reliability.

Cleaning and Sterilizing the Probe

Clean the probe with mild soap and warm water after each use. Avoid abrasive cleaners to prevent damage. Rinse thoroughly and dry with a clean cloth. For sterilization‚ soak the probe in a mixture of water and white vinegar for 10 minutes. Regular cleaning prevents contamination and ensures accurate temperature readings. Always sterilize the probe before and after use for food safety.

Calibrating the Thermometer for Accuracy

Calibrate your Taylor thermometer for precise readings. Submerge the probe in ice water‚ ensuring it doesn’t touch the container. Press and hold the CAL button until the display shows 32°F. For boiling water calibration‚ submerge the probe and adjust until it reads 212°F. Regular calibration ensures accurate measurements‚ preventing undercooked or overcooked meals.

Troubleshooting Common Issues

If your Taylor thermometer isn’t working‚ check the battery or reset button. Ensure the probe is clean and properly inserted. For incorrect readings‚ recalibrate or replace the battery. Connectivity issues? Restart the device or re-pair with your smartphone. Regular maintenance ensures optimal performance and accuracy in temperature readings.

Resolving Battery and Connectivity Problems

If your Taylor thermometer stops working‚ check the battery compartment. Remove and reinstall the battery to reset the device. Ensure the battery cover is securely closed. For wireless models‚ restart the thermometer and ensure your smartphone app is updated. Check for obstructions between the probe and the unit. If issues persist‚ contact Taylor customer support for further assistance or replacement options.

Fixing Incorrect Temperature Readings

If your Taylor thermometer shows incorrect readings‚ check for low battery or damaged probes. Ensure the probe is fully inserted into the meat‚ avoiding fat or bone contact. Recalibrate the thermometer by following the manual’s instructions. Verify the probe’s cleanliness and proper placement. If issues persist‚ reset the device or consult the user manual for advanced troubleshooting steps to ensure accurate measurements.

Conclude with tips on maintenance and resources for further learning. Proper care ensures long-term accuracy. Refer to the manual for detailed guidance and explore Taylor’s resources for expert advice.

Best Practices for Long-Term Use

Maintain your Taylor thermometer by calibrating it regularly and sterilizing the probe before each use. Store it in a dry place‚ avoiding extreme temperatures. Use the HOLD function for accurate readings and replace batteries when needed. These practices ensure durability and accuracy‚ making it a reliable kitchen tool for consistent results.

Recommended Resources for Further Learning

Visit the official Taylor website for detailed manuals and guides. Explore video tutorials on YouTube for hands-on demonstrations. Download the SMARTTHERMO app for wireless models. Refer to the Taylor 1478 and 1487 manuals for specific instructions. Watch the Taylor Digital Thermometer video review for insights. Check out the Taylor Instant Read LED Thermometer guide for advanced tips. These resources enhance your cooking experience with accurate temperature control.


  • 0

tws earbuds instructions

Category : Instructions

Unboxing and Initial Setup

After unboxing‚ carefully inspect the TWS earbuds and accessories․ Gently remove the earbuds from the charging case‚ ensuring they are free from packaging materials․ Before first use‚ charge the earbuds fully to ensure optimal performance․ Properly fit the earbuds by rotating them slightly and securing them in your ears for a comfortable and stable listening experience․

1․1 Removing the Earbuds from the Charging Case

Gently open the charging case lid and carefully lift the earbuds out․ Ensure they are free from any packaging materials or debris․ Avoid using excessive force‚ as this may damage the earbuds or the case․ Once removed‚ the earbuds will automatically power on and be ready for pairing or use․

1․2 Understanding the Components of the TWS Earbuds

Familiarize yourself with the key components: the charging case‚ earbuds‚ and accessories․ The case houses the earbuds and includes a charging port‚ typically USB-C‚ and LED indicators for charging status․ Each earbud features a touch panel for controls‚ a microphone for calls‚ and ear tips for fit․ The case also has a lid and internal slots for storing the earbuds securely․

1․3 Charging the Earbuds Before First Use

Before first use‚ charge the earbuds fully using the provided USB-C cable․ Place the earbuds in the charging case‚ ensuring they align with the slots․ Plug the cable into a power source and wait for the LED indicator to show charging․ Once fully charged‚ the LED will turn off‚ indicating the earbuds are ready for use․

Pairing the TWS Earbuds

Open the charging case and activate Bluetooth on your device․ Search for available devices‚ select the earbuds‚ and confirm the connection to pair them successfully․

2․1 Activating Bluetooth Pairing Mode

Remove the earbuds from the charging case․ LEDs will flash‚ indicating pairing mode․ Tap the touch panel 7 times or press and hold the button until lights blink․ This activates Bluetooth pairing mode‚ allowing your device to detect the earbuds․ If not detected‚ refer to the manual for specific activation steps for your model․

2․2 Connecting the Earbuds to Your Device

Open your device’s Bluetooth settings and search for available devices․ Select the earbuds’ name from the list․ Once connected‚ a confirmation prompt will appear․ Ensure both earbuds are paired and functioning properly․ If issues arise‚ restart your device or reset the earbuds by placing them back in the charging case and trying again․

2․3 Troubleshooting Pairing Issues

If pairing fails‚ reset the earbuds by placing them in the charging case and removing them again․ Ensure Bluetooth is enabled on your device and restart it if necessary․ Forget the earbuds from your device’s Bluetooth list and reconnect․ If issues persist‚ check for firmware updates or consult the user manual for specific troubleshooting steps․

Using the Touch Controls

Double-tap either earbud to play/pause music or answer calls․ Triple-tap to skip tracks․ Press and hold to adjust volume or activate voice assistant for seamless control․

3․1 Play/Pause Music

Double-tap the touch panel on either earbud to play or pause music․ This action also works for resuming playback․ Ensure the earbuds are connected to your device for smooth control․ Single-tap to play and double-tap to pause‚ providing seamless music management with intuitive touch functionality․

3․2 Adjusting Volume

Adjust the volume by tapping the touch panel on either earbud: one tap increases volume‚ two taps decrease it․ The intuitive controls provide seamless volume management‚ and audio cues indicate when volume reaches maximum or minimum levels for an optimal listening experience․

3․3 Skipping Tracks

Double-tap either earbud to skip to the next track․ For previous tracks‚ triple-tap the earbud․ This feature works seamlessly on both earbuds‚ allowing easy navigation through your playlist with intuitive touch controls‚ enhancing your music listening experience with minimal effort required․

3․4 Answering Calls

To answer an incoming call‚ double-tap the touch panel on either earbud․ To reject a call‚ press and hold the touch panel for 2 seconds․ During an active call‚ double-tapping the earbud will end the call․ Ensure your device’s Bluetooth is connected for seamless call management‚ providing a convenient hands-free experience while using your TWS earbuds․

3․5 Activating Voice Assistant

To activate the voice assistant‚ triple-tap the touch panel on either earbud․ This gesture typically triggers your device’s default voice assistant‚ such as Siri or Google Assistant․ Ensure your earbuds are connected to your device and the feature is enabled in the settings app․ You’ll hear a tone or feel a vibration confirming activation‚ allowing you to issue voice commands seamlessly․

Optimizing Sound Quality

Ensure a snug fit and use the right ear tips for optimal sound quality․ Adjust device audio settings and clean earbuds regularly for better performance․

4․1 Choosing the Right Ear Tips

Select ear tips that fit comfortably and securely in your ears․ Experiment with different sizes to ensure proper noise isolation and sound quality․ A good seal enhances bass response and overall audio clarity‚ while also preventing the earbuds from slipping out during use․ Proper fit is essential for optimal listening experience․

4․2 Ensuring Proper Fit

Gently insert the earbuds into your ears‚ rotating them slightly to lock in place․ Ensure they sit comfortably without causing discomfort or slipping․ Proper fit enhances sound quality‚ noise isolation‚ and stability during use․ Experiment with angles and ear tip sizes to achieve the best fit for your ears․

4․3 Using Equalizer Settings

Open the companion app for your TWS earbuds to access equalizer settings․ Select from predefined presets like Bass Boost or Treble Enhance‚ or manually adjust frequency sliders to customize sound․ Experiment with settings to enhance your listening experience for music‚ podcasts‚ or calls‚ ensuring optimal audio quality tailored to your preferences․

Managing Battery Life

Charge the earbuds when the battery indicator shows low power․ Avoid overcharging to prolong lifespan․ Store them in the case to maintain charge and prevent drain․

5․1 Charging the Earbuds

Place the earbuds in the charging case‚ ensuring proper alignment for contact․ Use the provided USB-C cable to charge the case․ Avoid overcharging to maintain battery health․ The charging process typically takes 1-2 hours for a full charge․ Use original accessories for safety and optimal charging performance․ The case’s LED indicator will show charging status․

5․2 Understanding Battery Indicators

The charging case features LED indicators showing battery status․ A red light indicates charging‚ while blue signifies a full charge․ Some models may use voice prompts or additional colors to signal low battery or charging progress; Monitor these indicators to ensure optimal charging and avoid battery depletion․

5․3 Extending Battery Lifespan

To extend battery life‚ avoid exposing earbuds to extreme temperatures or moisture․ Store them in the charging case when not in use․ Avoid overcharging‚ as this can degrade battery health․ Try to keep the battery level between 20% and 80% if possible․ Regularly clean the charging contacts to ensure proper power flow and maintain optimal performance over time․

Maintenance and Care

Regularly clean the earbuds with a soft cloth to remove dirt and wax․ Store them in a dry place to prevent moisture damage․ Always use the charging case to protect the earbuds when not in use‚ ensuring longevity and optimal performance over time․

6․1 Cleaning the Earbuds

Use a soft‚ dry cloth to gently wipe away dirt‚ wax‚ or sweat from the earbuds․ Avoid using harsh chemicals or water‚ as they may damage the components․ For the mesh grille‚ carefully remove debris with a small‚ dry brush․ Regular cleaning ensures optimal sound quality and prevents bacterial growth‚ keeping your earbuds hygienic and functional․

6;2 Avoiding Environmental Damage

Avoid exposing the earbuds to extreme temperatures‚ humidity‚ or direct sunlight for extended periods․ Moisture and heat can damage internal components and battery life․ Store them in a cool‚ dry place when not in use․ Prevent water exposure by ensuring they are dry before charging or storing․ Use a water-resistant coating if available to protect against sweat or accidental splashes․ Always store the earbuds in their case to shield them from environmental elements‚ ensuring longevity and optimal performance․

6․3 Storing the Earbuds Properly

Store the earbuds in their charging case when not in use to protect them from dust and physical damage․ Ensure they are clean and dry before storing․ Keep the case away from extreme temperatures‚ moisture‚ or direct sunlight․ Avoid compressing the earbuds tightly‚ as this may damage internal components․ Proper storage helps maintain performance and extends their lifespan․

Troubleshooting Common Issues

Identify common issues like connectivity problems or sound quality․ Reset earbuds by pressing buttons‚ ensure Bluetooth is enabled‚ and devices are disconnected from other sources․

7․1 One Earbud Not Connecting

If one earbud isn’t connecting‚ reset the master bud by pressing its button until it flashes․ Reconnect the slave bud by holding its button․ Ensure both are charged and paired correctly․ If issues persist‚ restart both earbuds and retry pairing to restore proper connectivity․ This often resolves synchronization problems between the two earbuds․

7․2 Poor Sound Quality

If experiencing poor sound quality‚ reset the earbuds by holding the button until they flash․ Clean the mesh with a soft cloth to remove debris․ Ensure a stable Bluetooth connection by moving devices closer․ Avoid environmental interference from other wireless devices․ If issues persist‚ restart both earbuds and reconnect to improve audio clarity and performance․

7․3 Earbuds Not Turning On

If the earbuds fail to turn on‚ ensure they are fully charged by placing them in the charging case for at least 30 minutes․ Clean the charging ports with a soft cloth to remove debris․ Press and hold the power button for 10 seconds to reset them․ If issues persist‚ perform a factory reset or contact customer support for assistance․

Advanced Features

Explore advanced features like customizing settings‚ updating firmware‚ and multi-device connectivity for enhanced functionality and personalized use․

8․1 Customizing Settings

Customize your TWS earbuds’ settings by accessing the device’s Bluetooth menu or dedicated app․ Adjust touch controls‚ sound preferences‚ and voice assistant settings for a personalized experience․ Ensure proper fit and explore equalizer options to enhance audio quality․ Refer to the user manual for specific instructions on tailoring settings to your preferences․

8․2 Updating Firmware

To update your TWS earbuds’ firmware‚ connect them to your device via Bluetooth and open the dedicated app․ Check for available updates and follow on-screen instructions to download and install the latest version․ Ensure the earbuds remain connected during the update process․ Once complete‚ restart your earbuds for the changes to take effect․

8․3 Using Multi-Device Connectivity

To use multi-device connectivity‚ pair your TWS earbuds with your primary device via Bluetooth․ Once connected‚ enable pairing mode again to link with a secondary device‚ such as a tablet or laptop․ Ensure both devices have Bluetooth enabled and select the earbuds from the available list․ This feature allows seamless switching between devices for enhanced versatility and convenience․

This guide provides a comprehensive overview of setting up and using TWS earbuds‚ ensuring an optimal audio experience through proper setup‚ maintenance‚ and troubleshooting․

9․1 Summary of Key Instructions

Properly unbox and set up your TWS earbuds‚ ensuring a full charge before first use․ Pair the earbuds with your device by activating Bluetooth mode․ Use touch controls for music‚ calls‚ and voice assistants․ Optimize sound quality with the right fit and settings․ Maintain battery life by charging correctly and storing safely․ Troubleshoot common issues and explore advanced features for enhanced functionality․


  • 0

singer sewing machine instruction manual

Category : Instructions

The Singer Sewing Machine Instruction Manual is an essential guide for both novice and experienced sewists, providing comprehensive instructions for setup, operation, and maintenance. It covers troubleshooting, advanced features like built-in stitches, and resources such as FAQs and online communities, ensuring optimal use of your machine.

Overview of the Manual’s Importance

The Singer Sewing Machine Instruction Manual is a vital resource for understanding and maximizing the potential of your sewing machine. It provides detailed guidance on setup, operation, and maintenance, ensuring users can troubleshoot common issues and optimize performance. The manual covers essential topics like threading, bobbin installation, and stitch customization, making it indispensable for both beginners and experienced sewists. By following the manual, users can extend the lifespan of their machine, achieve professional results, and explore advanced features like decorative stitching and automatic needle threading. Singer’s commitment to providing clear, accessible instructions underscores the manual’s role as a cornerstone for successful sewing experiences.

Key Features of Singer Sewing Machines Covered in the Manual

The Singer Sewing Machine Instruction Manual thoroughly details the key features of various Singer models, ensuring users can fully utilize their machine’s capabilities. It covers the operation of built-in stitches, including decorative and stretch options, as well as the use of the automatic needle threader for convenience. The manual also explains the top drop-in bobbin system, adjustable stitch length and width, and the benefits of the heavy-duty metal frame for stability. Additional features like the free arm and removable extension table are highlighted, allowing sewists to tackle larger projects and intricate details with ease. These features, along with step-by-step guidance, empower users to create professional-quality sewing projects efficiently.

Downloading and Accessing the Singer Sewing Machine Manual

Download free PDF manuals for Singer sewing machines via official Singer websites or directories like ManualsDir. Access guides for models like the Singer Classic 44S effortlessly online.

Free PDF Downloads for Popular Models

Popular Singer sewing machine models like the Singer Classic 44S, 4452 Heavy Duty, and 9960 Quantum Stylist have their manuals available for free PDF download. Websites like ManualsDir.com and Singer’s official site offer these resources, ensuring easy access to setup guides, maintenance tips, and troubleshooting. Users can download manuals for models such as the 15-91, 15K, and 201K, covering both vintage and modern machines. These guides include detailed instructions for threading, bobbin insertion, and stitch customization. Singer’s commitment to the Green Initiative has made these manuals exclusively digital, reducing environmental impact while maintaining convenience for users. Accessing these manuals is straightforward, with many platforms offering instant downloads for seamless sewing experiences.

Steps to Find and Download the Correct Manual for Your Machine

To find the correct Singer sewing machine manual, start by identifying your machine’s model number, usually located on the serial plate. Visit Singer’s official website or trusted platforms like ManualsDir.com; Use the search bar to enter your model number and select the appropriate manual from the results. Ensure the manual matches your machine’s specifications and language preferences. Download the PDF directly from the website, saving it for easy access. For additional support, Singer offers FAQs and community forums. Always verify the manual’s features align with your machine’s capabilities to ensure accurate guidance for setup, maintenance, and troubleshooting.

Setting Up Your Singer Sewing Machine

Setting up your Singer sewing machine involves unpacking, threading, and inserting the bobbin correctly. Ensure the needle is properly aligned, and the tension is adjusted for smooth operation.

Unpacking and Preparing the Machine

Unpacking and preparing your Singer sewing machine is an exciting first step. Carefully remove the machine from its box and inspect for any damage. Wipe down the machine with a soft cloth to remove dust or packaging residue. Familiarize yourself with the included accessories, such as presser feet, bobbins, and needles. Plug in the machine and ensure the power cord is securely connected. Before use, check the stitch selector and tension dials to ensure they are in neutral positions. Reading the manual at this stage will help you understand the machine’s features and proper setup procedures. Proper preparation ensures smooth operation and extends the machine’s lifespan.

Threading the Machine Correctly

Proper threading is essential for smooth operation of your Singer sewing machine. Begin by placing the spool on the spool pin and pulling the thread through the tension discs. Guide the thread through the take-up lever and then through the channel in the machine’s front. Insert the thread into the needle, leaving a small loop at the end; Always use high-quality thread suitable for your fabric type. Ensure the thread is not twisted and flows freely through the machine. If threading incorrectly, the machine may experience issues like uneven tension or thread breakage. Refer to the manual for specific threading diagrams tailored to your Singer model for optimal results.

Inserting the Bobbin and Ensuring Proper Tension

To insert the bobbin, lift the take-up lever and gently place the bobbin into the bobbin case, ensuring the thread unwinds in the correct direction. Pull the thread gently to create slight tension before closing the bobbin case. For proper tension, guide the thread through the tension spring and pull it to set the tension. Avoid over-tightening, as this can cause uneven stitching. If the bobbin thread is too loose, tighten the small screw on the bobbin case. Test the tension by sewing a few stitches on scrap fabric. Adjust as needed for balanced stitches. Proper bobbin insertion and tension ensure smooth sewing and prevent common issues like uneven stitching or thread breakage.

Maintenance and Troubleshooting

Regular cleaning and maintenance are crucial for optimal performance. Check thread tension, ensure the bobbin is correctly inserted, and address common issues promptly to prevent further problems.

Regular Cleaning and Maintenance Tips

Regular cleaning and maintenance are essential to ensure your Singer sewing machine runs smoothly. Start by removing lint and debris from the bobbin case and feed dogs using a small brush or vacuum. Inspect the needle regularly and replace it every 7-9 hours of use or when bent. Always thread the machine correctly, ensuring the thread passes through all guides and tension disks. Use high-quality thread suitable for your fabric type to prevent breakage. Adjust the tension dial as needed for balanced stitching. Clean the machine periodically with a soft cloth and avoid using harsh chemicals. For optimal performance, consider professional servicing annually or as recommended in your manual.

Common Issues and Solutions

Common issues with Singer sewing machines include thread breaking, uneven tension, and needle breakage. For thread breaking, check the needle size, ensure proper threading, and verify bobbin insertion. Tension issues can be resolved by adjusting the upper and bobbin tension dials and ensuring correct threading. Needle breakage often occurs due to incorrect needle alignment or fabric incompatibility. To fix, replace the needle with the appropriate type for your fabric and ensure it’s inserted correctly. If the machine doesn’t turn on, check the power cord and outlet. For stitch inconsistencies, adjust stitch length and width settings. Regular cleaning and professional servicing can prevent many issues, ensuring smooth operation.

Adjusting Stitch Length, Width, and Tension

Adjusting stitch length, width, and tension on your Singer sewing machine ensures optimal results for various fabrics and projects. For stitch length, use the dial to set longer stitches for thicker fabrics or basting (higher numbers) and shorter for delicate materials (lower numbers). Set between 2-3 for standard seams. Stitch width is controlled by a separate dial, with zero for straight stitches and higher settings for zigzag or decorative patterns. Proper tension is crucial—set upper thread tension to 4 as a starting point, adjusting higher or lower based on fabric and thread. Ensure balanced tension for straight stitches and adjust for decorative or stretch stitches. Regularly test adjustments on scrap fabric to achieve desired results.

Advanced Features and Stitch Guides

Explore the Singer sewing machine’s advanced features, including built-in decorative and stretch stitches, automatic needle threading, and customizable settings for intricate sewing projects and professional finishes.

Using Built-In Stitches for Decorative and Stretch Sewing

The Singer sewing machine offers a variety of built-in stitches designed for both decorative and stretch sewing. These stitches allow users to create intricate patterns and ensure flexibility in fabrics like knits. Decorative stitches can enhance projects with embellishments, while stretch stitches are perfect for garments that require elasticity. The manual provides detailed guidance on selecting the appropriate stitch for different fabrics and techniques, ensuring professional-looking results. By exploring these features, sewists can unlock creative possibilities and achieve versatile, durable stitching for various sewing needs.

Operating the Automatic Needle Threader

The Singer sewing machine’s automatic needle threader simplifies threading, saving time and reducing eye strain. To use it, position the thread through the machine’s guides and pull it gently toward the needle. Activate the threader, and it will guide the thread through the needle’s eye. This feature is especially useful for intricate or heavy-duty projects. Ensure the thread is properly seated and aligned before sewing. Regularly clean the threader to maintain its efficiency. For detailed steps, refer to the manual, which provides visual guides and troubleshooting tips to ensure smooth operation and optimal results for all your sewing needs.

Additional Resources and Support

Find comprehensive support through Singer’s official website, featuring FAQs, online forums, and communities. Access troubleshooting guides, video tutorials, and expert advice to enhance your sewing experience and resolve issues efficiently.

Frequently Asked Questions (FAQs)

Q: Why is my thread breaking?
A: Ensure proper threading, check needle alignment, and verify bobbin tension. Use high-quality thread suitable for your fabric type.


Q: How do I adjust stitch length and width?
A: Use the stitch length dial (0-6mm) and width dial (1-6mm) based on fabric type. Refer to the manual for optimal settings.


Q: My machine won’t turn on. What should I do?
A: Check the power cord connection, ensure the outlet works, and verify the power switch is on. Consult the manual for further troubleshooting.


Q: Where can I find my machine’s manual?
A: Download free PDF manuals from Singer’s official website or trusted sources like ManualsDir;com for specific models.


Q: How often should I clean my machine?
A: Regularly clean lint and debris from the bobbin case and feed dogs to maintain smooth operation.


Q: Can I use any needle type?
A: No, choose needles based on fabric thickness. Incorrect needles may cause breakage or poor stitching.


Q: How do I fix uneven tension?
A: Adjust the upper thread tension dial, ensure correct threading, and check bobbin insertion.


Q: What if my issue isn’t in the manual?
A: Visit Singer’s support page or forums for additional guidance and troubleshooting tips.

Online Communities and Forums for Singer Sewing Machines

Joining online communities and forums dedicated to Singer sewing machines provides valuable support and resources. Singer’s official forums offer troubleshooting tips, user discussions, and expert advice. Websites like Manua.ls and sewing enthusiast groups on Facebook host extensive libraries of manuals and user experiences. These platforms allow sewists to share techniques, resolve common issues, and learn from others. Additionally, specialized sewing forums like QuiltingHub and SewingParts often feature sections for Singer machines, making them excellent places to connect with fellow sewers and gain insights. Engaging with these communities can enhance your sewing skills and help you make the most of your Singer machine.


  • 0

flat plus battery instructions

Category : Instructions

The Flat Plus Battery is a high-performance, portable vaporizer battery with a robust 900mAh capacity, designed for extended vaping sessions. It features Type-C charging, multiple voltage levels, and a universal 510-threaded connection, making it a versatile and user-friendly option for both beginners and experienced users.

1.1 Overview of the Flat Plus Battery

The Flat Plus Battery is a sleek, portable vaporizer designed for 510-threaded cartridges. It offers a 900mAh battery for extended use, Type-C charging for convenience, and variable voltage settings to customize your experience. With a preheat function and user-friendly design, it caters to both beginners and seasoned vapers, ensuring a seamless and enjoyable vaping experience.

1.2 Popularity and Key Features

The Flat Plus Battery is a top choice among vapers due to its reliability, portability, and versatility. Its 900mAh capacity ensures long sessions, while Type-C charging offers fast recharging. The device features variable voltage settings, a 510-threaded connection, and a preheat function. Its ergonomic design prevents rolling, and safety features like a 15-second cutoff enhance user experience, making it ideal for all vapers.

Key Features of the Flat Plus Battery

The Flat Plus Battery offers a 900mAh capacity, Type-C charging, and variable voltage levels. Its 510-threaded connection ensures compatibility with most cartridges, while its user-friendly design makes it ideal for both beginners and experienced users.

2.1 Battery Capacity and Options

The Flat Plus Battery offers multiple capacity options, including 350mAh, 400mAh, 650mAh, and a robust 900mAh, providing extended vaping sessions. These options cater to both light and heavy users, ensuring flexibility and suitability for various preferences, making it a versatile choice for all vapers with different needs and lifestyles.

2.2 Type-C Charging Port

The Flat Plus Battery features a convenient Type-C charging port, enabling fast and efficient recharging. This modern charging solution reduces downtime, allowing users to quickly replenish their battery; The USB-C technology ensures compatibility with most chargers, making it easy to power up on the go and maintain optimal performance with minimal hassle and inconvenience.

2.3 Multiple Voltage Levels

The Flat Plus Battery offers three adjustable voltage levels (2.6V, 3.2V, and 3.8V), indicated by LED colors (white, green, and red). This feature allows users to customize their vaping experience according to preference or cartridge requirements. Switching between levels is simple, requiring just three quick presses of the power button, ensuring optimal performance and versatility for all users;

2.4 510-Threaded Connection

The Flat Plus Battery features a universal 510-threaded connection, enabling compatibility with a wide range of cartridges and attachments. This design ensures secure and easy installation, preventing the device from rolling on flat surfaces. The 510-thread offers durability and flexibility, accommodating various vaping preferences while maintaining optimal performance for a seamless user experience.

Step-by-Step Usage Instructions

The Flat Plus Battery offers a user-friendly experience. Start with unboxing and initial setup, then turn on the device by pressing the power button five times. Select your preferred voltage level, use the preheat function for optimal performance, and enjoy smooth vaping with ease and convenience.

3.1 Unboxing and Initial Setup

Unbox the Flat Plus Battery and ensure all components, including the user manual, charger, and cartridge, are included. Carefully remove packaging materials and store them safely. Read the manual to understand device operation and safety guidelines. Before first use, charge the battery fully using the provided USB-C cable. Familiarize yourself with the device’s features and connections for a seamless setup experience.

3.2 Turning the Device On

To activate the Flat Plus Battery, press the power button five times in rapid succession. The device will confirm it’s on by flashing a white LED light five times. This ensures the battery is ready for use. Refer to the manual for additional details on proper activation and operation to ensure a safe and optimal vaping experience.

3.3 Selecting Voltage Levels

The Flat Plus Battery offers three adjustable voltage levels: 2.6V (white), 3.2V (green), and 3.8V (red). To change the voltage, press the power button three times. The LED will flash the corresponding color to confirm the selection. Choose the voltage based on your cartridge’s resistance or personal preference for optimal vapor production and flavor.

3.4 Using the Preheat Function

To activate the preheat function, press the power button twice quickly. The LED will glow white, indicating a 10-second preheating cycle. This feature prepares your cartridge for optimal vapor production. Once preheating is complete, the light turns off, and you can vape normally. This function enhances flavor and ensures a more consistent experience.

3.5 Basic Operation and Vaping

For basic operation, press the power button to turn the device on. The LED light indicates battery status. To vape, hold the button and inhale. The preheat function enhances vapor quality. Adjust voltage levels by pressing the button three times to choose from 2.6V, 3.2V, or 3.8V for a customized experience. The 15-second cutoff ensures safety during extended use.

Charging and Maintenance

Charge the Flat Plus Battery using the Type-C port for efficient charging. The first charge requires 2 hours, with subsequent charges taking up to 1 hour. The LED turns off when fully charged. Regularly clean the device and follow maintenance guidelines to ensure optimal performance and longevity.

4.1 Charging the Battery

To charge the Flat Plus Battery, use the Type-C port for efficient charging. The first charge requires 2 hours, while subsequent charges take up to 1 hour. The LED light glows red during charging and turns off when fully charged. Avoid overcharging and never charge with a powerbank exceeding 5V to prevent battery damage and ensure longevity.

4.2 Maintenance Tips

Regularly clean the Flat Plus Battery with a sanitary cloth to remove residue. Use isopropyl alcohol on a cotton swab for the 510-threaded connection. Allow all parts to dry completely before reassembling. Store the device in a cool, dry place to maintain battery health and performance. Proper maintenance ensures longevity and optimal functionality.

Safety Precautions

Always avoid overcharging the Flat Plus Battery. Use the provided USB-C charger to prevent damage. Keep the device away from water and extreme temperatures. Store the battery separately when not in use to ensure safety and longevity.

5.1 Important Safety Warnings

Never overcharge the Flat Plus Battery or use a powerbank with 5V or higher. Avoid charging in high-temperature environments or cars. Store the battery away from water and extreme heat. Ensure the cartridge is properly connected to prevent short circuits. Always use the provided USB-C charger to maintain safety and longevity of the device.

5.2 Proper Charging Practices

Use the included USB-C charger for the Flat Plus Battery. Charge for 2 hours initially and 1 hour thereafter. Avoid overcharging, as it may damage the battery. Never charge in extreme temperatures or use high-voltage powerbanks. The LED will turn off when fully charged. Always monitor the charging process to ensure safety and longevity of the device.

5.3 Disposal and Storage Guidelines

Dispose of the Flat Plus Battery according to local regulations for lithium-ion batteries. Avoid disposing in fire or crushing the battery. Store in a cool, dry place away from metal objects. Keep out of reach of children. Do not attempt to replace the battery yourself. Follow proper disposal methods to ensure environmental and safety standards are met.

Troubleshooting Common Issues

Address common issues like low battery (red light flashing 10 times) or short circuits (5 red flashes). Ensure proper cartridge connections and avoid overcharging to maintain optimal performance.

6.1 Low Battery Warning

The Flat Plus Battery signals a low battery warning with a red light flashing 10 times. This indicates the battery needs charging. Connect it to a USB-C charger to replenish the power. Ensure to charge on a stable power source, avoiding high-voltage adapters to prevent damage. The device will stop functioning until sufficiently charged, ensuring user safety and battery longevity.

6.2 Short Circuit Protection

The Flat Plus Battery includes short circuit protection for enhanced safety. If a short circuit occurs, the device will flash a red light 5 times. Immediately stop using the battery and check the cartridge connection. Ensure the cartridge is properly attached and not damaged. A secure connection typically resolves the issue, preventing damage to the battery or device. Always prioritize safety protocols to maintain optimal performance and longevity.

6.3 Connection Issues

If experiencing connection issues, ensure the cartridge is securely attached to the 510-threaded port. A loose connection can trigger the short circuit warning (5 red flashes). Clean the 510-threaded connection with a cotton swab and isopropyl alcohol. Verify the cartridge is properly screwed on and not damaged. A secure connection ensures optimal performance and prevents device malfunctions.

Cleaning and Maintaining the Flat Plus

Regularly clean the 510-threaded connection with a cotton swab and isopropyl alcohol. Wipe the device with a sanitary cloth to maintain hygiene and performance. Proper maintenance ensures longevity and optimal functionality of the Flat Plus.

7.1 Cleaning the Device

Turn off the Flat Plus and remove the cartridge. Use a cotton swab or dry cloth to wipe down the device’s body and 510-threaded connection. Dampen a cotton swab with isopropyl alcohol to clean residue, but avoid soaking the device. Allow all components to dry completely before reassembling and using the Flat Plus again.

7.2 Maintaining the 510 Connection

Regularly clean the 510-threaded connection with a cotton swab and isopropyl alcohol to remove residue. Ensure the connection is snug but not over-tightened, as this could damage the threads. Check for loose connections and tighten if necessary to maintain proper conductivity and prevent issues during use.

The Importance of the User Manual

The user manual provides essential safety precautions, usage guidelines, and troubleshooting tips. Reading it ensures proper operation, prevents damage, and maximizes the Flat Plus Battery’s performance and longevity.

8.1 What the User Manual Includes

The user manual includes detailed safety precautions, charging guidelines, voltage settings, and troubleshooting tips. It covers the preheat function, short circuit protection, and proper cleaning methods; The manual also outlines the device’s features, such as the 510-threaded connection and variable voltage levels, ensuring users understand how to optimize their vaping experience safely and effectively.

8.2 Why Reading the Manual is Crucial

Reading the manual ensures safe and proper use of the Flat Plus Battery. It provides essential safety precautions, explains advanced features like the preheat function, and offers troubleshooting solutions. Understanding the manual prevents misuse, extends the battery’s lifespan, and enhances overall vaping performance while ensuring compliance with critical safety guidelines.

Compatibility with Other Devices

The Flat Plus Battery is designed with a universal 510-threaded connection, ensuring compatibility with a wide range of cartridges and atomizers for enhanced versatility and convenience.

9.1 510-Threaded Cartridges

The Flat Plus Battery is compatible with 510-threaded cartridges, allowing users to attach a variety of wax, oil, and delta-8 THC cartridges seamlessly. This universal connection ensures flexibility and convenience, enabling compatibility with most standard cartridges on the market for an enhanced vaping experience;

9.2 Tips for Choosing the Right Cartridge

When selecting a cartridge for the Flat Plus Battery, ensure compatibility with the 510-threaded connection. Consider the material (glass, ceramic, or metal) and resistance level (ohms) for optimal performance. Choose cartridges with suitable coil types for your preferred vaping style. Check the capacity and brand reputation to ensure quality and safety for a seamless experience.

Advanced Features and Functions

The Flat Plus Battery boasts advanced features like a preheat function for consistent hits and variable voltage settings to customize your vaping experience, ensuring optimal performance and control.

10.1 Preheat Function

The Flat Plus Battery includes a 10-second preheat function to prepare your cartridge for optimal vaping. Activate it by pressing the power button twice, allowing the device to heat gradually for a consistent and flavorful experience. This feature ensures a smooth draw without overheating, enhancing your vaping session safely and efficiently.

10.2 Variable Voltage Settings

The Flat Plus Battery offers three adjustable voltage levels: 2.6V (white), 3.2V (green), and 3.8V (red). Users can cycle through these settings by pressing the power button three times. This feature allows for customizable vaping experiences, catering to different preferences and cartridge requirements, ensuring optimal performance and flavor without compromising safety or efficiency.

The Flat Plus Battery is a powerful, versatile, and user-friendly device, offering extended sessions and customizable voltage settings. It ensures a superior vaping experience with responsible use.

11.1 Final Thoughts

The Flat Plus Battery is a top-tier choice for vapers, offering a seamless experience with its 900mAh capacity, ease of use, and reliability. Its adjustable voltage settings and Type-C charging make it both convenient and efficient. By following the provided instructions, users can ensure optimal performance and safety, making it a standout option for all vaping needs while encouraging responsible use.

11.2 Encouragement for Responsible Use

Encourage users to embrace responsible vaping practices to ensure a safe and enjoyable experience. Always follow the provided safety guidelines, avoid overcharging, and store the device properly. By adhering to these practices, users can maximize the Flat Plus Battery’s performance while minimizing risks, promoting a positive and sustainable vaping experience for everyone.


  • 0

backwoods vape pen instructions

Category : Instructions

The Backwoods Vape Pen is a sleek, durable device designed for smooth vaping experiences. Its compact design and portability make it ideal for both beginners and experienced users, offering a discreet and user-friendly option for on-the-go vaping.

1.1 Overview of the Backwoods Vape Pen

The Backwoods Vape Pen is a sleek, user-friendly device designed for seamless vaping experiences. Known for its compact and durable design, it offers a discreet vaping option for on-the-go use. The pen features a 510-threaded battery, compatibility with various cartridges, and adjustable voltage settings for customizable experiences.

Its lightweight construction, long battery life, and easy operation make it ideal for both beginners and experienced users. The device is praised for its portability and versatility, ensuring a smooth and enjoyable vaping experience with minimal effort required.

1.2 Key Features and Benefits

The Backwoods Vape Pen features a sleek, durable design with a 510-threaded battery for universal cartridge compatibility. Its adjustable voltage settings allow users to customize their vaping experience, while the long-lasting battery ensures extended use. Designed for portability and ease of use, this pen is ideal for both novices and experienced vapers. Its discreet form factor and smooth, consistent performance make it a preferred choice for those seeking a reliable vaping solution.

Design and Build Quality

The Backwoods Vape Pen boasts a compact, lightweight design with a durable build, featuring a sleek and portable structure that ensures ease of use and discrete vaping.

2.1 Compact and Durable Design

The Backwoods Vape Pen features a sleek, compact design that combines portability with durability. Its lightweight construction ensures easy carrying, while its robust build withstands frequent use. The pen’s durable materials and ergonomic design make it ideal for on-the-go vaping, offering a reliable and discreet experience. With a long-lasting 650mAh battery, it provides extended use without compromising on size or comfort, making it perfect for outdoor enthusiasts and everyday users alike.

2.2 Lightweight and Portable

The Backwoods Vape Pen is designed with portability in mind, featuring a lightweight and compact build that fits easily into pockets or bags. Its sleek, discreet design ensures it remains unnoticed, while its durable construction withstands travel. Weighing approximately 10-15 grams, the pen is easy to carry, making it perfect for on-the-go use. Its compact size, measuring around 94mm x 16mm x 8mm, enhances its portability without compromising performance or comfort.

Setting Up Your Backwoods Vape Pen

Unbox your Backwoods Vape Pen, detach the cartridge, and locate the USB charging port at the battery’s base. Use a compatible charger to prepare for first-time use.

3.1 Unboxing and Initial Setup

Unboxing your Backwoods Vape Pen is an exciting first step. Inside, you’ll typically find the vape pen, a cartridge, a USB charger, and a user manual. Start by inspecting the device for any damage. Gently detach the cartridge from the battery to ensure proper setup. Locate the USB charging port, usually at the base of the battery, and prepare for charging. Familiarize yourself with the device’s features and buttons before proceeding to charging or attaching the cartridge.

3.2 Attaching the Cartridge

Attaching the cartridge to your Backwoods Vape Pen is straightforward. Ensure the cartridge is compatible with the 510-threaded battery. Align the cartridge’s base with the battery’s connection point. Gently twist the cartridge clockwise until it securely clicks into place. Avoid over-tightening to prevent damage. Once attached, verify the cartridge is properly seated and test the device by taking a few light draws to ensure proper function and airflow.

Charging the Backwoods Vape Pen

Charging your Backwoods Vape Pen involves detaching the cartridge, using a compatible USB charger, and avoiding overcharging to maintain battery health and ensure safe operation always.

4.1 Charging Instructions

To charge your Backwoods Vape Pen, detach the cartridge and locate the USB charging port at the base of the battery. Use the provided USB charger or a compatible one, plugging it into a reliable power source like a wall adapter. Avoid using damaged cables or chargers to prevent fire hazards. The charging indicator light will typically illuminate during charging and may blink when fully charged. Never overcharge the battery to maintain its longevity and performance. Always consult the user manual for specific charging guidelines.

4.2 Best Practices for Battery Maintenance

To maintain your Backwoods Vape Pen’s battery, always use the provided USB charger or a compatible one to prevent damage. Avoid overcharging, as it can reduce battery lifespan. Keep the battery away from extreme temperatures and moisture. Store the pen upright when not in use to prevent leakage. Regularly clean the charging port with a soft brush or compressed air to remove debris. Never charge a damaged battery, and replace it if you notice any swelling or deterioration.

Selecting the Right Cartridge

Selecting the right cartridge ensures optimal performance and flavor. Choose 510-threaded cartridges for compatibility and consider oil type and viscosity for smooth vaping experiences.

5.1 Compatibility and Types of Cartridges

The Backwoods Vape Pen is compatible with 510-threaded cartridges, offering versatility for oils and concentrates. Choose between pre-filled cartridges for convenience or refillable options for customization. Ensure the cartridge matches your oil’s viscosity, as thicker oils may require higher voltage. Always inspect for leaks or damage before use to maintain performance and safety. Compatibility ensures a seamless vaping experience tailored to your preferences.

5.2 Ensuring Proper Cartridge Quality

Selecting high-quality cartridges is essential for a safe and enjoyable vaping experience. Choose cartridges from reputable brands to avoid counterfeit products, which may pose health risks. Always inspect for damage or leaks before use. Verify the oil’s viscosity to ensure compatibility with your device. Read product descriptions to understand the oil’s composition and flavor profile. Prioritizing quality ensures consistent performance, safety, and a satisfying vape experience tailored to your preferences.

Activating the Vape Pen

Activate your Backwoods Vape Pen using a simple five-click on/off system. Rapidly press the power button five times to power on, indicated by a light. Deactivate similarly.

6.1 Turning the Device On/Off

To activate your Backwoods Vape Pen, press the power button five times rapidly. The indicator light will illuminate, confirming the device is on. Repeat the same process to turn it off. This ensures safe operation and preserves battery life. Some models may feature draw-activation, so always consult your manual for specific instructions. Proper on/off procedures are essential for maintaining your device’s longevity and performance.

6.2 Understanding Activation Modes

Backwoods Vape Pens feature user-friendly activation modes. Most models use a five-click on/off system, while others offer draw-activation for seamless use. The five-click method ensures intentional operation, preventing accidental firing. Draw-activation provides a hands-free experience, starting vapor production with each inhale. Always consult your manual to confirm the specific activation mode for your device, as this varies by model. Proper activation enhances safety, convenience, and overall vaping satisfaction.

Adjusting Voltage and Temperature

Backwoods Vape Pens offer adjustable voltage (3.3-4.8V) and temperature control for customized vaping experiences, with higher settings producing more vapor and warmer flavors, while lower settings provide smoother hits.

7.1 Variable Voltage Settings

The Backwoods Vape Pen features variable voltage settings, typically ranging from 3;3V to 4.8V, allowing users to customize their vaping experience. Higher voltage increases vapor production and flavor intensity, while lower settings provide a smoother, cooler draw. Adjustments are usually made via a dial or button near the base. Experiment with settings to find your preference, starting low and gradually increasing. Proper adjustment enhances flavor and prevents overheating.

7.2 Optimizing for Different Vaping Experiences

Optimize your vaping experience by adjusting voltage and temperature settings to suit your preferences. Lower settings deliver smoother, flavor-focused hits, while higher settings produce thicker vapor. Experiment with preheat modes for consistent results and use draw-activation for effortless vaping. Tailor your settings based on cartridge type and oil viscosity to ensure optimal performance. This customization ensures a personalized experience, whether you prefer flavorful draws or dense vapor clouds.

Proper Inhalation Techniques

Mastering proper inhalation enhances your vaping experience. Start with gentle, slow draws, holding vapor briefly before exhaling. Avoid forceful inhalations to prevent discomfort. Experiment to find your ideal technique.

8.1 Mastering the Draw

Mastering the draw is essential for a smooth vaping experience. Start with short, gentle puffs to acclimate to the vapor density. Gradually increase draw duration as comfort allows. Avoid forceful inhalations, as this can cause discomfort or irritation. Hold the vapor in your mouth briefly before inhaling to enhance flavor. Adjust your technique based on vapor thickness and personal preference. Proper inhalation ensures optimal flavor and comfort.

8.2 Avoiding Common Mistakes

Avoiding common mistakes ensures a better vaping experience. Don’t over-inhale, as it can cause irritation. Refrain from holding vapor too long, as it may lead to discomfort. Avoid forceful draws, which can damage the cartridge or produce harsh flavors. Keep the pen upright to prevent leakage. Don’t overcharge the battery, as it can reduce lifespan. Always use the correct charger and adjust voltage settings wisely. Proper technique enhances safety and enjoyment.

Cleaning and Maintaining the Vape Pen

Regularly clean the Backwoods Vape Pen with a soft cloth or cotton swab to remove residue. Use isopropyl alcohol for tougher spots, avoiding internal components. Air dry thoroughly after cleaning to maintain performance and longevity.

9.1 Regular Cleaning Practices

Regular cleaning ensures optimal performance and longevity of your Backwoods Vape Pen. Disconnect the battery from the cartridge and wipe the connection points with a soft cloth or cotton swab. For tougher residue, dampen the cloth with isopropyl alcohol (70% or higher), but avoid getting alcohol inside the cartridge or battery. Clean the mouthpiece with a cotton swab and warm soapy water, then rinse thoroughly. Allow all components to air dry completely before reassembling. Regular cleaning prevents residue buildup and maintains a smooth vaping experience.

9.2 Tips for Longevity

To extend the life of your Backwoods Vape Pen, avoid exposing it to extreme temperatures or moisture. Store the device in a protective case when not in use to prevent scratches and damage. Regularly clean the connection points to prevent residue buildup and ensure proper functionality. Never use harsh chemicals or abrasive materials, as they can damage the pen’s surface. Always use the correct charger to avoid battery damage. By following these tips, you can maintain your device’s performance and longevity.

Troubleshooting Common Issues

Common issues include a non-functioning pen, weak vapor, or blinking lights. Check battery life, ensure proper cartridge connections, and clean residue. Adjust voltage settings or allow the device to cool down if overheating occurs. Consult the user manual for error codes and follow troubleshooting steps to resolve problems effectively.

10.1 Diagnosing and Fixing Problems

Diagnosing issues with your Backwoods Vape Pen starts with identifying symptoms like weak vapor or blinking lights. Check the battery life and ensure proper cartridge connections. Clean residue from the battery and cartridge contacts using a soft cloth or cotton swab. If the pen overheats, allow it to cool down. For inconsistent vapor, adjust voltage settings or replace a faulty cartridge. Refer to the user manual for specific error codes and solutions to resolve issues effectively.

10.2 Blinking Lights and Error Codes

Blinking lights on your Backwoods Vape Pen indicate specific statuses or issues. Refer to the user manual for detailed explanations of each code. For example, a red blink may signal a low battery, while a blue blink could indicate overheating. Address the issue by charging the battery or allowing it to cool down. Always consult the manual for precise troubleshooting guidance to resolve errors effectively and ensure optimal performance.

Safety Tips for Using the Vape Pen

Always detach the cartridge before charging and use the provided USB charger to avoid fire hazards. Keep the pen away from extreme temperatures and moisture.

11.1 Battery Safety Guidelines

Always use the provided USB charger or a compatible one to avoid damage or fire hazards. Detach the cartridge before charging to prevent potential damage. Avoid overcharging, as it can shorten battery life. Store the pen in a cool, dry place, away from extreme temperatures and moisture. Never expose the battery to physical stress or water. Regularly check the battery for signs of wear and follow the manual for specific guidelines.

11.2 Proper Storage and Handling

Proper storage and handling are crucial for maintaining your Backwoods Vape Pen’s performance and longevity. Store the pen in a cool, dry place, away from direct sunlight and moisture. Use a protective case to prevent scratches or damage. Always handle the device with care to avoid drops or physical stress. Clean the pen regularly and ensure all parts are dry before storing. Keep it out of reach of children and pets for safety.

The Backwoods Vape Pen offers a sleek, durable, and portable vaping experience, ideal for both beginners and experienced users. Its ease of use and versatility ensure satisfaction, promoting responsible vaping practices.

12.1 Final Thoughts on the Backwoods Vape Pen

The Backwoods Vape Pen is a standout choice for its reliability, ease of use, and versatility. Its compact design, long battery life, and compatibility with various cartridges make it ideal for on-the-go vaping. Users appreciate its sleek, durable build and user-friendly interface, catering to both beginners and experienced vapers. The ability to adjust voltage settings and customize the vaping experience further enhances its appeal, ensuring consistent satisfaction and flexibility for all users.

12.2 Encouraging Responsible Vaping

Responsible vaping is essential for a safe and enjoyable experience. Always follow safety guidelines, such as proper battery handling and storage. Use authentic cartridges from trusted sources to avoid health risks. Be mindful of local laws and regulations regarding vaping. Practice moderation and prioritize your health by avoiding excessive use. Dispose of batteries and cartridges responsibly to protect the environment. By adopting these habits, you contribute to a positive vaping community.


  • 0

tamagotchi pet instructions

Category : Instructions

A Tamagotchi is a handheld digital pet that requires care, feeding, and attention to grow and evolve; The latest version, Tamagotchi Uni, offers colorful, interactive experiences, teaching responsibility and nurturing skills through its unique life cycle.

1.1 What is a Tamagotchi?

A Tamagotchi is a handheld digital pet that requires care, feeding, and attention to grow and evolve. It is a virtual companion that mimics real-life pet ownership, teaching responsibility and nurturing skills. The latest version, Tamagotchi Uni, features a color screen and interactive gameplay, allowing users to raise their pet from egg to adulthood, with its evolution depending on care quality.

1.2 Brief History of Tamagotchi

The Tamagotchi, created by Bandai, first launched in 1996 and became a global phenomenon. It introduced the concept of virtual pet ownership, allowing users to care for a digital creature. Over the years, it evolved with new versions like Tamagotchi Connection and Tamagotchi Smart. The latest model, Tamagotchi Uni, released in 2023, features color screens and enhanced interactivity, continuing its legacy as a beloved digital companion.

Setting Up Your Tamagotchi

Insert batteries, press A and C to restart, and wait for the egg to hatch. Familiarize yourself with the buttons to navigate menus and care for your pet.

2.1 How to Activate Your Tamagotchi

To activate your Tamagotchi, insert the batteries and press the A and C buttons simultaneously until the screen lights up. This will reset the device, and after a few moments, a digital egg will appear. The egg will hatch into your new pet, signaling the start of your caregiving journey. Ensure the batteries are correctly placed for proper functionality.

2.2 Understanding the Buttons and Controls

The Tamagotchi features three main buttons: left (select), middle (enter), and right (cancel). Use the left button to navigate through options, the middle to confirm actions, and the right to cancel. Some models, like the Tamagotchi Uni, include touch-sensitive controls for interactive play. Familiarize yourself with the buttons to efficiently manage feeding, games, and care tasks for your digital pet.

Feeding and Nourishing Your Tamagotchi

Feeding your Tamagotchi regularly is essential for its growth and happiness. Provide food and snacks in moderation to avoid overfeeding. Portion control ensures a healthy, thriving pet;

3.1 Types of Food and Snacks

Your Tamagotchi can enjoy various foods like rice bowls, soup, and snacks such as candies or fruits. Feeding a balanced diet ensures proper growth and happiness. Snacks can boost morale but should be given in moderation to avoid overfeeding. Regular meals and treats keep your Tamagotchi healthy and content, promoting a positive evolution and overall well-being.

3.2 Feeding Schedule and Portion Control

Maintain a consistent feeding schedule to keep your Tamagotchi happy and healthy. Feed when the hunger icon appears, using the left button to select meals and the middle to confirm. Avoid overfeeding, as it can lead to waste and unhappy conditions. Balanced portions ensure proper growth and evolution. Moderation is key to raising a thriving Tamagotchi.

Maintaining Health and Happiness

Monitor your Tamagotchi’s hunger and happiness levels regularly. Check the meters often and respond promptly to its needs. A well-cared-for Tamagotchi stays healthy and joyful.

4.1 Monitoring Hunger and Happiness Levels

Regularly check the hunger and happiness meters on your Tamagotchi. These indicators show when your pet needs food, attention, or play. Keeping these levels balanced is crucial for its well-being. Neglecting them can lead to sadness or illness, so always prioritize timely care to ensure your Tamagotchi remains content and healthy over time.

4.2 Discipline and Attention Requirements

Discipline is essential for your Tamagotchi’s development. Press the buttons to interact, feed, or play when prompted. Consistent attention ensures happiness and prevents sadness or discipline issues. Neglecting these needs can lead to behavioral problems or an unhappy pet, so stay engaged and responsive to maintain a healthy, thriving Tamagotchi.

Evolution and Growth Stages

Tamagotchi evolves through stages, from egg to adult, based on care and attention. Proper feeding, play, and discipline influence its growth and final form, teaching responsibility.

5.1 Life Cycle of a Tamagotchi

A Tamagotchi begins as an egg and progresses through stages: baby, child, teenager, and adult. Its growth depends on care, feeding, and happiness levels. Proper attention ensures a healthy evolution, while neglect may result in a less desirable adult form. Each stage brings unique behaviors and requirements, teaching users responsibility and patience.

5.2 Factors Influencing Evolution

Evolution is shaped by feeding habits, happiness levels, discipline, and play. Overfeeding or neglecting hunger affects growth, while consistent care promotes desirable traits. Happiness and interaction also play roles, as a content Tamagotchi evolves differently than a neglected one. Proper balance ensures optimal development through its life stages.

Games and Activities

Tamagotchi offers built-in games and activities to keep your pet entertained. These interactions boost happiness, strengthen your bond, and are essential for a fulfilling virtual pet experience.

6.1 Built-in Games for Entertainment

Built-in games on Tamagotchi provide endless fun and engagement. From puzzle-solving to rhythm-based tasks, these activities entertain your pet and boost its happiness. Regular play strengthens your bond and keeps your Tamagotchi lively and content. Games also offer a chance to earn rewards and snacks, making care more interactive and enjoyable for both you and your virtual companion.

6.2 Interacting with Your Tamagotchi

Interacting with your Tamagotchi involves feeding, playing, and providing care. Use the buttons to navigate menus, offer snacks, and engage in activities. Regular interaction strengthens your bond and keeps your pet happy. Pay attention to its needs, as neglect can lead to unhappiness. Consistent care ensures your Tamagotchi thrives, evolving into a well-adjusted companion.

Cleaning Up After Your Tamagotchi

Cleaning up involves managing waste and maintaining hygiene. Regularly remove droppings using the buttons to ensure your Tamagotchi stays happy and healthy, preventing neglect or dissatisfaction.

7.1 Waste Management and Hygiene

Regularly clean up after your Tamagotchi by pressing the appropriate buttons to remove waste. Neglecting this can lower happiness and health. Use the controls to maintain hygiene, ensuring a positive experience. A clean environment keeps your digital pet thriving and prevents behavioral issues. Consistency is key to a happy and healthy Tamagotchi. Always check the waste indicator to stay on top of cleanup duties.

Troubleshooting Common Issues

Address common problems like misbehavior or neglect by resetting your Tamagotchi. Press and hold buttons A and C until a new egg appears to restart its life cycle.

8.1 Solving Behavioral Problems

Addressing behavioral issues in your Tamagotchi involves consistent care and attention. Ensure regular feeding, playtime, and waste removal to prevent unhappiness. Discipline your Tamagotchi when it misbehaves to maintain good behavior. Monitor happiness and health meters to catch problems early. If issues persist, resetting by pressing buttons A and C together can restart its life cycle, offering a fresh start.

8.2 Restarting Your Tamagotchi

To restart your Tamagotchi, press and hold the A and C buttons simultaneously until a new egg appears. This process resets the device, allowing a fresh start. The egg will hatch after a few minutes, giving you another chance to raise your digital pet from the beginning. Use this feature if your Tamagotchi becomes unresponsive or if you wish to start over.

Advanced Tips for Success

Experimenting with feeding schedules and play activities can optimize your Tamagotchi’s growth and evolution, ensuring a unique experience each time you restart the device effectively.

9.1 Maximizing Your Tamagotchi’s Happiness

To maximize your Tamagotchi’s happiness, focus on consistent feeding with a variety of food and snacks, and engage in regular play sessions. Avoid neglect, as low happiness can stunt evolution. Keep its environment clean, and ensure it gets enough attention and interaction. A balanced routine of care and entertainment will lead to a thriving, happy Tamagotchi, fostering a positive and fulfilling experience.

9.2 Avoiding Common Mistakes

Avoid overfeeding your Tamagotchi, as it can lead to poor health. Neglecting waste cleanup and ignoring low happiness levels are common errors that can hinder growth. Overlooking the importance of balanced care and interaction can result in a stressed or Evolution issues. Consistency and moderation are key to raising a healthy, happy Tamagotchi, ensuring its optimal development and longevity.

Raising a Tamagotchi is a rewarding journey that teaches responsibility and care. By following these guidelines, you’ll foster a happy, healthy digital pet and enjoy the unique bond it brings.

10.1 Final Thoughts on Raising a Tamagotchi

Raising a Tamagotchi is a delightful and educational experience. It teaches responsibility, patience, and empathy. By providing consistent care and attention, you’ll enjoy watching your digital pet grow and evolve; Remember, every action shapes its life cycle, making each Tamagotchi unique. Embrace the journey and cherish the bond you build with your virtual companion.


  • 0

office chair assembly instructions pdf

Category : Instructions

Discover a comprehensive guide to assembling your office chair with detailed PDF manuals. Follow step-by-step instructions, diagrams, and safety tips for a successful setup.

1.1 Importance of Proper Assembly

Proper assembly ensures your office chair is stable, safe, and functional. Incorrect assembly can lead to structural weakness, safety hazards, or improper ergonomic alignment. Follow instructions carefully to avoid risks and guarantee optimal performance. A well-assembled chair supports long-term comfort and durability, making it essential to adhere to manufacturer guidelines for a secure and enjoyable user experience.

1.2 Overview of the Assembly Process

The assembly process involves unpacking components, attaching the seat to the gas lift, assembling the base and casters, securing the backrest, and making final adjustments. Each step requires precision to ensure stability and functionality. Detailed PDF guides provide diagrams and numbered instructions to help users navigate the process efficiently, ensuring a seamless and successful chair setup experience.

Essential Tools and Hardware Required

Gather tools like an Allen wrench, screwdriver, and bolts. Ensure all hardware is included before starting. Check for wrenches and pliers if needed. Follow safety guidelines.

2.1 List of Tools Needed for Assembly

Essential tools: Allen wrench, screwdriver, and bolts. Ensure all hardware is included before starting. Check for wrenches and pliers if needed. Follow safety guidelines to avoid injuries.

2.2 Understanding the Hardware Components

Familiarize yourself with key hardware components: gas lift, five-star base, casters, seat, backrest, and armrests. Identify bolts, screws, and washers. Ensure proper alignment and secure tightening to maintain stability and functionality. Refer to diagrams for clarity and correct installation of each part.

Step-by-Step Assembly Guide

Start by unfolding the chair, then align and secure components like the seat, backrest, and armrests. Follow instructions for attaching the base and final adjustments.

3.1 Unpacking and Preparing the Components

Start by carefully unpacking all parts, ensuring no damage. Verify the inclusion of all hardware and components, such as the seat, backrest, and base. Refer to the PDF manual for a detailed parts list and diagrams. Organize the components on a clean surface for easy access. Double-check for any missing items to avoid assembly delays.

3.2 Attaching the Seat to the Gas Lift

Remove the seat from its packaging and align the post on the underside with the gas lift mechanism. Gently press down until the seat clicks into place. Ensure the connection is secure by tightening the bolts provided. Refer to the PDF manual for precise alignment and tightening instructions to ensure stability and safety.

3.3 Assembling the Base and Casters

Attach the five-star base to the gas lift by aligning the piston with the base’s center hole. Secure it using the provided bolts. Next, screw the casters into each base leg, ensuring they fit snugly. Tighten all connections firmly to ensure stability. Refer to the PDF guide for diagrams and specific torque recommendations to prevent loosening over time.

3.4 Aligning and Securing the Backrest

Position the backrest over the seat, ensuring alignment of the screw holes. Insert the provided bolts through both the backrest and seat, then tighten firmly using a wrench. Avoid over-tightening to prevent damage. Once secured, adjust the tilt mechanism according to your preference for optimal comfort and support. Ensure all connections are snug to maintain stability and durability.

3.5 Final Adjustments and Tightening

Once all components are assembled, test the chair’s stability and functionality. Adjust the seat height, tilt, and armrests to your preference. Tighten all bolts and connections firmly to ensure safety. Lubricate moving parts if necessary, and verify that the chair operates smoothly. Double-check all adjustments before first use to ensure optimal performance and longevity.

Common Challenges and Solutions

Address common issues like misaligned parts or loose bolts by referring to the PDF manual. Ensure all hardware is included and properly tightened for stability and safety.

4.1 Troubleshooting Common Assembly Issues

Identify and resolve common assembly challenges, such as misaligned parts or loose bolts, by reviewing the PDF guide. Ensure proper alignment of components and verify all hardware is included. Tighten bolts firmly and double-check connections for stability. Refer to diagrams for clarity and consult customer support if issues persist. Regularly inspect for wear or damage to maintain safety and functionality.

4.2 Tips for Avoiding Mistakes During Assembly

Prevent errors by carefully reviewing the PDF manual before starting. Verify all parts are included and tools are ready. Follow step-by-step instructions precisely, ensuring proper alignment and secure connections. Avoid over-tightening bolts, which may damage components. Double-check each assembly stage and consult diagrams for clarity. Seek assistance if unsure to ensure a safe and stable chair setup.

Safety Precautions and Warnings

Always follow safety guidelines to avoid injury. Ensure the chair is on a stable surface and all bolts are tightened properly before use. Avoid overleaning or exceeding weight limits.

5.1 Importance of Following Safety Guidelines

Adhering to safety guidelines ensures the chair’s stability and prevents accidents. Proper assembly avoids structural weaknesses, while correct usage maintains ergonomic benefits. Always read manuals carefully and verify all components are securely fastened before use to guarantee safe and durable performance.

5.2 Avoiding Injuries During Assembly

To prevent injuries, wear protective gloves and ensure a clear workspace. Avoid over-tightening bolts, as this may damage components or cause accidents. Use tools appropriately and avoid applying excessive force, which could lead to personal harm or equipment malfunction.

Ergonomic Adjustments and Features

Explore ergonomic adjustments like seat height, tilt, and lumbar support for optimal comfort. Customize your chair to promote proper posture and reduce strain during long work hours.

6.1 Adjusting the Seat Height and Tilt

Pull the height adjustment handle to modify the seat position, ensuring your feet are flat on the floor. Tilt the chair by leaning back and using the tilt mechanism. Proper adjustments enhance posture, reduce strain, and boost comfort for extended periods. Always refer to the PDF manual for specific instructions tailored to your chair model.

6.2 Customizing the Armrests and Lumbar Support

Adjust the armrests up or down and side to side for optimal comfort. Modify the lumbar support by moving it up or down to fit your lower back. Ensure proper alignment to maintain ergonomic posture. Tighten all bolts securely after adjustments. Refer to the PDF guide for specific instructions to customize your chair effectively.

Maintenance and Upkeep Tips

Regularly clean and lubricate moving parts to ensure smooth operation. Check for loose bolts and wear, tightening as needed. Maintain proper ergonomics for long-term comfort and durability.

7.1 Cleaning and Lubricating Moving Parts

Regularly clean the chair’s surfaces using a mild polish to remove stains. Lubricate all moving parts, such as casters and tilt mechanisms, to ensure smooth operation. Avoid using harsh chemicals that may damage materials. Proper maintenance extends the chair’s lifespan and maintains its functionality and comfort for daily use.

7.2 Regular Checks for Loose Bolts and Wear

Inspect all bolts and screws periodically to ensure they are tightly secured. Check for signs of wear on casters, armrests, and other components. Replace any damaged parts promptly to maintain stability and prevent potential safety hazards. Regular checks help preserve the chair’s durability and ensure optimal performance over time.

Additional Features and Customizations

Explore advanced features like rocking tension, adjustable armrests, and lumbar support. Customize your chair with optional accessories to enhance comfort and functionality, ensuring a tailored experience.

8.1 Understanding Special Functions Like Rocking Tension

Rocking tension allows smooth reclining, enhancing comfort. Adjust the knob to customize resistance. Proper setup ensures balance, preventing tipping. Refer to your PDF manual for precise instructions to optimize this feature for your chair;

8.2 Adding Accessories for Enhanced Comfort

Enhance your office chair’s comfort by adding accessories like flip-up armrests, lumbar support, and adjustable headrests. Ventilated mesh inserts improve airflow, while document holders keep materials at eye level. Adjust tilt and tension to suit your preference, and consider detachable cushions for extra support. Always follow the PDF manual for proper installation.

Warranty and Manufacturer Support

Understand your warranty coverage and how to contact customer service for assistance with assembly or performance issues. Manufacturer support ensures help is available when needed.

9.1 Understanding Your Warranty Coverage

Your warranty provides coverage for manufacturing defects and ensures durability. Most warranties last several years, covering parts like the gas lift and frame. Review the PDF manual to understand exclusions and terms. Proper assembly and usage are crucial for warranty validity. Contact customer service for any warranty-related queries or claims assistance.

9.2 Contacting Customer Service for Assistance

For assembly queries or warranty issues, contact customer service via phone or email. Check the PDF manual for contact details. Provide order number and product details for faster resolution. Friendly representatives are available to address concerns, ensuring your office chair experience is smooth and hassle-free. Reach out for expert guidance and support.

Complete the assembly by verifying the chair’s stability and functionality. Ensure all bolts are tightened and moving parts are lubricated. Your chair is now ready for comfortable use.

10.1 Verifying the Chair’s Stability and Functionality

After assembly, check the chair’s stability by ensuring all bolts are tightened and the base is securely attached. Test the height adjustment, tilt mechanism, and armrests to confirm smooth functionality. Sit on the chair to verify there’s no wobbling or instability. Ensure all safety features, like the tilt lock, are working correctly for optimal performance and safety.

10.2 Final Inspection Before First Use

Conduct a thorough inspection to ensure all parts are correctly assembled. Check for any loose bolts, proper alignment of components, and functionality of adjustable features. Verify that no damage occurred during assembly. Ensure the chair meets safety standards and is free from defects. This final check ensures a safe and comfortable user experience from the start.

Resources for Further Assistance

Access downloadable PDF guides, video tutorials, and manufacturer support for detailed assembly instructions and troubleshooting. These resources ensure clarity and ease for a successful chair setup.

11.1 Downloading the PDF Manual

Download the official PDF manual for your office chair assembly instructions. This document provides detailed diagrams, step-by-step guidance, and hardware lists to ensure a smooth assembly process. Many manufacturers offer these manuals on their official websites, often searchable by model number. Save the PDF for easy access and future reference during assembly.

  • Visit the manufacturer’s official website.
  • Search for your chair model.
  • Download the PDF manual.

11.2 Accessing Video Tutorials and Guides

Enhance your assembly experience with video tutorials and guides. Many manufacturers provide instructional videos on platforms like YouTube or their official websites. These videos offer visual step-by-step guidance, making complex steps easier to follow. Search for your chair model or brand to find relevant tutorials. Pausing and replaying videos ensures accurate assembly.

  • Visit the manufacturer’s YouTube channel.
  • Search for your chair model + “assembly tutorial.”
  • Follow along with detailed visual instructions.

Frequently Asked Questions

Address common queries about office chair assembly, such as missing hardware, alignment issues, or adjustment difficulties. Refer to your PDF manual or contact support for assistance.

12.1 Common Queries About Assembly and Usage

Users often ask about missing hardware, proper alignment of parts, and adjusting features like tilt and lumbar support. Issues with seat height adjustment and armrest installation are also common. Questions about troubleshooting wobbly chairs or damaged components frequently arise. Refer to your PDF manual or contact customer support for tailored assistance.

12.2 Addressing Concerns About Chair Performance

Many users inquire about improving chair stability, reducing squeaking noises, and enhancing comfort. Concerns often arise regarding proper weight capacity, uneven casters, and malfunctioning mechanisms. Regular maintenance, such as lubricating moving parts, is recommended. Refer to your PDF guide for specific solutions and contact customer service for further troubleshooting.


ninja food processor instruction manual

Category : Instructions

Welcome to the Ninja Food Processor, your ultimate kitchen companion designed for efficiency and versatility. This powerful appliance simplifies food preparation with its advanced features and user-friendly interface. Packed with innovative technology like Auto-IQ, it ensures precise processing and consistent results. Perfect for chopping, blending, and more, this processor is a must-have for home cooks and professionals alike. The instruction manual will guide you through setup, operation, and maintenance to maximize your culinary creativity and ensure longevity of the device.

1.1 Overview of the Ninja Food Processor

The Ninja Food Processor is a versatile kitchen appliance designed to simplify food preparation. With advanced features like Auto-IQ technology and multiple preset programs, it offers precise control for chopping, blending, and processing. Its compact design and powerful motor make it ideal for both small and large tasks, ensuring efficiency and ease of use.

1.2 Importance of Reading the Instruction Manual

Reading the instruction manual is crucial for safe and efficient use of the Ninja Food Processor. It provides essential guidance on setup, operation, and maintenance, ensuring optimal performance and longevity. The manual also highlights safety precautions, such as handling sharp blades and avoiding overloading, to prevent accidents and maximize your processing experience.

Key Features of the Ninja Food Processor

The Ninja Food Processor boasts cutting-edge features like Auto-IQ Technology, multiple preset programs, and unmatched versatility for chopping, blending, and processing various foods with precision and ease.

2.1 Auto-IQ Technology

Auto-IQ Technology automatically senses the container size and adjusts processing speed and timing for optimal results. This intelligent feature ensures precise chopping, blending, and mixing with minimal effort, delivering consistent outcomes for various recipes and food types, making it a standout innovation in the Ninja Food Processor.

2.2 Multiple Preset Programs

The Ninja Food Processor offers multiple preset programs for various tasks, such as chopping, blending, and mixing. These programs simplify food preparation by automatically adjusting speed and timing, ensuring consistent results. With options for different food types and recipes, the preset programs enhance versatility and make processing effortless and efficient for users of all skill levels.

2.3 Versatility in Food Processing

The Ninja Food Processor excels in handling various food processing tasks, from chopping vegetables to blending sauces. Its interchangeable blades and bowls allow for seamless transitions between functions like slicing, shredding, and pureeing. This versatility makes it an essential tool for preparing diverse recipes, catering to both simple and complex culinary needs efficiently.

Understanding the Components

The Ninja Food Processor consists of a powerful motor, sharp blades, a durable processor bowl, and a user-friendly control panel. These components work together to ensure efficient food processing and precise results, making it easy to achieve professional-grade outcomes in your kitchen.

3.1 Motor and Blades

The Ninja Food Processor features a high-performance motor designed for heavy-duty tasks, ensuring smooth operation even with tough ingredients. The blades are crafted for precision, offering multiple functions like chopping, slicing, and pureeing. Their sharp edges and strategic design maximize efficiency, making food preparation quick and effortless while maintaining consistent results.

3.2 Processor Bowl and Lid

The processor bowl is designed for durability and ease of use, with a BPA-free construction ensuring safety. The lid features a secure locking mechanism to prevent accidental opening during operation. Proper alignment of the lid is crucial for optimal performance and safety. Regular cleaning of both components is recommended to maintain hygiene and functionality.

3.4 Control Panel and Buttons

The control panel is designed for intuitive operation, featuring buttons for Auto-IQ programs, manual mode, and preset functions. The buttons include options for pulsing, dough mixing, and speed control. A safety lock button ensures the processor only operates when the lid is securely closed. Proper button usage is detailed in the manual for optimal performance.

Assembly and Setup

Begin by placing the processor bowl securely on the motor base, ensuring proper alignment. Attach the blades according to the manual’s guidance. Close the lid tightly to complete the setup.

4.1 Unboxing and Initial Setup

Excited to begin? Carefully unbox your Ninja Food Processor, ensuring all components like the bowl, blades, and lid are included. Place the processor bowl securely onto the motor base, aligning it properly. Handle sharp blades with caution and refer to the manual for precise setup instructions to ensure safety and optimal performance.

4.2 Attaching the Bowl and Blades

Align the processor bowl with the motor base, ensuring it clicks securely into place. Next, attach the appropriate blades by inserting them into the bowl’s center post and twisting gently until they lock. Always handle blades with care to avoid injury. Refer to the manual for specific guidance on proper assembly.

4.3 Placing the Lid Correctly

Ensure the lid is properly aligned with the bowl’s locking mechanism. Gently lower it until it clicks into place securely. Always verify the lid is tightly sealed before operating to prevent leaks or accidents. Handle the lid with care, as it may have sharp edges or components. Refer to the manual for visual guidance.

Operating the Ninja Food Processor

Ensure safety by following manual guidelines. Add ingredients, select desired settings, and start processing. Monitor operation and adjust as needed. Refer to troubleshooting tips for any issues.

5.1 Basic Operation Steps

Start by adding ingredients to the processor bowl; Close the lid securely and ensure it locks. Select the appropriate preset program or manual mode. Press the start button to begin processing. Monitor progress through the lid’s opening. Stop the processor when desired consistency is achieved. Always follow safety guidelines in the manual.

5.2 Using Auto-IQ Programs

Select the desired Auto-IQ program based on your recipe needs, such as Chop or Puree. Add ingredients to the processor bowl without overloading. Securely close and lock the lid. Press the corresponding preset button on the control panel. The processor will automatically adjust speed and timing for optimal results. Press Start and let the machine work. For safety, always refer to the manual for specific program guidelines and ensure proper lid alignment before operation. Regularly clean the processor after use to maintain performance.

5.3 Manual Mode for Custom Control

For precise control, use Manual Mode to customize processing speed and duration. Select the manual option on the control panel, adjust the speed setting, and press Start. Monitor progress through the lid and pulse as needed to achieve desired results. Always follow the manual’s guidelines for safe operation and optimal performance.

Safety Precautions

Handle sharp blades with care, avoid overloading, and ensure proper ventilation. Keep children away and never insert utensils while processing. Always follow manual guidelines for safe operation and maintenance.

6.1 Handling Sharp Blades Safely

The Ninja Food Processor’s blades are sharp and essential for optimal performance. Always handle them with care, using the provided handles to avoid direct contact. Keep fingers away from the cutting edges, and store blades separately when not in use. This ensures safety and prevents accidental injuries during food processing tasks.

6.2 Avoiding Overloading the Processor

To ensure optimal performance and prevent damage, avoid overloading the Ninja Food Processor. Adding too much food can strain the motor and lead to inconsistent results. Always follow the recommended capacity guidelines and add ingredients gradually. This maintains efficiency and extends the appliance’s lifespan while ensuring safe and effective food processing.

6.3 Ensuring Proper Ventilation

Proper ventilation is crucial for the Ninja Food Processor’s operation. Ensure the appliance is placed on a stable, well-ventilated surface to prevent overheating. Keep the surrounding area clear of obstructions to allow adequate airflow. This helps maintain motor efficiency and ensures smooth operation during processing, preventing potential damage or performance issues.

Maintenance and Cleaning

Regular cleaning and drying prevent residue buildup. Check for food particles and wash detachable parts thoroughly. Dry all components before storage to maintain hygiene and longevity.

7.1 Cleaning the Processor After Use

After each use, disassemble the processor and wash all parts with warm soapy water. Avoid abrasive cleaners to prevent scratching. Regularly clean the motor base with a damp cloth. For tough food residue, soak parts in warm water before scrubbing gently. Dry thoroughly to prevent rust and maintain performance.

7.2 Regular Maintenance Tips

Regularly lubricate moving parts to ensure smooth operation. Check blades for dullness and replace as needed. Clean the motor base and fans to prevent dust buildup. Inspect seals for wear and tear to maintain a tight fit. Always align the bowl and lid properly for optimal performance. Refer to the manual for specific care instructions to extend the lifespan of your processor.

7.3 Storing the Processor Correctly

Store the Ninja Food Processor in a dry, cool place, away from direct sunlight. Ensure all parts are clean and dry before storage to prevent moisture buildup. Keep the processor and accessories in their original packaging or a protective case to avoid damage. Avoid stacking heavy items on top of the processor.

Troubleshooting Common Issues

Troubleshoot common issues like the processor not turning on or blades not spinning. Refer to the manual for solutions or contact customer support for assistance.

8.1 Processor Not Turning On

If your Ninja Food Processor won’t turn on, check the power cord connection and ensure it’s properly plugged in. Verify the outlet is working and the processor is assembled correctly. Consult the instruction manual for troubleshooting steps or contact customer support for further assistance to resolve the issue quickly.

8.2 Blades Not Spinning Properly

If the blades aren’t spinning, ensure they’re clean and free from food residue. Check for proper installation and alignment as per the instruction manual. If issues persist, contact customer support for assistance. Regular maintenance can prevent such problems and ensure smooth operation of your Ninja Food Processor.

8.3 Overheating Issues

Overheating issues can occur due to prolonged use or blockages. If the Ninja Food Processor overheats, stop operation immediately and unplug it. Allow the motor to cool down before resuming use. Ensure adequate ventilation and avoid overloading to prevent overheating. For persistent problems, refer to the instruction manual or contact customer support.

Additional Resources

For further assistance, visit the official Ninja website to download the instruction manual or explore online tutorials. You can also contact customer support for troubleshooting or maintenance guidance.

9.1 Downloading the Instruction Manual

To access the Ninja Food Processor manual, visit the official Ninja website. Select your specific model (e.g., BN650UK or BN800UK) and download the PDF or Word Doc file. Ensure compatibility with your device for easy viewing. This resource provides detailed setup, operation, and troubleshooting guidance tailored to your appliance.

9.2 Accessing Online Tutorials

Visit the official Ninja Kitchen website or YouTube channel for video tutorials and step-by-step guides. These resources provide visual instructions for assembly, operation, and troubleshooting. Online tutorials are ideal for understanding advanced features like Auto-IQ and preset programs, ensuring you maximize your Ninja Food Processor’s potential with ease and confidence.

9.3 Contacting Customer Support

For assistance, visit the official Ninja Kitchen website and navigate to the support section. Use the contact form, phone number, or email provided for inquiries. Customer support is available to address troubleshooting, warranty, or operational questions. Ensure to have your product details ready for efficient assistance.


s&g combination lock instructions

Category : Instructions

Renowned for durability and reliability‚ S&G combination locks offer precise mechanical and electronic locking solutions․ Their ease of use and maintenance make them ideal for securing safes and vaults․

Overview of S&G Combination Locks

S&G combination locks are renowned for their durability and precision engineering‚ offering reliable security solutions for safes‚ vaults‚ and secure storage systems․ Available in both mechanical and electronic models‚ these locks provide a user-friendly interface while maintaining high-level security․ Key features include a left-right-left dialing sequence‚ anti-manipulation mechanisms‚ and internal relockers to prevent unauthorized access․ Models like the 6120 and 2740B offer advanced features such as time delays and electronic keypads․ Designed for ease of use‚ S&G locks require accurate alignment of numbers and smooth dial rotation․ Regular maintenance and adherence to operating instructions ensure optimal performance․ Whether for residential or commercial use‚ S&G combination locks deliver exceptional security and convenience‚ making them a trusted choice for safeguarding valuable assets․

Importance of Following Instructions

Adhering to the provided instructions is crucial for the proper operation and security of S&G combination locks․ Failure to follow the steps precisely can result in the lock malfunctioning or the combination not aligning correctly․ For mechanical locks‚ accurate dial alignment and smooth rotation are essential to avoid damaging the internal mechanism․ Electronic models also require careful input to ensure the combination is recognized․ Ignoring instructions may lead to issues like the lock not opening or the combination resetting unintentionally․ Additionally‚ improper handling can trigger relocking devices‚ further complicating access․ Always test new combinations multiple times before securing valuables․ Following the guidelines ensures the lock’s longevity‚ maintains security‚ and prevents potential frustrations․ Proper maintenance and operation are key to reliable performance;

Understanding the Components of an S&G Combination Lock

An S&G combination lock consists of a dial mechanism‚ alignment index‚ and locking arms․ The dial mechanism sets the combination‚ while the alignment index guides proper number positioning․ Locking arms secure the lock‚ and relocking devices enhance security by engaging during forced entry attempts․

Key Features of S&G Locks

S&G combination locks are known for their precision engineering and robust security features․ They include a manipulation-proof dial mechanism‚ anti-pick pins‚ and dual locking arms to prevent combination drift․ The locks also feature a relocking device that activates during forced entry attempts‚ enhancing security․ A key locking day-lock option allows the dial to be fixed in either open or closed positions․ Some models offer a time delay feature‚ which can be programmed for added protection․ The locks are designed for durability‚ with internal components built to withstand tampering and ensure long-term reliability․ These features make S&G locks a trusted choice for securing valuable items in safes and vaults․

Dial Mechanism and Alignment

The dial mechanism of S&G locks requires precise alignment to function correctly․ Users must ensure each number in the combination aligns accurately with the index mark․ Turning the dial too quickly or unevenly can disrupt proper alignment․ When entering the combination‚ the dial should be rotated smoothly and steadily‚ avoiding overshooting numbers․ If the dial overshoots‚ the combination process must be restarted․ Proper alignment ensures the internal wheels correctly engage‚ allowing the lock to open․ Regular maintenance‚ such as cleaning and lubricating the dial‚ is essential for maintaining smooth operation․ Misalignment can lead to common issues‚ such as failure to open‚ requiring troubleshooting steps like adjusting numbers slightly․ Accurate dialing is crucial for consistent and reliable performance of the lock mechanism․

Step-by-Step Operating Instructions

Opening: Turn dial left past the first number three times‚ stop on the fourth․ Turn right to the second number‚ stop on the third․ Turn left to the final number‚ stop on the first․ Locking: Turn dial left at least four times to secure․

Opening the Lock

To open an S&G combination lock‚ follow these precise steps․ Start by turning the dial to the left‚ passing your first combination number three full times‚ and stopping on the fourth occurrence of the number․ Next‚ turn the dial to the right‚ passing the second number twice‚ and stop on the third occurrence․ Finally‚ turn the dial to the left again‚ stopping on the first number․ Ensure each number aligns perfectly with the index mark․ If the combination doesn’t work‚ verify each number and try adjusting slightly up or down․ Always operate the dial smoothly and avoid rapid or jerky movements․ Proper alignment and sequence are crucial for successful operation․ After opening‚ test the combination multiple times to confirm accuracy․

Locking the Safe

To lock the safe‚ ensure the door is fully closed and the locking bolts are extended․ Turn the dial to the left (counterclockwise) at least four full revolutions‚ passing your first combination number each time․ Stop on the first number to ensure proper alignment․ Verify that the dial is set correctly and the locking mechanism engages securely․ If the safe is equipped with a Day-Lock feature‚ ensure it is activated to prevent unintended opening․ Always test the lock by attempting to open it with the combination to confirm it is securely locked․ Proper locking ensures the safe’s contents are protected and maintains the integrity of the locking mechanism․

Troubleshooting Common Issues

If the lock fails to open despite entering the correct combination‚ ensure the dial is aligned accurately with the index mark․ Turn the dial slowly and avoid overshooting numbers‚ as this can disrupt the mechanism․ If the lock does not respond‚ check for worn or damaged parts‚ such as the dial or spindle․ For electronic models‚ verify battery life or replace them if drained․ If the lock chirps or makes no sound‚ consult the manual for reset procedures․ For mechanical locks‚ ensure the Day-Lock feature is disengaged․ If issues persist‚ lightly lubricate the dial and test the combination again․ Always refer to the specific model’s manual for tailored troubleshooting steps‚ and contact a professional if problems remain unresolved․

Changing the Combination

Insert the change key‚ turn the dial to the correct position‚ and set your new combination․ Remove the key and test the new code to ensure functionality․

Preparing to Change the Combination

To change the combination on your S&G lock‚ begin by ensuring the safe is open and the locking mechanism is extended․ Locate the change key‚ typically provided with your lock‚ and have it ready․ Enter the current combination to confirm access․ Once open‚ turn the handle or wheel counterclockwise to extend the locking bolts fully․ Insert the change key into the designated receptacle on the lock cover․ Ensure the dial is aligned properly and the lock is in the correct position for reprogramming․ For mechanical locks‚ align the numbers precisely with the index mark․ Some models may require turning the dial to a specific starting point before proceeding․ Always refer to your specific lock model’s instructions for exact preparation steps․ Keep the safe door open during this process to avoid accidental locking․ Testing the new combination afterward is crucial to ensure it works correctly․

Steps to Reset the Combination

To reset the combination on your S&G lock‚ insert the change key into the keyhole and turn it clockwise․ This will disengage the old combination․ Turn the dial left‚ passing the first number of the new combination three times‚ stopping on the fourth turn․ Next‚ turn the dial right‚ passing the second number twice‚ stopping on the third turn․ Finally‚ turn the dial left and align the third number of the new combination with the index mark․ Remove the change key to complete the reset․ Test the new combination by opening and locking the safe several times to ensure it works correctly․ Always refer to your specific lock model’s instructions for precise steps‚ as procedures may vary slightly between mechanical and electronic locks․

Maintenance and Care Tips

Regular maintenance ensures optimal performance of your S&G combination lock․ Lubricate internal mechanisms annually with a high-quality lock oil to prevent friction and wear․ Avoid exposure to extreme temperatures and humidity‚ as this can affect the lock’s accuracy․ Clean the dial and exterior with a soft cloth and mild detergent to remove grime․ Never force the dial beyond its stopping points‚ as this can damage internal components․ Store the combination securely outside the safe to prevent unauthorized access․ For electronic locks‚ replace batteries as indicated‚ typically every 2-3 years‚ to maintain functionality․ Schedule professional servicing every 5-7 years to inspect and adjust internal parts‚ ensuring long-term reliability and security․