instructional facilitator
Category : Instructions
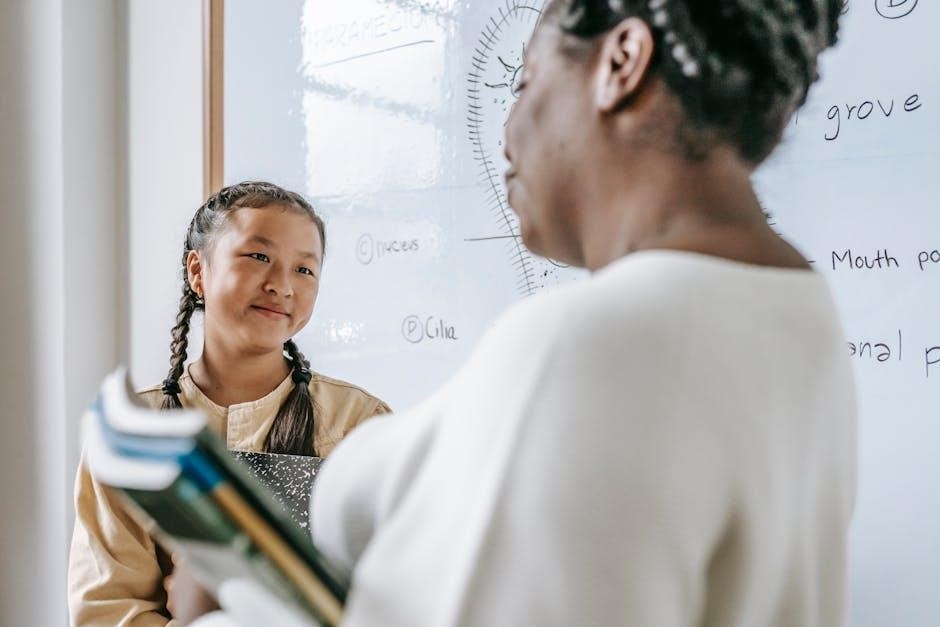
An Instructional Facilitator supports educators by enhancing teaching methods and using data. They play a crucial role in educational settings, helping teachers improve instruction. This role is vital for student success.
1.1 Definition and Overview
An Instructional Facilitator is an educator who supports teachers in improving instructional practices and student outcomes. They act as a bridge between teaching strategies and classroom implementation, ensuring effective learning environments. This role involves collaborating with educators to enhance lesson planning, integrate technology, and analyze data to inform instruction. Instructional facilitators often work in schools or districts, focusing on professional development and fostering a culture of continuous improvement. Their expertise helps teachers adapt to new educational trends and challenges, ultimately benefiting student achievement. By providing resources and guidance, instructional facilitators play a pivotal role in modern education systems.
1.2 Importance in Educational Settings
Instructional Facilitators are essential in educational settings as they enhance teaching quality and student performance. By supporting teachers with innovative strategies and resources, they foster a culture of continuous improvement. Their role is critical in addressing diverse learning needs, ensuring equity, and promoting academic success. Facilitators also bridge gaps between curriculum design and classroom implementation, helping educators adapt to evolving educational standards. Their expertise in data analysis and professional development enables schools to make informed decisions, improving overall instructional effectiveness. Ultimately, Instructional Facilitators play a key role in creating learning environments that empower both teachers and students to thrive.
Key Responsibilities of an Instructional Facilitator
An Instructional Facilitator supports teachers with strategies, facilitates professional growth, and analyzes data to improve instruction. They foster collaboration and ensure effective teaching practices for student success.
2.1 Supporting Teachers in Instructional Strategies
An Instructional Facilitator empowers teachers by assessing their needs and providing tailored resources. They model effective strategies, collaborate on lesson planning, and offer feedback to enhance teaching practices. By fostering a collaborative environment, they help educators adapt innovative methods to meet diverse student needs, ensuring alignment with curriculum goals. This support enables teachers to refine their skills, leading to improved student engagement and academic outcomes. The facilitator’s role is instrumental in bridging the gap between theory and practice, making instructional strategies accessible and actionable for educators.
2.2 Facilitating Professional Development
Instructional Facilitators organize workshops, training sessions, and collaborative meetings to enhance teachers’ skills. They design professional development programs aligned with school goals, addressing topics like technology integration and diverse learning strategies. By fostering a culture of continuous improvement, they help educators stay updated on best practices. Isabel Becerra, for instance, leverages her experience to lead multilingual education initiatives, ensuring teachers are equipped to support diverse learners. These efforts not only boost teacher confidence but also improve student outcomes, creating a more inclusive and effective learning environment. Professional development is a cornerstone of their role, driving educational excellence and innovation.
2.3 Monitoring and Analyzing Instructional Data
Instructional Facilitators collect and analyze data to assess teaching effectiveness and student progress. They use formative assessments and performance metrics to identify trends and areas for improvement. By monitoring data, they provide insights to teachers, helping them adjust strategies. For instance, Isabel Becerra emphasizes the importance of leading data in guiding instruction. Facilitators also collaborate with educators to set goals and track outcomes, ensuring data-driven decisions. This process supports personalized learning and enhances overall academic achievement. Regular analysis helps maintain high standards and fosters a culture of accountability, ultimately benefiting both teachers and students.
The Role in Multilingual and Multicultural Education
Instructional facilitators support educators in addressing language barriers and cultural differences, fostering inclusive learning environments through tailored strategies and collaboration.
3.1 Case Study: Isabel Becerra in Garland ISD
Isabel Becerra, a sheltered-instruction facilitator in Garland ISD, Texas, exemplifies the role of an instructional facilitator in multilingual education. Born in Bolivia, she brings a deep understanding of cultural and linguistic diversity. Since 1992, she has supported educators in creating inclusive learning environments for multilingual students. Her work focuses on using formative data to guide instruction and collaborating with teachers to implement culturally responsive strategies. By fostering professional development and advocating for equitable practices, Isabel has significantly impacted student outcomes and teacher confidence in addressing diverse learner needs.
3.2 Strategies for Supporting Diverse Learners
Instructional facilitators employ strategies to support diverse learners by fostering cultural responsiveness, differentiated instruction, and scaffolding techniques. They promote the use of multilingual resources and technology to bridge language gaps. Professional development is provided to teachers, focusing on inclusive practices and culturally relevant pedagogy. Facilitators also encourage collaboration among staff to create personalized learning plans. By leveraging data, they identify student needs and tailor interventions. These strategies ensure equitable access to education, empowering diverse learners to thrive academically and socially. The goal is to create an inclusive environment where all students, regardless of background, can achieve their full potential.
Professional Development and Collaboration
Instructional facilitators foster professional growth by collaborating with teachers, providing resources, and promoting a supportive school culture that enhances educational practices and student learning outcomes.
4.1 Organizing Workshops and Training Sessions
Instructional facilitators play a key role in organizing workshops and training sessions to enhance teacher effectiveness. These sessions often focus on innovative teaching strategies, technology integration, and data-driven instruction. By collaborating with educators, facilitators ensure workshops are relevant and practical, addressing specific school needs. Hands-on activities and group discussions encourage active learning and peer collaboration. These professional development opportunities not only improve teaching skills but also foster a culture of continuous improvement. Regular training sessions help educators stay updated on best practices, aligning with school goals and improving student outcomes. Effective facilitation ensures these sessions are engaging, informative, and tailored to diverse teacher needs.
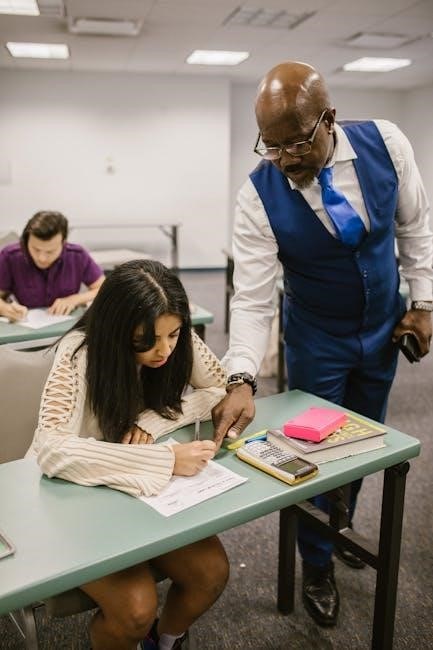
4.2 Mentoring and Coaching Teachers
Mentoring and coaching teachers is a cornerstone of an instructional facilitator’s role. They provide one-on-one support, helping educators refine their teaching practices and address classroom challenges. Through collaborative planning and observation, facilitators offer constructive feedback and strategies to enhance instruction. This personalized approach fosters professional growth and builds teacher confidence. Facilitators also encourage reflection, helping teachers identify strengths and areas for improvement. By aligning mentoring with school goals, they ensure interventions are impactful. Regular check-ins and data-driven insights further tailor support, celebrating successes and addressing needs. This nurturing process not only benefits teachers but ultimately enhances student learning and achievement.
4.3 Building a Collaborative School Culture
Building a collaborative school culture is essential for fostering a supportive educational environment. Instructional facilitators play a key role in promoting teamwork among teachers, staff, and administrators. By organizing collaborative meetings and fostering open communication, they help create a shared vision for student success. Isabel Becerra, for instance, has successfully bridged gaps in Garland ISD by facilitating cross-departmental discussions and encouraging collective problem-solving. Her efforts have strengthened relationships and aligned instructional strategies. A collaborative culture not only enhances teacher morale but also ensures a cohesive approach to education, ultimately benefiting students. This teamwork-driven environment is vital for addressing diverse learner needs and achieving school-wide goals.
Technology Integration in Instructional Facilitation
Technology integration enhances instructional facilitation by providing tools for interactive lessons, data analysis, and professional development, fostering innovation and efficiency in education, and improving student engagement.
5.1 Tools for Enhancing Teaching and Learning
Instructional facilitators utilize various tools to enhance teaching and learning, such as learning management systems, interactive whiteboards, and educational apps. These tools promote engagement and personalized instruction. Formative assessment software helps monitor student progress, enabling data-driven decisions. Collaboration platforms like Google Workspace foster teamwork among teachers and students. Additionally, multimedia resources and virtual learning environments provide diverse ways to deliver content. These technologies not only streamline instruction but also create a more dynamic and inclusive learning environment, supporting both teachers and students in achieving educational goals effectively.
5.2 Best Practices for Tech-Driven Instruction
Instructional facilitators should prioritize professional development to ensure teachers are proficient in using educational technology. Aligning tech tools with learning objectives is crucial for effective integration. Encouraging the use of data analytics to track student progress helps inform instruction. Facilitators should foster a collaborative environment where teachers share best practices. Providing equitable access to technology for all students is essential. Regularly updating digital resources and ensuring they are user-friendly can enhance teaching and learning. By promoting a balanced approach to technology use, instructional facilitators can create engaging, student-centered classrooms that prepare learners for the digital age while maintaining a focus on academic excellence.
Data-Driven Instructional Practices
Instructional facilitators use data to enhance teaching and learning, ensuring informed decisions. They collaborate with teachers to analyze progress, aligning strategies with student needs for improved outcomes.
6.1 Using Formative Assessments
Instructional facilitators utilize formative assessments to monitor student progress and adjust teaching strategies. These assessments provide real-time data, enabling educators to identify learning gaps and tailor instruction. By analyzing formative data, facilitators help teachers refine their approaches, ensuring alignment with student needs. For instance, Isabel Becerra in Garland ISD emphasizes the importance of ongoing meetings to review formative data, fostering collaborative problem-solving. This data-driven approach allows for timely interventions, enhancing student outcomes and instructional effectiveness. Formative assessments are a cornerstone of data-driven practices, enabling facilitators to support teachers in creating responsive and impactful learning environments.
6.2 Analyzing Student Performance Data
Instructional facilitators play a key role in analyzing student performance data to inform instruction. By examining trends and patterns, they help teachers identify areas where students may need additional support. This data-driven approach enables facilitators to recommend targeted interventions and resources. For example, Isabel Becerra in Garland ISD highlights the importance of collective meetings to review student data, ensuring aligned strategies. Regular analysis of performance data allows educators to track progress, measure the effectiveness of instructional strategies, and make data-informed decisions. This process fosters a culture of continuous improvement, ultimately enhancing student outcomes and the quality of education.
Challenges Faced by Instructional Facilitators
Instructional facilitators face challenges like balancing multiple roles, managing change resistance, and interpreting complex data to support effective teaching and learning environments consistently.
7.1 Balancing Multiple Responsibilities
Instructional facilitators often juggle diverse tasks, from supporting teachers to analyzing data. Managing these responsibilities requires strong time management and prioritization skills. They must ensure they allocate sufficient time to each duty without compromising quality. Effective communication and delegation can help distribute workload evenly. Additionally, setting clear goals and using organizational tools can enhance productivity. Balancing these roles is essential to maintain a cohesive educational environment and support both teachers and students effectively. This challenge underscores the need for adaptability and strategic planning in their daily operations to meet the demands of their multifaceted role successfully.
7.2 Addressing Resistance to Change
Instructional facilitators often face resistance when introducing new teaching strategies or technologies. This can stem from teachers’ comfort with traditional methods or skepticism about the effectiveness of change. To address this, facilitators must communicate clearly, emphasizing the benefits of innovation and involving educators in the decision-making process. Building trust through open dialogue and providing support during transitions can ease concerns. Celebrating small successes and offering professional development opportunities also encourage acceptance. By fostering a collaborative environment, instructional facilitators can help educators embrace change, ultimately enhancing student outcomes and school-wide progress.
Best Practices for Effective Instructional Facilitation
Effective instructional facilitators foster collaboration, provide constructive feedback, and encourage continuous learning. They promote a growth mindset and support teachers in reflecting on their practices to enhance student outcomes.
8.1 Fostering a Growth Mindset
Fostering a growth mindset is essential for instructional facilitators to encourage continuous improvement and resilience among educators. By modeling growth-oriented behaviors and providing resources, facilitators help teachers embrace challenges and persist through difficulties. This involves creating a supportive environment where risks are encouraged and learning from failures is valued. Instructional facilitators promote professional development opportunities and collaborative discussions to nurture this mindset. They also emphasize the importance of self-reflection and goal-setting, empowering teachers to take ownership of their growth. By fostering a growth mindset, facilitators not only enhance teacher capacity but also create a culture that benefits student learning and overall school improvement.
8.2 Encouraging Teacher Reflection and Feedback
Encouraging teacher reflection and feedback is a cornerstone of effective instructional facilitation. Facilitators create opportunities for educators to reflect on their practices through structured discussions, peer feedback, and self-assessment tools. Regular feedback sessions help teachers identify strengths and areas for growth, fostering a culture of continuous improvement. Instructional facilitators also model reflective practices themselves, demonstrating how to analyze teaching strategies and student outcomes. By promoting open dialogue and constructive criticism, facilitators empower teachers to refine their skills and adapt to evolving educational needs. This collaborative approach not only enhances teaching quality but also strengthens the overall educational environment, benefiting both educators and students alike.
The Future of Instructional Facilitation
The future of instructional facilitation lies in integrating advanced technologies, fostering personalized learning, and evolving the facilitator’s role to meet diverse educational needs and emerging trends.
9.1 Emerging Trends in Education
Emerging trends in education, such as personalized learning and technology integration, are reshaping the role of instructional facilitators. The rise of AI and data analytics enables more precise monitoring of student progress, allowing facilitators to tailor strategies. Additionally, there is a growing emphasis on cultural responsiveness and equity in education, requiring facilitators to adapt their approaches to diverse student populations. These trends highlight the need for facilitators to stay ahead of innovative practices, ensuring they can effectively support teachers in creating dynamic, inclusive, and technologically advanced learning environments. By embracing these trends, facilitators can enhance teaching and learning outcomes for all students.
9.2 Evolving Role of the Instructional Facilitator
The role of the instructional facilitator is evolving to meet the demands of modern education. With advancements in technology and a focus on personalized learning, facilitators are increasingly expected to integrate innovative tools and strategies. They must also adapt to diverse student needs, emphasizing cultural responsiveness and equity. Professional development is now more data-driven, with facilitators using analytics to inform their practices. Additionally, there is a growing emphasis on fostering collaborative learning environments and supporting teachers in adopting adaptive teaching methods. As education continues to transform, the facilitator’s role expands, requiring continuous learning and a commitment to staying at the forefront of educational innovation.
Conclusion
The role of an instructional facilitator is pivotal in shaping modern education. By supporting teachers, leveraging data, and fostering innovation, facilitators directly impact student success. Their ability to adapt to evolving educational needs ensures they remain central to improving teaching practices. As education advances, the facilitator’s role continues to expand, emphasizing collaboration, technology integration, and cultural responsiveness. Their work not only enhances instructional strategies but also cultivates a growth mindset among educators. Ultimately, instructional facilitators are key drivers of educational progress, ensuring schools remain dynamic and effective learning environments for all students.