
metal bunk bed assembly instructions pdf
Category : Instructions
Metal bunk bed assembly is a straightforward process when following detailed instructions. It ensures safety, durability, and proper structure. This guide provides a comprehensive step-by-step approach to assembling your metal bunk bed, covering everything from preparation to final checks. By following these instructions, you can efficiently build a sturdy and safe bunk bed for years of reliable use.
1.1 Overview of Metal Bunk Beds
Metal bunk beds are durable, space-saving solutions ideal for maximizing room efficiency. They typically feature sturdy frames, weight capacities for safety, and versatile designs. These beds often include guardrails for upper bunks and are built to withstand regular use. Popular models come in twin-over-twin or twin-over-full configurations, catering to different needs and room layouts. Their metal construction ensures long-lasting stability and support.
1.2 Importance of Using a PDF Guide
A PDF guide is essential for metal bunk bed assembly, offering clear, detailed instructions and visuals. It ensures all components are correctly identified and assembled, preventing errors. The guide also outlines safety standards, weight limits, and proper tools needed. By following a PDF guide, you can complete the assembly efficiently, ensuring stability and safety for years of reliable use;

Tools and Materials Required
Essential tools include an Allen wrench, screwdrivers, and a wrench. Materials like screws, bolts, and washers are provided. Ensure all parts are included before starting assembly.
2.1 Essential Tools for Assembly
The primary tools needed include an adjustable spanner, a straight-edge screwdriver, and a Philips screwdriver. Additionally, having an extra pair of hands can simplify the process. Ensure all tools are readily available before starting. Always refer to the provided manual for specific hardware requirements to avoid delays. Proper tools ensure a safe and efficient assembly experience.
2.2 List of Provided and Needed Parts
Your metal bunk bed kit typically includes frame legs, side rails, slats, support brackets, and fasteners like bolts and washers. Ensure all parts match the manual’s inventory list. Verify the presence of guardrails and ladder components. If any items are missing or damaged, contact the manufacturer promptly. Having all parts ready ensures a smooth assembly process without interruptions.

Safety Considerations
Safety is crucial when assembling metal bunk beds. Always follow the manufacturer’s guidelines, check weight limits, ensure proper mattress fit, and install guardrails. Keep children under 6 away.
3.1 Precautions to Avoid Accidents
To avoid accidents while assembling your metal bunk bed, ensure all parts are securely tightened, and the structure is stable. Use guardrails on the upper bunk and avoid attaching any unauthorized items. Keep children away during assembly and supervise them when using the bed. Follow all weight and safety guidelines provided in the instructions.
3.2 Weight and Safety Guidelines
Adhere to weight limits: upper bunk typically supports up to 200 lbs, while the lower bunk can hold up to 450 lbs. Use mattresses of specified dimensions to ensure proper fit and safety. Always follow CPSC and ASTM safety standards for bunk beds to prevent accidents and ensure structural integrity.

Workspace Preparation
Prepare a spacious, flat workspace. Use a protective cover like cardboard to prevent damage. Organize all parts and tools for efficient assembly.
4.1 Setting Up Your Assembly Area
Clear a large, flat workspace on the floor. Cover it with cardboard or a tarp to protect the surface. Ensure the area is free from obstructions. Gather all parts, tools, and instructions nearby for easy access. This setup ensures efficient assembly and minimizes the risk of losing components or damaging the bunk bed frames during construction.
4.2 Organizing Parts and Tools
Lay out all components and hardware on a clean, flat surface. Use the instruction manual as a reference to identify each part. Separate items into categories, such as frames, slats, and fasteners. Label or group similar pieces to avoid confusion. Keep essential tools like screwdrivers and wrenches within easy reach. Cross-reference the parts list to ensure nothing is missing before starting assembly.
Understanding the Hardware
Understanding the hardware ensures proper assembly. Identify key components like frames, slats, and support legs. Familiarize yourself with fasteners, such as bolts, screws, and washers, and their roles in stability and safety.
5.1 Identifying Key Components
Identifying key components is crucial for efficient assembly. Start by locating the metal frames, slats, and support legs. Familiarize yourself with fasteners like bolts, screws, and washers. Check for side rails, ladder components, and guardrails. Ensure all hardware, such as Allen wrenches and lag bolts, is accounted for. Proper identification ensures each part is used correctly, preventing errors and ensuring stability.
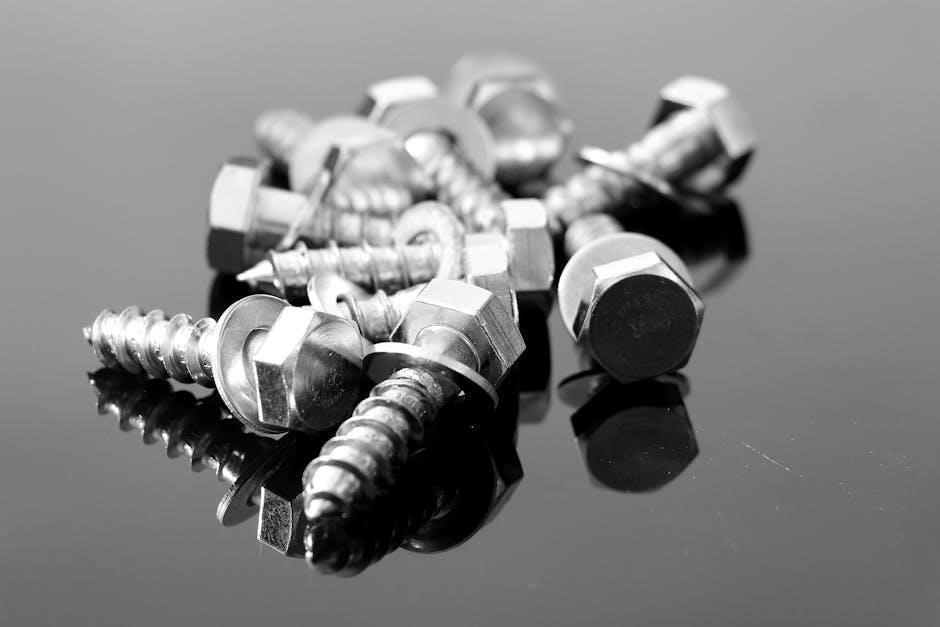
5.2 Explaining Different Types of Fasteners
Metal bunk beds use various fasteners like bolts, screws, and washers. Bolts secure major frame connections, while screws are for smaller parts. Washers prevent loosening and distribute pressure. Allen wrenches are often required for tightening bolts. Understanding each fastener’s role ensures proper assembly and stability. Always use the correct type and size to avoid damage or safety risks.

Assembling the Bed Frame
Begin by setting up the lower frame, then attach side rails and support beams. Next, assemble the upper frame and secure it to the lower section. Ensure all connections are tight for stability and safety.
6.1 Constructing the Lower Bunk
Start by placing the lower bunk frame on a level surface. Attach the feet or wheels to the frame legs for stability. Pull out the side arms and secure them using the provided lag bolts. Tighten all connections firmly to ensure a sturdy base. Double-check the alignment and stability before proceeding to the next step. This ensures a solid foundation for the entire bunk bed structure.
6.2 Building the Upper Bunk Structure
Assemble the upper bunk frame by attaching the side rails to the top ends using the provided lag bolts. Connect the support beams between the side rails to ensure structural integrity. Align the upper bunk carefully with the lower bunk, ensuring all bolts are securely tightened. Double-check the stability and proper alignment before proceeding to the next step. This ensures a safe and sturdy upper bunk structure.

Installing Slats and Supports
Secure slats evenly across the frame for mattress support. Attach additional brackets to reinforce the structure, ensuring stability and preventing sagging. Tighten all connections firmly for safety.
7.1 Securing Slats for Mattress Support
7.2 Adding Additional Support Brackets
For enhanced stability, install additional support brackets to the frame. Align each bracket with the pre-marked holes and secure them firmly using the provided bolts. Ensure brackets are evenly spaced to distribute weight evenly. Tighten all connections thoroughly to prevent shifting. These brackets add extra reinforcement, particularly for the upper bunk, ensuring long-lasting durability and safety for users. Regularly inspect brackets for tightness to maintain structural integrity.

Constructing the Ladder
Assemble the ladder by attaching the rungs to the side rails using the provided bolts. Ensure all connections are secure for stability. Follow the manual carefully to properly attach the ladder to the bunk bed frame, ensuring safe access to the upper bunk.
8.1 Assembling Ladder Components
Begin by identifying all ladder parts, including side rails, rungs, and hardware; Use an Allen wrench to attach the rungs to the side rails, ensuring a snug fit. Align each rung evenly and secure with bolts provided. Tighten all connections firmly for stability. Double-check the alignment to ensure the ladder is straight and sturdy before proceeding to the next step.
8.2 Attaching the Ladder Safely
Align the ladder with the upper bunk’s frame, ensuring it is securely positioned. Attach the ladder using the provided bolts, tightening them firmly for stability. Double-check that the ladder is evenly balanced and cannot shift. Test the ladder by gently applying weight to ensure it holds firmly. Always follow the manufacturer’s guidelines for weight limits and safety precautions to avoid accidents.
Securing the Bunk Beds
Securing the bunk beds involves properly aligning the frames and tightly fastening all bolts to ensure balance and stability for safe use.
9.1 Stacking the Bunks Correctly
Stack the upper bunk onto the lower frame, ensuring all pre-drilled holes align. Use the provided bolts to secure the two sections tightly. Double-check that the structure is level and balanced. Refer to the manual for specific bolt locations and tightening sequences to guarantee stability and safety. Proper alignment prevents wobbling and ensures the bunk bed remains sturdy.
9.2 Ensuring Stability and Balance
After stacking, ensure the bunk bed is stable by tightening all bolts firmly. Check that the frame is level and balanced. Use wall brackets if provided to secure the bed to the wall, preventing tipping. Verify that the weight limits for both bunks are not exceeded. Regularly inspect the connections and tighten any loose bolts to maintain structural integrity and safety.

Guardrail Installation
Install guardrails on the upper bunk to enhance safety. Ensure they are securely attached and properly aligned with the bed frame. Follow the manufacturer’s instructions for installation.
10.1 Adding Guardrails for Safety
Guardrails are essential for preventing falls from the upper bunk. Ensure they are securely attached using the provided hardware. Properly align the guardrails with the bed frame and tighten all connections. Follow the manufacturer’s instructions for installation. Guardrails should run the full length of the bed for maximum safety. Regularly inspect the guardrails to ensure stability and security.
10.2 Ensuring Proper Guardrail Alignment
Align guardrails evenly with the bed frame, ensuring they are level and secure. Use the provided bolts to tighten them firmly. Double-check the alignment to prevent gaps or unevenness. Refer to the manufacturer’s instructions for specific measurements and positioning. Proper alignment ensures the guardrails meet safety standards and provide reliable protection for the upper bunk occupant.

Final Checks and Adjustments
After assembly, inspect all connections for tightness and stability. Ensure guardrails are secure and properly aligned. Check for any wobbling or unevenness and make necessary adjustments. Verify all safety features are in place before use.
11.1 Tightening All Connections
Tightening all connections is crucial for ensuring stability and safety. Use a wrench or screwdriver to secure bolts and screws firmly. Double-check every joint, especially where the bunks stack and the ladder attaches. Make sure no parts are loose, as this can lead to wobbling or structural failure. Start from the bottom bunk and work your way up for optimal stability.
11.2 Inspecting for Stability and Safety
After assembly, inspect the bunk bed for stability and safety. Check all connections for tightness and ensure the frame is level. Verify that guardrails are securely attached and mattress sizes meet specifications. Test the weight limit by gently applying pressure. Ensure no sharp edges or loose parts exist. Regular inspections help maintain safety and prevent potential hazards.
Maintenance Tips
Regularly inspect the bunk bed for wear and tear. Tighten loose bolts and clean metal surfaces with mild detergent. Lubricate moving parts to ensure smooth operation and safety.
12.1 Regular Care and Inspection
Regularly inspect the metal bunk bed for any signs of wear, such as rust, dents, or loose connections. Tighten all bolts and screws periodically to maintain stability. Clean metal surfaces with a mild detergent to prevent corrosion. Inspect guardrails and ladder for damage, ensuring they remain securely attached. Address any issues promptly to uphold safety and durability.
12.2 Troubleshooting Common Issues
If the bed squeaks, tighten all connections and bolts. For loose parts, resecure with provided hardware. Address wobbling by ensuring all frames are properly aligned and stabilized. Check for missing or damaged components and replace them if necessary. Regularly inspect for rust or corrosion and treat promptly. Always refer to the manual for specific solutions to maintain stability and safety.