
office chair assembly instructions pdf
Category : Instructions
Discover a comprehensive guide to assembling your office chair with detailed PDF manuals. Follow step-by-step instructions, diagrams, and safety tips for a successful setup.
1.1 Importance of Proper Assembly
Proper assembly ensures your office chair is stable, safe, and functional. Incorrect assembly can lead to structural weakness, safety hazards, or improper ergonomic alignment. Follow instructions carefully to avoid risks and guarantee optimal performance. A well-assembled chair supports long-term comfort and durability, making it essential to adhere to manufacturer guidelines for a secure and enjoyable user experience.
1.2 Overview of the Assembly Process
The assembly process involves unpacking components, attaching the seat to the gas lift, assembling the base and casters, securing the backrest, and making final adjustments. Each step requires precision to ensure stability and functionality. Detailed PDF guides provide diagrams and numbered instructions to help users navigate the process efficiently, ensuring a seamless and successful chair setup experience.

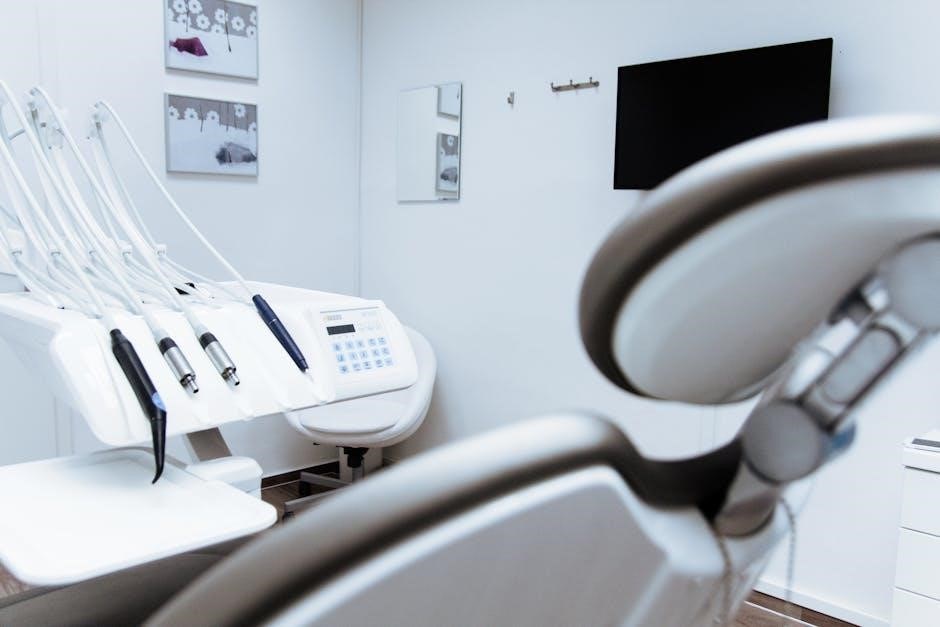
Essential Tools and Hardware Required
Gather tools like an Allen wrench, screwdriver, and bolts. Ensure all hardware is included before starting. Check for wrenches and pliers if needed. Follow safety guidelines.
2.1 List of Tools Needed for Assembly
Essential tools: Allen wrench, screwdriver, and bolts. Ensure all hardware is included before starting. Check for wrenches and pliers if needed. Follow safety guidelines to avoid injuries.
2.2 Understanding the Hardware Components
Familiarize yourself with key hardware components: gas lift, five-star base, casters, seat, backrest, and armrests. Identify bolts, screws, and washers. Ensure proper alignment and secure tightening to maintain stability and functionality. Refer to diagrams for clarity and correct installation of each part.

Step-by-Step Assembly Guide
Start by unfolding the chair, then align and secure components like the seat, backrest, and armrests. Follow instructions for attaching the base and final adjustments.
3.1 Unpacking and Preparing the Components
Start by carefully unpacking all parts, ensuring no damage. Verify the inclusion of all hardware and components, such as the seat, backrest, and base. Refer to the PDF manual for a detailed parts list and diagrams. Organize the components on a clean surface for easy access. Double-check for any missing items to avoid assembly delays.
3.2 Attaching the Seat to the Gas Lift
Remove the seat from its packaging and align the post on the underside with the gas lift mechanism. Gently press down until the seat clicks into place. Ensure the connection is secure by tightening the bolts provided. Refer to the PDF manual for precise alignment and tightening instructions to ensure stability and safety.
3.3 Assembling the Base and Casters
Attach the five-star base to the gas lift by aligning the piston with the base’s center hole. Secure it using the provided bolts. Next, screw the casters into each base leg, ensuring they fit snugly. Tighten all connections firmly to ensure stability. Refer to the PDF guide for diagrams and specific torque recommendations to prevent loosening over time.
3.4 Aligning and Securing the Backrest
Position the backrest over the seat, ensuring alignment of the screw holes. Insert the provided bolts through both the backrest and seat, then tighten firmly using a wrench. Avoid over-tightening to prevent damage. Once secured, adjust the tilt mechanism according to your preference for optimal comfort and support. Ensure all connections are snug to maintain stability and durability.
3.5 Final Adjustments and Tightening
Once all components are assembled, test the chair’s stability and functionality. Adjust the seat height, tilt, and armrests to your preference. Tighten all bolts and connections firmly to ensure safety. Lubricate moving parts if necessary, and verify that the chair operates smoothly. Double-check all adjustments before first use to ensure optimal performance and longevity.

Common Challenges and Solutions
Address common issues like misaligned parts or loose bolts by referring to the PDF manual. Ensure all hardware is included and properly tightened for stability and safety.
4.1 Troubleshooting Common Assembly Issues
Identify and resolve common assembly challenges, such as misaligned parts or loose bolts, by reviewing the PDF guide. Ensure proper alignment of components and verify all hardware is included. Tighten bolts firmly and double-check connections for stability. Refer to diagrams for clarity and consult customer support if issues persist. Regularly inspect for wear or damage to maintain safety and functionality.
4.2 Tips for Avoiding Mistakes During Assembly
Prevent errors by carefully reviewing the PDF manual before starting. Verify all parts are included and tools are ready. Follow step-by-step instructions precisely, ensuring proper alignment and secure connections. Avoid over-tightening bolts, which may damage components. Double-check each assembly stage and consult diagrams for clarity. Seek assistance if unsure to ensure a safe and stable chair setup.

Safety Precautions and Warnings
Always follow safety guidelines to avoid injury. Ensure the chair is on a stable surface and all bolts are tightened properly before use. Avoid overleaning or exceeding weight limits.
5.1 Importance of Following Safety Guidelines
Adhering to safety guidelines ensures the chair’s stability and prevents accidents. Proper assembly avoids structural weaknesses, while correct usage maintains ergonomic benefits. Always read manuals carefully and verify all components are securely fastened before use to guarantee safe and durable performance.
5.2 Avoiding Injuries During Assembly
To prevent injuries, wear protective gloves and ensure a clear workspace. Avoid over-tightening bolts, as this may damage components or cause accidents. Use tools appropriately and avoid applying excessive force, which could lead to personal harm or equipment malfunction.
Ergonomic Adjustments and Features
Explore ergonomic adjustments like seat height, tilt, and lumbar support for optimal comfort. Customize your chair to promote proper posture and reduce strain during long work hours.
6.1 Adjusting the Seat Height and Tilt
Pull the height adjustment handle to modify the seat position, ensuring your feet are flat on the floor. Tilt the chair by leaning back and using the tilt mechanism. Proper adjustments enhance posture, reduce strain, and boost comfort for extended periods. Always refer to the PDF manual for specific instructions tailored to your chair model.
6.2 Customizing the Armrests and Lumbar Support
Adjust the armrests up or down and side to side for optimal comfort. Modify the lumbar support by moving it up or down to fit your lower back. Ensure proper alignment to maintain ergonomic posture. Tighten all bolts securely after adjustments. Refer to the PDF guide for specific instructions to customize your chair effectively.

Maintenance and Upkeep Tips
Regularly clean and lubricate moving parts to ensure smooth operation. Check for loose bolts and wear, tightening as needed. Maintain proper ergonomics for long-term comfort and durability.
7.1 Cleaning and Lubricating Moving Parts
Regularly clean the chair’s surfaces using a mild polish to remove stains. Lubricate all moving parts, such as casters and tilt mechanisms, to ensure smooth operation. Avoid using harsh chemicals that may damage materials. Proper maintenance extends the chair’s lifespan and maintains its functionality and comfort for daily use.
7.2 Regular Checks for Loose Bolts and Wear
Inspect all bolts and screws periodically to ensure they are tightly secured. Check for signs of wear on casters, armrests, and other components. Replace any damaged parts promptly to maintain stability and prevent potential safety hazards. Regular checks help preserve the chair’s durability and ensure optimal performance over time.

Additional Features and Customizations
Explore advanced features like rocking tension, adjustable armrests, and lumbar support. Customize your chair with optional accessories to enhance comfort and functionality, ensuring a tailored experience.
8.1 Understanding Special Functions Like Rocking Tension
Rocking tension allows smooth reclining, enhancing comfort. Adjust the knob to customize resistance. Proper setup ensures balance, preventing tipping. Refer to your PDF manual for precise instructions to optimize this feature for your chair;
8.2 Adding Accessories for Enhanced Comfort
Enhance your office chair’s comfort by adding accessories like flip-up armrests, lumbar support, and adjustable headrests. Ventilated mesh inserts improve airflow, while document holders keep materials at eye level. Adjust tilt and tension to suit your preference, and consider detachable cushions for extra support. Always follow the PDF manual for proper installation.
Warranty and Manufacturer Support
Understand your warranty coverage and how to contact customer service for assistance with assembly or performance issues. Manufacturer support ensures help is available when needed.
9.1 Understanding Your Warranty Coverage
Your warranty provides coverage for manufacturing defects and ensures durability. Most warranties last several years, covering parts like the gas lift and frame. Review the PDF manual to understand exclusions and terms. Proper assembly and usage are crucial for warranty validity. Contact customer service for any warranty-related queries or claims assistance.
9.2 Contacting Customer Service for Assistance
For assembly queries or warranty issues, contact customer service via phone or email. Check the PDF manual for contact details. Provide order number and product details for faster resolution. Friendly representatives are available to address concerns, ensuring your office chair experience is smooth and hassle-free. Reach out for expert guidance and support.
Complete the assembly by verifying the chair’s stability and functionality. Ensure all bolts are tightened and moving parts are lubricated. Your chair is now ready for comfortable use.
10.1 Verifying the Chair’s Stability and Functionality
After assembly, check the chair’s stability by ensuring all bolts are tightened and the base is securely attached. Test the height adjustment, tilt mechanism, and armrests to confirm smooth functionality. Sit on the chair to verify there’s no wobbling or instability. Ensure all safety features, like the tilt lock, are working correctly for optimal performance and safety.
10.2 Final Inspection Before First Use
Conduct a thorough inspection to ensure all parts are correctly assembled. Check for any loose bolts, proper alignment of components, and functionality of adjustable features. Verify that no damage occurred during assembly. Ensure the chair meets safety standards and is free from defects. This final check ensures a safe and comfortable user experience from the start.
Resources for Further Assistance
Access downloadable PDF guides, video tutorials, and manufacturer support for detailed assembly instructions and troubleshooting. These resources ensure clarity and ease for a successful chair setup.
11.1 Downloading the PDF Manual
Download the official PDF manual for your office chair assembly instructions. This document provides detailed diagrams, step-by-step guidance, and hardware lists to ensure a smooth assembly process. Many manufacturers offer these manuals on their official websites, often searchable by model number. Save the PDF for easy access and future reference during assembly.
- Visit the manufacturer’s official website.
- Search for your chair model.
- Download the PDF manual.
11.2 Accessing Video Tutorials and Guides
Enhance your assembly experience with video tutorials and guides. Many manufacturers provide instructional videos on platforms like YouTube or their official websites. These videos offer visual step-by-step guidance, making complex steps easier to follow. Search for your chair model or brand to find relevant tutorials. Pausing and replaying videos ensures accurate assembly.
- Visit the manufacturer’s YouTube channel.
- Search for your chair model + “assembly tutorial.”
- Follow along with detailed visual instructions.

Frequently Asked Questions
Address common queries about office chair assembly, such as missing hardware, alignment issues, or adjustment difficulties. Refer to your PDF manual or contact support for assistance.
12.1 Common Queries About Assembly and Usage
Users often ask about missing hardware, proper alignment of parts, and adjusting features like tilt and lumbar support. Issues with seat height adjustment and armrest installation are also common. Questions about troubleshooting wobbly chairs or damaged components frequently arise. Refer to your PDF manual or contact customer support for tailored assistance.
12.2 Addressing Concerns About Chair Performance
Many users inquire about improving chair stability, reducing squeaking noises, and enhancing comfort. Concerns often arise regarding proper weight capacity, uneven casters, and malfunctioning mechanisms. Regular maintenance, such as lubricating moving parts, is recommended. Refer to your PDF guide for specific solutions and contact customer service for further troubleshooting.