
gel nail instructions
Category : Instructions
Gel nails offer a durable‚ high-shine finish that lasts longer than traditional polish. This guide provides step-by-step instructions for applying gel nails at home‚ ensuring professional results.
1.1 What Are Gel Nails?
Gel nails are a popular manicure option that uses a cured gel polish to create a durable‚ high-shine finish. Unlike traditional nail polish‚ gel nails are cured under a UV or LED lamp‚ making them long-lasting and resistant to chipping. They can be applied to natural nails or used for extensions‚ offering versatility and a salon-quality appearance at home.
1.2 Benefits of Gel Nails
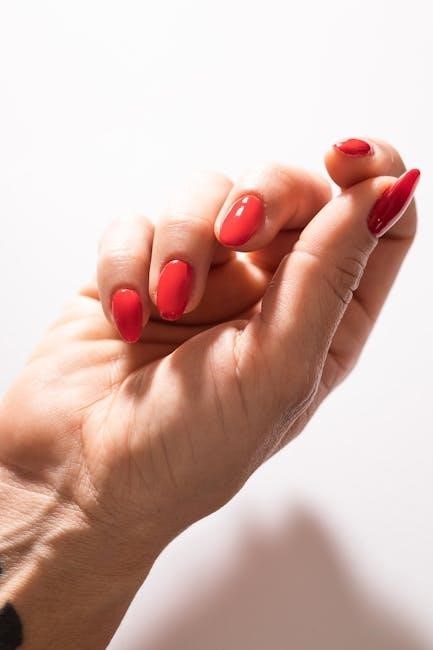
Gel nails provide a long-lasting‚ high-gloss finish that resists chipping and fading. They are perfect for special occasions or everyday wear‚ offering durability and versatility. Gel nails also allow for creative nail art and can strengthen natural nails when applied correctly. With proper aftercare‚ they can last up to two weeks‚ making them a convenient beauty choice.
1.3 Tools and Materials Needed
To achieve professional gel nail results‚ you’ll need essential tools: a UV/LED lamp‚ gel polish‚ base coat‚ top coat‚ nail cleanser‚ lint-free wipes‚ a nail file‚ and a buffer. Additionally‚ cuticle oil‚ a cuticle pusher‚ and nail art brushes can enhance your application. These tools ensure a smooth‚ long-lasting finish and proper nail preparation.
Preparing Your Nails for Gel Application
Properly preparing your nails is crucial for a successful gel application. Clean‚ shape‚ and buff your nails to ensure a smooth surface and proper adhesion‚ promoting a long-lasting‚ professional finish.
2.1 Trimming and Shaping Your Nails
Trim and shape your nails to your desired length and style using nail clippers. File the edges to smooth any roughness‚ ensuring a clean‚ even surface for the gel application. Avoid cutting too close to the cuticles to prevent irritation and promote a professional finish.
2.2 Buffing Your Nails
Buff your nails gently with a nail buffer to create a smooth surface. This step removes ridges and enhances adhesion for the gel polish. Use light strokes‚ moving from the cuticle to the tip‚ ensuring even texture without damaging the nail plate. This ensures a long-lasting‚ professional finish for your gel nails.
2.3 Cleaning Your Nails
Clean your nails thoroughly with an alcohol wipe or nail cleanser to remove oils and residue. This crucial step ensures proper adhesion of the gel polish. Gently wipe each nail surface‚ avoiding the cuticles‚ to create a dry‚ oil-free base for a flawless application and long-lasting results.
Applying the Base Coat
Apply a thin layer of base coat evenly across each nail to protect and prepare the surface. Cure under UV/LED light as instructed to ensure proper adhesion.
3.1 How to Apply a Thin Base Coat
Dip the brush in base coat‚ wiping excess on the bottle neck. Starting at the center‚ stroke outward in smooth‚ even motions. Ensure thin coverage to avoid pooling. Cure immediately under UV/LED light for proper bonding and a long-lasting finish.
3.2 Curing the Base Coat
Place your hand under the UV or LED lamp‚ following the manufacturer’s time instructions. Typically‚ cure for 30-60 seconds. Ensure all nails are exposed to the light. Proper curing ensures adhesion and prevents peeling. Avoid moving your hand during the process for an even finish.
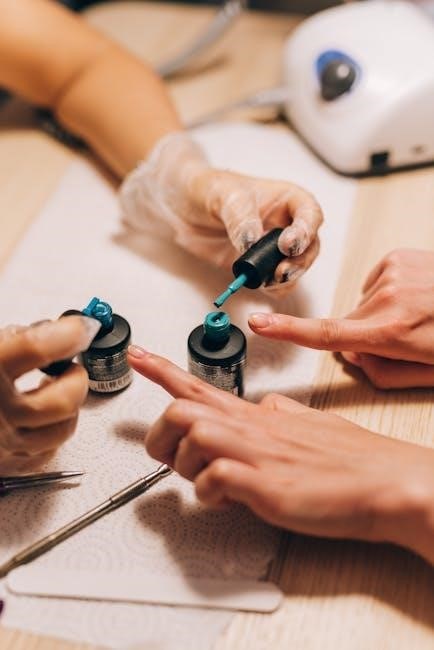
Gel Nail Polish Application
Apply a thin‚ even layer of gel polish‚ starting at the center and sweeping toward the tips. Use a brush to clean up edges. Repeat for desired color intensity.
4.1 Selecting the Right Gel Polish Color
Choosing the right gel polish color enhances your look. Consider skin tone—cool tones for fair skin‚ warm for medium‚ and jewel tones for deep. Match your personal style and occasion. Test the color on one nail first. Finish options like glossy or matte add personality. Select wisely for a polished appearance.
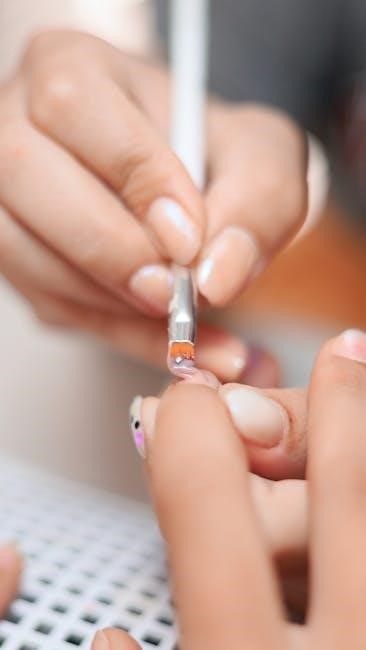
4.2 Applying the First Coat of Gel Polish
Start by dipping brush in polish‚ wiping excess. Paint center‚ stroke outward. Cover tip‚ cure under UV/LED. Thin coats prevent pooling. Avoid cuticles. Let cure before next coat. Clean up with acetone. This ensures even coverage and durability for professional results without smudging. Proper application is key for lasting finish.
4.3 Curing the Gel Polish
Place hand under UV/LED lamp‚ following manufacturer’s time. Typically‚ 30-60 seconds for LED‚ 2-3 minutes for UV. Ensure all nails are exposed. Curing hardens polish‚ creating durable finish. Repeat for each coat. Proper curing prevents smudging‚ ensuring long-lasting results. Avoid moving nails during curing for best adhesion and even drying. Consistency is key.
4.4 Applying Subsequent Coats
For a flawless finish‚ apply thin‚ even layers of gel polish‚ repeating steps 4.2 and 4.3. Allow each coat to cure fully before adding the next. Lightly sweep the brush across the nail to avoid pulling polish. Two to three thin coats ensure opacity without pooling. Avoid touching nails until fully cured to prevent smudging.
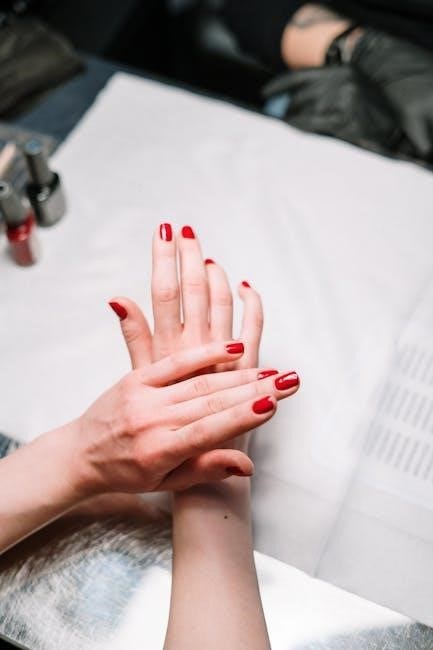
Finishing Touches
Seal your gel nails with a thin top coat‚ curing it under the lamp as instructed. Wipe away excess gel around the cuticles using acetone. Finish by applying cuticle oil to hydrate the skin‚ ensuring a polished and professional-looking result that lasts. Proper cleanup and moisturizing are key to maintaining nail health and appearance.
5.1 Applying the Top Coat
Apply a thin‚ even layer of top coat to each nail‚ ensuring full coverage. Avoid getting it on cuticles. Cure under the UV/LED lamp as recommended. This step seals the color‚ adds shine‚ and extends wear‚ creating a professional finish. Use a lint-free wipe with acetone to clean up any excess around the nail bed.
5.2 Curing the Top Coat
Place your hand under the UV or LED lamp‚ following the manufacturer’s time instructions. Typically‚ cure for 30 seconds with LED or 2 minutes with UV. This step hardens the top coat‚ ensuring a glossy‚ long-lasting finish. Avoid moving your hand during curing to prevent unevenness. Proper curing is key for durability and chip resistance.
5.3 Cleaning Up Excess Gel
Dip a cotton ball in acetone and gently wipe away excess gel around your cuticles and nail edges. Be cautious not to touch the polished area; This step ensures a clean finish and prevents smudging. Use a lint-free wipe for final cleanup‚ removing any remaining acetone residue to leave your nails polished and neat.
Aftercare for Gel Nails
Proper aftercare ensures long-lasting gel nails. Moisturize your nails and cuticles‚ avoid harsh chemicals‚ and maintain good nail hygiene to keep your nails healthy and strong.
6.1 Moisturizing Your Nails and Cuticles
Regularly moisturize your nails and cuticles to prevent dryness and brittleness. Use a nail oil or cuticle cream‚ gently massaging it into the nail bed and surrounding skin. This helps maintain nail health and prevents peeling‚ ensuring your gel nails remain intact and your nails stay strong and vibrant over time.
6.2 Avoiding Harsh Chemicals
Avoid exposing your gel nails to harsh chemicals‚ such as detergents or cleaning products‚ as they can weaken the gel and cause lifting or cracking. Use gloves when handling chemicals to protect your nails and maintain the longevity of your gel manicure. This preserves the integrity and appearance of your nails.
6.3 Maintaining Nail Health
Properly caring for your nails after gel application is essential. Moisturize your nails and cuticles regularly to prevent dryness and brittleness. Avoid using nails as tools‚ as this can cause damage. By maintaining nail health‚ you ensure a strong foundation for future gel applications and promote overall nail longevity and strength naturally.
Common Mistakes to Avoid
Avoid applying thick gel coats‚ as they may not cure properly and can lead to uneven finishes. Ensure correct curing times and proper nail preparation for best results.
7.1 Applying Thick Coats
Applying thick gel coats can lead to uneven curing‚ causing the polish to lift or crack. It’s essential to use thin‚ even layers‚ allowing each coat to cure properly under the UV/LED lamp. Thick coats may not adhere well to the nail‚ resulting in a shorter-lasting finish and potential damage to your nails.
7.2 Incorrect Curing Times
Incorrect curing times can prevent the gel polish from hardening properly‚ leading to a tacky finish or peeling. Always follow the manufacturer’s instructions for UV/LED curing times‚ typically 30 seconds for LED and 2 minutes for UV lamps. Under-curing or over-curing can damage the nail and compromise the longevity of your gel manicure.
7.3 Not Preparing the Nails Properly
Skipping proper nail preparation can lead to poor adhesion and a shorter-lasting gel manicure. Ensure nails are clean‚ shaped‚ and buffed to remove oils and create a rough surface for the gel to adhere to. Neglecting these steps can result in peeling or uneven application‚ compromising the overall finish and durability of your gel nails.
Advanced Techniques
Explore advanced techniques like gel nail extensions for added length or nail art for custom designs. These methods enhance your gel nail experience‚ offering creative and professional finishes.
8.1 Gel Nail Extensions
Gel nail extensions involve adding length or shape using poly gel. Apply a small amount to the nail form‚ shape‚ and cure. Ensure a seamless blend with your natural nail. Finish by buffing for a natural look. Proper preparation and curing are key for durability and a professional finish.
8.2 Nail Art and Designs
Gel nails allow for creative expression with intricate designs. Use nail art brushes for details or stampers for patterns. Apply thin coats of gel polish‚ curing between layers. Clean up edges with acetone for crisp lines. Techniques like ombre‚ stripes‚ or chrome finishes can elevate your look. Practice and patience will refine your artistic skills.

Troubleshooting
Gel nails can sometimes have uneven application or chips. To fix this‚ gently buff the uneven area and apply a thin coat of gel polish‚ curing as instructed. For chips‚ use a nail art brush to fill in the damaged spot and cure under the lamp. Regular touch-ups maintain a polished look.
9.1 Fixing Uneven Gel Application
If your gel application appears uneven‚ use a lint-free wipe or cotton ball soaked in acetone to gently remove excess gel. Reapply a thin coat to the affected area‚ ensuring smooth coverage. Cure under the UV/LED lamp as instructed. Avoid thick layers‚ as they can worsen unevenness. For minor imperfections‚ use a nail art brush to touch up details.
9.2 Repairing Chips or Cracks
To repair chips or cracks in your gel nails‚ start by cleaning the damaged area with acetone. Apply a small amount of gel polish to the affected spot‚ smoothing it with a brush. Cure under the UV/LED lamp as instructed. Finish with a thin layer of top coat to seal and restore shine.

Gel Nail Removal
Gel nail removal involves soaking nails in acetone‚ gently buffing‚ and carefully scraping off the gel. Follow safe steps to avoid damaging your natural nails.
10.1 Preparing for Removal
Start by buffing the nail surface to break the gel seal. Soak cotton pads in acetone‚ place them on each nail‚ and wrap with foil. Let it sit to loosen the gel. Protect skin with petroleum jelly and avoid harsh scraping to prevent nail damage.
10.2 Safely Removing Gel Nails at Home
Gently scrape off loosened gel with a cuticle pusher. Avoid harsh scraping to prevent nail damage. After removal‚ wash hands and apply a nourishing cuticle oil or moisturizer to hydrate nails and surrounding skin. This ensures healthy nail care post-removal.
By following this detailed guide‚ you can master gel nail application and enjoy long-lasting‚ salon-quality results from home. Remember‚ practice makes perfect!
11.1 Final Tips for Long-Lasting Gel Nails
To ensure your gel nails last‚ avoid using harsh chemicals‚ keep your nails moisturized‚ and avoid excessive exposure to water. Regular aftercare and proper application techniques will help maintain their appearance and health. Practice makes perfect‚ so keep refining your skills for flawless results every time.