
toro model 20339 parts manual
Category : Manuals
The Toro Model 20339 parts manual provides essential guidance for maintaining and repairing your walk-behind mower, ensuring optimal performance and safety through detailed diagrams and instructions.
1.1 Overview of the Toro Model 20339
The Toro Model 20339 is a walk-behind lawn mower designed for residential use, offering reliable performance for cutting grass on well-maintained lawns. It features the innovative SmartStow® technology for vertical storage, saving space while maintaining functionality. This model is part of the Recycler® series, known for its efficient mulching capabilities and ergonomic design.
1.2 Importance of the Parts Manual
The parts manual is crucial for identifying components, ensuring correct replacements, and maintaining your Toro Model 20339 mower. It provides detailed diagrams and part numbers, helping users and technicians perform repairs efficiently while adhering to safety and manufacturer guidelines for optimal performance and longevity.
1.3 Key Features of the Toro Model 20339
The Toro Model 20339 features a 22-inch cutting deck, SmartStow technology for vertical storage, and a reliable engine. It includes adjustable handlebars, high-capacity grass bag, and mulching capability. Designed for residential use, it offers efficient performance, durability, and user-friendly operation, making it ideal for maintaining well-manicured lawns with ease and precision.
How to Use the Toro Model 20339 Parts Manual
Navigate through sections like parts diagrams and maintenance schedules. Use the index to locate specific components and follow step-by-step instructions for repairs and replacements efficiently.
2.1 Navigating the Manual
The Toro Model 20339 manual features a clear table of contents, detailed parts diagrams, and diagnostic tools. Use the index to quickly locate specific sections, such as maintenance schedules or troubleshooting guides, ensuring efficient navigation and easy access to essential information for repairs and upkeep.
2.2 Understanding Parts Diagrams
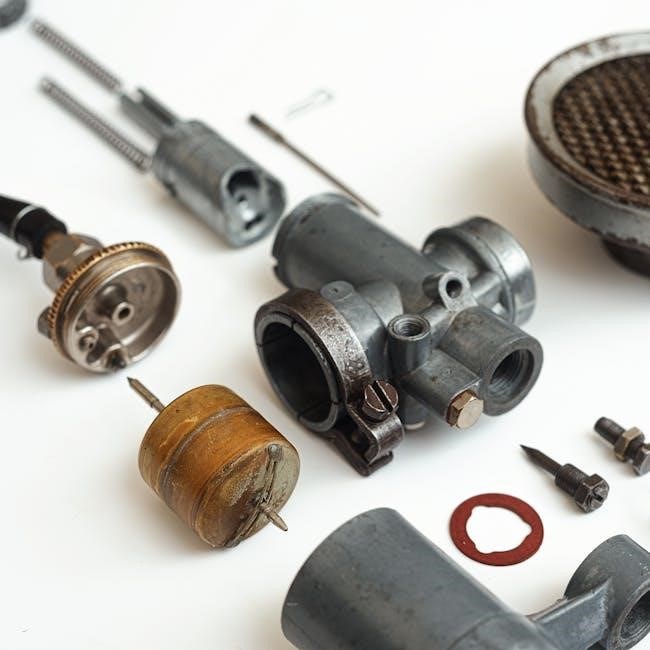
The Toro Model 20339 manual includes detailed parts diagrams to help identify components. These visual guides outline assembly views, part numbers, and locations, making it easier to understand the mower’s structure. Use the diagrams to locate specific parts quickly and ensure accurate ordering or replacement during maintenance and repairs.
2.3 Locating Specific Parts
To locate specific parts, refer to the detailed index in the Toro Model 20339 manual. Use part numbers or descriptions to find components quickly. Cross-reference with diagrams for visual identification. Online resources like Repair Clinic and Toro’s official website offer additional tools to search and verify part compatibility efficiently.

Safety Precautions and Guidelines
Always avoid moving parts and wear protective gear. Never operate without guards in place. Keep bystanders away and ensure the machine is cool before maintenance. Handle fuel safely to prevent fires.
3.1 General Safety Tips
Always wear protective gear, including gloves and eyewear. Keep loose clothing tied back and avoid jewelry near moving parts. Ensure the area is clear of obstacles and debris. Maintain firm grip on handles and avoid overreaching. Keep children and pets away while operating. Regularly inspect the mower for damage or wear. Never modify the machine beyond manufacturer recommendations. Always follow the manual’s guidelines for safe operation and maintenance.
3.2 Safety Warnings and Symbols
The manual uses a safety-alert symbol to highlight potential hazards, signaling danger, warning, or caution. This symbol appears throughout to emphasize critical safety information, ensuring users are aware of risks that could lead to serious injury or death if precautions are not followed. Always pay attention to these symbols.
3.3 Precautions Before Performing Maintenance
Always stop the engine, allow all parts to cool, and disconnect the spark plug before performing maintenance. Wear protective gear, ensure all safety guards are in place, and consult the manual for specific precautions to avoid injury or damage during repairs and adjustments.

Maintenance and Repair
Regular maintenance ensures optimal performance and longevity of the Toro Model 20339. This section covers routine schedules, troubleshooting common issues, and replacing wearable parts effectively.
4.1 Routine Maintenance Schedule
The Toro Model 20339 requires regular maintenance to ensure peak performance. This includes checking oil levels, sharpening blades, cleaning the mower deck, and inspecting belts and cables. Follow the recommended schedule to prevent wear and tear, ensuring your mower runs efficiently throughout the season.
4.2 Troubleshooting Common Issues
Common issues with the Toro Model 20339 include the mower not starting, uneven cutting, or reduced performance; Check oil levels, fuel quality, and blade condition. Refer to the manual for diagnostic steps and solutions to address these problems effectively and restore optimal performance.
4.3 Replacing Wearable Parts
Regularly inspect and replace wearable parts like blades, belts, and spark plugs to maintain performance. Use the parts manual to identify components and follow step-by-step replacement instructions. Always use genuine Toro parts to ensure compatibility and reliability, and refer to safety guidelines before starting any replacement procedure.
Parts and Accessories
Explore genuine Toro parts and accessories designed for the Model 20339, ensuring compatibility and optimal performance. Find detailed diagrams, replacement guides, and ordering information to maintain your mower efficiently and safely.
5.1 Genuine Toro Parts
Genuine Toro parts are specifically designed for the Model 20339, ensuring reliability and performance. These parts are engineered to maintain safety certifications and warranty compliance. Always use authentic components to guarantee optimal functionality and longevity of your mower; Detailed diagrams in the manual help identify the correct parts for replacement or maintenance needs.
5.2 Ordering Replacement Parts
Ordering replacement parts for the Toro Model 20339 is straightforward. Use the detailed diagrams in the manual to identify needed components. Visit authorized dealers or websites like Repair Clinic for genuine parts. Ensure to have the model and serial number ready for accurate ordering and compatibility, and check for return policies or warranties offered.
5.3 Recommended Accessories
Enhance your Toro Model 20339 with recommended accessories. Toro Premium Fuel Treatment ensures optimal engine performance and protection. Consider a mulch kit for efficient grass clippings management. Always use genuine Toro parts for compatibility and safety. These accessories optimize mower functionality and extend its service life effectively.
Warranty and Customer Support
Toro offers comprehensive warranty coverage for the Model 20339, ensuring protection for parts and labor. For support, visit www.Toro.com or contact authorized dealers for assistance.
6.1 Warranty Information
Toro provides comprehensive warranty coverage for the Model 20339, including parts and labor. Warranty details are outlined in the manual, and registration can be completed online at www.Toro.com. Contact Toro Customer Service for specific warranty terms and conditions.
6.2 Contacting Toro Customer Service
For assistance with the Toro Model 20339, visit www.Toro.com to contact customer service. Have your model and serial numbers ready for efficient support. Toro representatives are available to help with parts inquiries, troubleshooting, and service scheduling to ensure your mower operates at peak performance.
6.3 Finding Authorized Dealers
To locate authorized Toro dealers, visit www.Toro.com and use the dealer locator tool. Authorized dealers provide genuine Toro parts, expert service, and reliable support for your Model 20339, ensuring authenticity and quality for optimal performance and maintenance of your lawn mower.
Environmental and Emissions Information
The Toro Model 20339 complies with EPA and California emissions regulations, ensuring eco-friendly performance. Proper fuel handling and maintenance are crucial to minimize environmental impact and adhere to safety standards outlined in the manual.
7.1 Emissions Compliance
The Toro Model 20339 meets EPA and California Air Resources Board standards, ensuring reduced emissions. The engine is designed to comply with strict environmental regulations, contributing to cleaner air quality and eco-friendly performance, as detailed in the emissions section of the manual for user reference and adherence.
7.2 Fuel Safety and Handling
Always handle fuel with care, as it is highly flammable and explosive. Fill the tank outdoors when the engine is cold, avoiding sparks or open flames. Use clean, fresh fuel from reputable sources and add a fuel stabilizer to prevent degradation. Store fuel in approved containers, out of reach of children, and never smoke while handling it.
7.3 California Emissions Regulations
The Toro Model 20339 complies with California emissions standards, ensuring reduced environmental impact. The engine is designed to meet EPA and California Air Resources Board requirements. A spark arrester is required for operation in forested areas to prevent fire hazards, as mandated by California law. Proper emissions control system maintenance is essential for warranty compliance.
Digital Resources
The Toro Model 20339 parts manual is accessible online, featuring QR codes for quick parts lookup and video guides for maintenance and repair assistance.
8.1 Online Parts Manuals
The Toro Model 20339 parts manual is available online, offering easy access to detailed diagrams, parts lists, and repair guidance. Compatible with computers and mobile devices, it features a user-friendly interface for quick navigation and searching. Use the manual to identify components, explore exploded views, and streamline your maintenance or repair process efficiently.
8.2 QR Code Access for Parts Information
Scan the QR code on the Toro Model 20339’s serial number decal to instantly access warranty details, parts manuals, and repair guides. This convenient feature provides quick links to essential resources, ensuring easy troubleshooting and maintenance without manual searches, making it a user-friendly solution for owners seeking parts information efficiently.
8.3 Video Guides and Tutorials
Toro offers video guides and tutorials for the Model 20339, covering maintenance, troubleshooting, and repair procedures. These resources provide step-by-step visual instructions, helping users understand complex tasks like blade replacement and oil changes. Available online, they ensure easy access for DIY enthusiasts and professionals alike to enhance understanding and ensure proper techniques are applied.

Storage and Transportation
Proper storage and transportation of the Toro Model 20339 ensure longevity and safety. Store in a dry, secure location, prepare for seasonal storage, and transport securely to avoid damage.
9.1 Proper Storage Conditions
Store the Toro Model 20339 in a dry, clean area protected from direct sunlight and moisture. Ensure the mower is on a level surface, and check for any damage before storage. Use genuine Toro parts for repairs to maintain performance and safety during storage.
9.2 Transporting the Mower Safely
Ensure the mower is clean and properly secured before transport. Use genuine Toro parts to maintain safety. Handle fuel carefully to prevent spills. Always load the mower on a stable, level surface, and secure it firmly to avoid movement during transit. Follow all safety guidelines to protect the machine and passengers.
9.3 Preparing for Seasonal Storage
Before storing, clean under the mower and drain fuel to prevent corrosion. Store in a dry, protected area to shield from moisture. Use Toro-approved products to protect engine and parts during off-season. Ensure all safety precautions are followed for secure storage and maintenance.
Accessories and Enhancements
The Toro Model 20339 offers various accessories to enhance performance and functionality, including the SmartStow feature, mulch kit, and Toro Premium Fuel Treatment for optimal maintenance.
10.1 SmartStow Feature
The SmartStow feature allows for vertical storage of the Toro Model 20339, saving space while maintaining the mower’s cutting deck integrity. This innovative design enables easy storage without compromising performance, making it ideal for residential use. Proper handling ensures the feature functions optimally for seasonal maintenance and everyday convenience.
10.2 Mulch Kit Installation
Install the mulch kit by removing the side-discharge chute and attaching the mulch plug and blade. This setup allows clippings to be finely chopped and redistributed, enriching your lawn. Refer to the manual for precise steps to ensure proper installation and optimal mulching performance, promoting a healthy and neat lawn appearance.
10.3 Toro Premium Fuel Treatment
Toro Premium Fuel Treatment ensures clean, reliable engine performance and protection for your lawn mower. Use fresh fuel, as stale fuel can cause issues. Adding a fuel stabilizer prevents degradation and maintains optimal engine function. This treatment is ideal for Toro mowers and other small engine equipment, promoting longevity and efficiency.
The Toro Model 20339 parts manual is a comprehensive guide for maintaining and repairing your mower. Regular maintenance ensures optimal performance, safety, and longevity, keeping your lawn mower in peak condition for years to come.
11.1 Summary of Key Points
The Toro Model 20339 parts manual is a detailed resource for maintaining and repairing your mower. It covers safety guidelines, routine maintenance, troubleshooting, and parts identification. Regular upkeep ensures optimal performance, while adhering to safety tips protects users. Genuine Toro parts guarantee reliability and longevity, keeping your mower in top condition season after season.
11.2 Final Tips for Optimal Performance
Regularly check and maintain blade sharpness and deck cleanliness for consistent cutting. Store the mower in a dry, protected area during off-seasons. Use Toro-approved parts and follow recommended maintenance schedules to ensure longevity and reliability of your Toro Model 20339 lawn mower.
11.3 Encouragement for Proper Maintenance
Consistent maintenance ensures your Toro Model 20339 performs at its best. Regularly inspect and replace worn parts, follow the recommended schedule, and use genuine Toro components to maintain safety, efficiency, and longevity. Proper care protects your investment and guarantees reliable operation for years to come.