
tile cutter manual
Category : Manuals
Manual tile cutters are cost-effective tools for cutting tiles, ideal for small-scale projects. RUBI introduced the first tile cutter in 1951, revolutionizing tile installation efficiency.
1.1 What is a Manual Tile Cutter?
A manual tile cutter is a portable, cost-effective tool designed to cut tiles by scoring and snapping them. It typically features a sturdy frame, a scoring wheel, and a breaking mechanism. This tool is ideal for small-scale projects and softer materials like ceramic or porcelain tiles. Its simplicity and efficiency make it a popular choice for DIY enthusiasts and professionals alike, providing precise cuts without the need for electricity.
1.2 Brief History and Evolution
The manual tile cutter was first introduced by RUBI in 1951, revolutionizing tile installation by simplifying the cutting process. Over the years, these tools have evolved to become more durable and versatile, with advancements in materials and design. Modern manual tile cutters feature improved breaking systems, adjustable guides, and the ability to handle various tile types, making them indispensable for both professionals and DIY enthusiasts in achieving precise cuts efficiently.
Types of Manual Tile Cutters
Manual tile cutters are categorized into standard and scoring wheel types, each designed for specific materials and cutting needs, ensuring precision and efficiency in tile installation projects.
2.1 Standard Manual Cutters
Standard manual tile cutters are versatile tools designed for straight cuts on various tile materials. They feature a sturdy frame, adjustable guides, and a scoring wheel for precise markings. These cutters are ideal for small to medium projects, offering control and accuracy. They are especially effective for softer materials like ceramic and porcelain tiles, making them a popular choice among DIY enthusiasts and professionals alike for their reliability and ease of use.
2.2 Scoring Wheel Cutters
Scoring wheel cutters are specialized tools designed for precise scoring and cutting of tiles. They feature a hard, durable wheel that effectively marks and scores the tile surface, ensuring clean cuts. These cutters are particularly effective for harder materials like porcelain and natural stone. Their compact design and ease of use make them a favorite among professionals and DIY enthusiasts, offering excellent control and accuracy for various tiling projects.

Safety Precautions When Using a Manual Tile Cutter
Always wear safety glasses and ensure a stable workspace. Keep hands away from blades and use proper technique to avoid injuries. Maintain equipment for optimal performance.
3.1 Personal Protective Equipment
Wear safety glasses to protect your eyes from flying debris. Use gloves for a firm grip and to prevent cuts from sharp tile edges. Ensure proper footwear and clothing to maintain focus and safety while operating the cutter. Always maintain a clean and stable workspace to minimize accidents. Regularly inspect equipment for wear and tear to ensure optimal performance and safety during use.
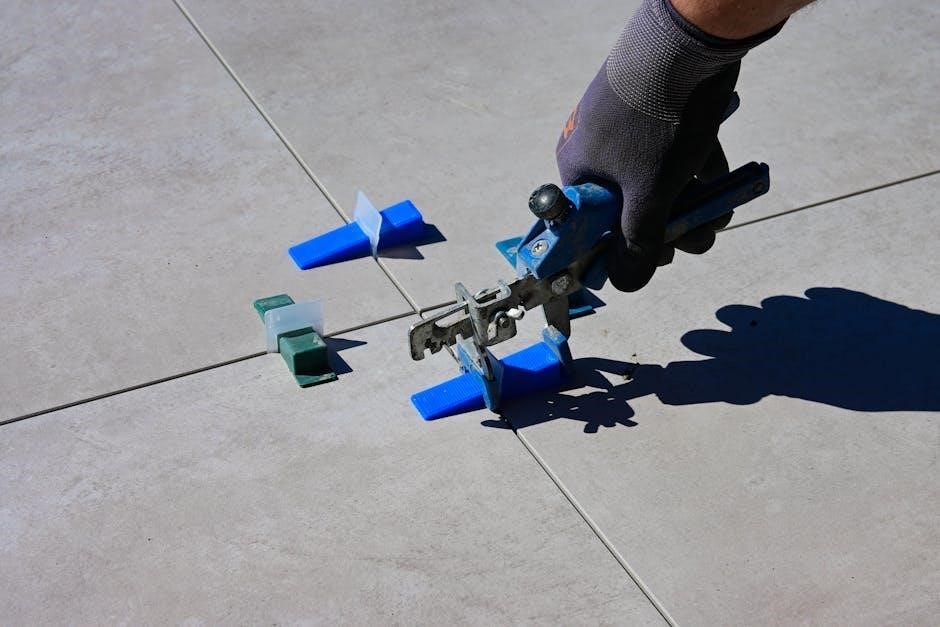
3.2 Workspace Setup and Safety
Ensure your workspace is stable, flat, and free from debris. Use a non-slip mat or clamps to secure the tile during cutting. Keep the area well-lit to maintain clear visibility. Store sharp tools and the cutter away from children and pets. Always have a first aid kit nearby. Regularly inspect the cutter for damage or wear. Proper workspace setup minimizes risks and ensures precise, safe cuts every time. A clean environment enhances focus and efficiency.

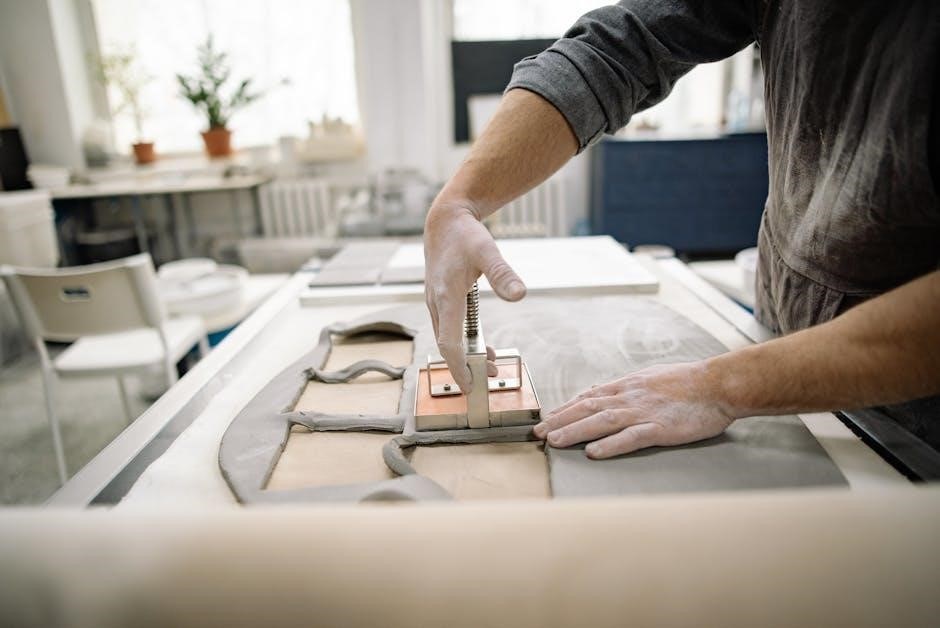
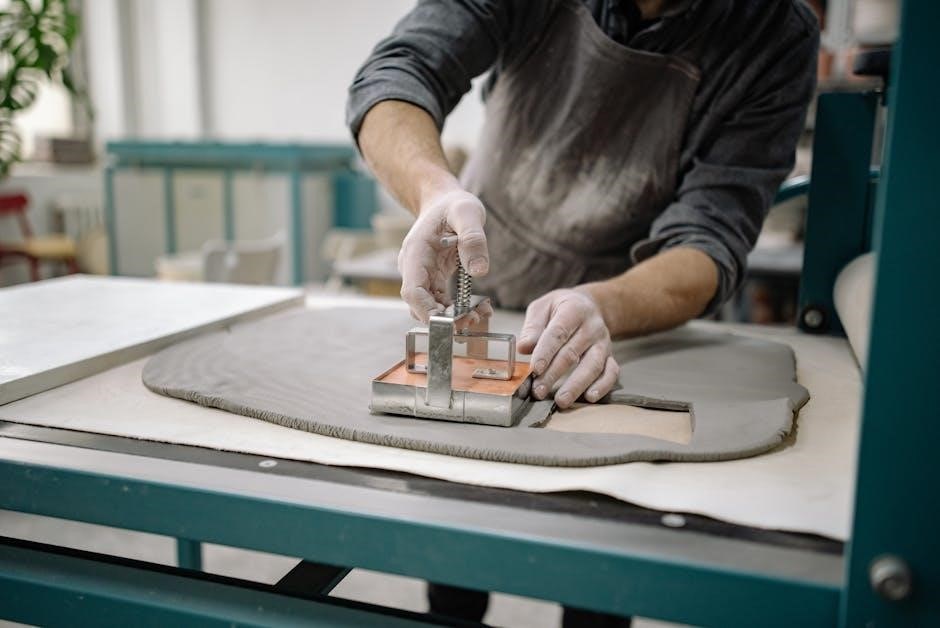
How to Score and Snap a Tile
Align the marked tile with the cutter’s guide; Score firmly with the wheel, then snap by applying pressure. Ensure a clean, precise cut every time.
4.1 Marking the Tile
Start by measuring and marking the tile where you want the cut using a felt-tip pen. Ensure the mark is clear and visible. Position the tile in the cutter with the glazed side up, aligning the mark with the guide. This ensures accuracy and a straight cut. Always test the pen on a spare tile to confirm it wipes off easily after cutting.
4.2 Scoring the Tile
Align the scoring wheel with the marked line and gently apply pressure while pushing the handle forward. Use the guide for accuracy. Ensure a single, smooth pass to create a clean score line. Avoid applying too much pressure, as it may cause the tile to break prematurely. The goal is to create a clear indentation for snapping. Proper scoring ensures a clean and precise cut, reducing the risk of uneven edges.
4.3 Snapping the Tile
Pull the handle back slightly to position the cross-toggle near the tile’s center. Grasp the handle firmly and press down until the tile snaps. A clean cut should result. If the cut is not perfect, smooth the edges with a tile stone. Proper snapping technique ensures a precise break along the scored line, minimizing waste and achieving professional-looking results. Always maintain control during this step to avoid accidental breaks or uneven edges.

Smoothing the Cut Edges
After snapping the tile, use a tile stone to smooth the cut edges. This ensures a clean finish and prevents sharp edges for a professional result.
5.1 Using a Tile Stone
A tile stone, or rubbing stone, is used to smooth cut edges after snapping. Rub the stone back and forth along the edge to remove sharp fragments. Apply light to moderate pressure, ensuring even coverage. This step is crucial for achieving a clean, professional finish. Regular use of the tile stone prevents rough edges and enhances safety. Always inspect the edge after smoothing to ensure a smooth surface.
5.2 Filing the Edges
Filing the edges is an alternative to using a tile stone, offering precise edge smoothing. Use a manual or electric file to gently remove sharp fragments. Apply light pressure, working in one direction to avoid creating new burrs. Regular filing ensures clean, polished edges, improving safety and aesthetics. This method is particularly effective for intricate cuts or uneven edges, providing a high-quality finish for professional results.
Choosing the Right Manual Tile Cutter
Selecting the right manual tile cutter depends on the material, project size, and type of cuts needed. Consider ceramic, porcelain, or stone tiles and compare with electric cutters for larger jobs.
6.1 Considerations for Material and Project Size
Manual tile cutters are ideal for smaller projects and softer materials like ceramic and porcelain. For larger projects or harder materials such as granite, electric cutters are more efficient. Consider the frequency of cuts and the tile thickness to ensure the cutter can handle the workload. Evaluating these factors helps in selecting the right tool for precise and efficient cutting, ensuring optimal results for your tiling needs.
6.2 Comparison with Electric Cutters
Manual tile cutters are cost-effective, portable, and ideal for small-scale projects, whereas electric cutters offer faster cutting for larger tasks. Manual cutters are best for softer materials like ceramic, while electric cutters handle harder materials such as granite. Electric cutters are more efficient but produce dust, requiring water cooling. Manual cutters are quieter, cleaner, and more affordable but slower for bulk cutting. Choose based on project size, material type, and desired convenience.
Maintenance and Care of a Manual Tile Cutter
Regular cleaning and lubrication are essential for optimal performance. RUBI, pioneers since 1951, recommend periodic adjustments to ensure accuracy and longevity of the cutter.
7.1 Cleaning the Cutter
Regularly clean the cutter to remove dust and debris. Use a soft brush or cloth to wipe down surfaces. For tougher residue, dampen the cloth with water, but avoid harsh chemicals to prevent damage. Ensure the scoring wheel and guide are free from obstructions for precise cuts. Proper cleaning maintains performance and extends the cutter’s lifespan, ensuring consistent results over time.
7.2 Replacing the Scoring Wheel
To replace the scoring wheel, first loosen the locking screw. Remove the old wheel and fit the new one, ensuring it’s securely fastened. Tighten the screw to maintain proper alignment. Regular replacement ensures precise scoring and clean cuts. Always check compatibility with your cutter model for optimal performance. Proper installation and alignment are crucial for maintaining the cutter’s efficiency and extending its service life. Follow manufacturer guidelines for the best results.

Tips for Achieving Perfect Cuts
Use accurate measurements, ensure proper alignment, and apply consistent scoring pressure. Clean snapping and smoothing edges with a tile stone can achieve professional-grade results efficiently.
8.1 Ensuring Proper Alignment
Accurate alignment is crucial for precise cuts. Mark the tile clearly with a pencil, ensuring the line is visible and straight. Position the tile securely in the cutter, aligning the marked line with the guide. Verify that the tile is flush against the end stop and evenly placed. Double-check measurements before scoring to avoid misalignment, ensuring clean, professional results every time. Proper alignment prevents uneven cuts and wasted material.
8.2 Using the Correct Scoring Technique
Applying the right scoring technique ensures clean cuts. Hold the cross-toggle firmly, applying steady, moderate pressure in one smooth motion. Avoid excessive force, as it may damage the tile. Keep the scoring wheel aligned with the marked line, maintaining consistent pressure throughout. After scoring, snap the tile by applying gentle yet firm pressure. Practice the motion to build confidence and achieve precise cuts. Proper technique prevents uneven breaks and enhances overall cutting efficiency for professional-looking results.
Common Mistakes to Avoid
- Incorrect alignment of the tile can lead to uneven cuts.
- Applying too much pressure may result in tile breakage.
- Using improper snapping techniques can cause jagged edges.
9.1 Incorrect Scoring Pressure
Applying too much or too little pressure while scoring can lead to poor results. Excessive pressure may cause the tile to break unevenly, while insufficient pressure might not create a clear score line. This can result in jagged edges or incomplete cuts. To avoid this, maintain consistent, firm pressure and ensure the scoring wheel is sharp. Proper technique ensures a clean score line, making the snapping process smoother and more precise for professional-looking cuts.
9.2 Improper Snapping Technique
Improper snapping technique can result in uneven or incomplete cuts; Applying uneven pressure or misaligning the cross-toggle can cause the tile to break unpredictably. This often leads to jagged edges or wasted material. To avoid this, ensure the cross-toggle is centered and apply firm, consistent pressure. If the tile doesn’t snap cleanly, check for proper alignment and scoring. Using a tile stone to smooth rough edges can help correct minor imperfections, ensuring professional-looking results for your projects.
Manual tile cutters are essential tools for precise and efficient tile cutting, offering cost-effectiveness and ease of use. Their evolution since 1951 highlights their reliability in various projects. Proper techniques and safety precautions ensure clean cuts and professional results. Whether for small DIY tasks or larger installations, manual tile cutters remain a versatile and indispensable choice for achieving perfect tile cuts every time. Their durability and simplicity make them a favorite among professionals and homeowners alike.