ts210c manual
Category : Manuals
Welcome to the TS210C manual, your comprehensive guide for Toto Silas TS210C, Vivian TS220C, and Wyeth TS230C models. This manual provides detailed instructions for installation, maintenance, and troubleshooting, ensuring optimal performance and longevity of your product. Available online as a downloadable PDF, it offers easy access to essential information for users of all skill levels.
1.1 Purpose and Scope of the Manual
This manual serves as a detailed guide for the installation, operation, and maintenance of the TS210C series, including models like Silas TS210C, Vivian TS220C, and Wyeth TS230C. It covers safety precautions, product features, troubleshooting, and best practices to ensure optimal performance and longevity of the device.
1.2 Intended Audience
This manual is designed for homeowners, plumbers, and technicians involved in the installation, maintenance, or repair of the TS210C series. It provides clear instructions and technical details, making it accessible to both professionals and DIY enthusiasts, ensuring safe and effective use of the product.
1.3 Overview of the TS210C Series
The TS210C series includes models like Toto Silas TS210C, Vivian TS220C, and Wyeth TS230C, offering versatile faucet solutions. Each model features advanced volume control, sleek designs, and durable construction, catering to various plumbing needs while ensuring high performance and reliability.

Product Overview
The TS210C series offers advanced faucet solutions with models like Silas TS210C, Vivian TS220C, and Wyeth TS230C, featuring volume control and sleek designs for various plumbing needs.
2.1 Key Features of the TS210C
The TS210C boasts a lever handle, consistent trim appearance, and an integrated off position for precise control. Available in finishes like polished chrome and brushed nickel, it ensures durability and aesthetic appeal, making it a versatile choice for modern plumbing systems.
2.2 Different Models and Applications
The TS210C series includes various models like Toto Silas TS210C, Vivian TS220C, and Wyeth TS230C, each designed for specific applications. These models cater to different installation needs and preferences, ensuring versatility in both residential and commercial settings, while maintaining consistent performance and quality across all configurations.
2.3 Design and Technical Specifications
The TS210C features a sleek, trapezoidal design with a 10-inch LF driver and 2-inch voice coil, ensuring high-quality sound. Available in finishes like Polished Chrome, Brushed Nickel, and Polished Nickel, it offers compatibility with Volume Control Valves (TSMA) and includes components like gaskets and escutcheons for precise installation and durability.

Installation Guide
This guide outlines the steps for installing the TS210C, including removing screws, pulling out the escutcheon, and mounting the handle. Refer to the manual for detailed instructions and ensure all parts are securely fitted to avoid leaks or damage.
3.1 Pre-Installation Requirements
Before installing the TS210C, ensure a stable water supply, compatible plumbing connections, and necessary tools are ready. Disconnect water supply lines and drain the system to prevent leaks. Familiarize yourself with the components and manual instructions to ensure a smooth and safe installation process without damaging the faucet or surrounding fixtures.
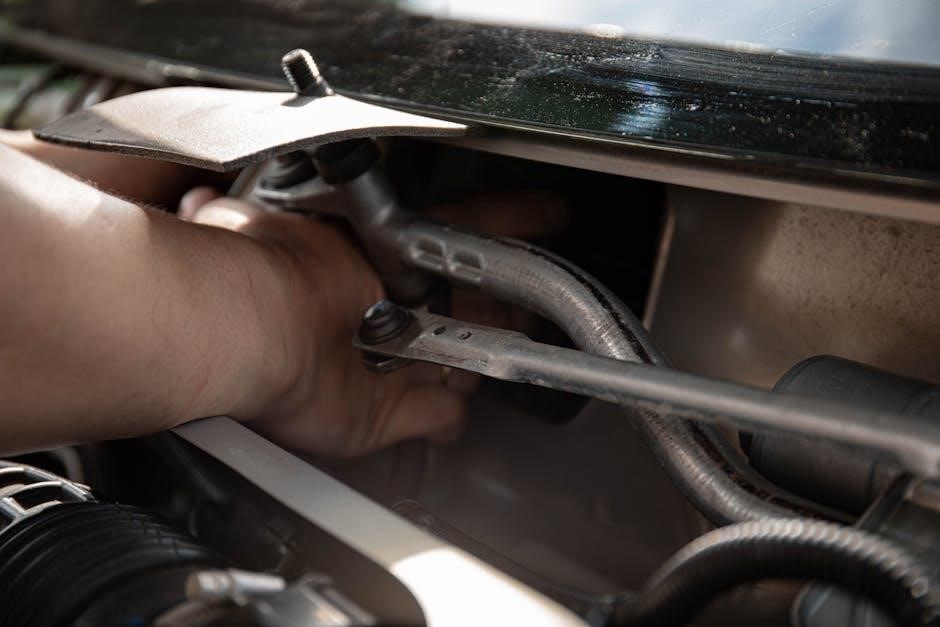
3.2 Step-by-Step Installation Instructions
Install the handle assembly by aligning it with the valve stem and securing it with the provided screw. 2. Place the gasket over the valve body to ensure a watertight seal. 3. Mount the escutcheon plate, aligning it with the handle. 4. Attach the adapter to the valve body using the lock washer and screw. 5. Tighten all connections firmly and test the valve operation to ensure proper function.
3.3 Common Installation Mistakes to Avoid
- Ensure the gasket screw is removed before installing the handle to avoid damage.
- Align the handle assembly correctly with the valve stem to prevent improper operation.
- Do not overtighten the screw and lock washer, as this may damage the valve body.
- Verify all connections are secure but not over-torqued to maintain integrity.

Maintenance and Troubleshooting
Regularly clean and inspect the faucet for wear. Address leaks promptly and refer to the manual for troubleshooting common issues like low water flow or temperature control problems.
4;1 Regular Maintenance Tips
Regularly clean the faucet to prevent mineral buildup. Inspect for worn-out parts like gaskets and O-rings. Replace them promptly to avoid leaks. Check water flow and temperature control for optimal performance. Refer to the manual for detailed cleaning and inspection procedures to ensure longevity and functionality of your TS210C faucet.
4.2 Troubleshooting Common Issues
- Common issues include leaks, low water flow, or temperature control problems.
- Check for loose connections or worn-out gaskets and O-rings.
- Clean or replace faulty components as outlined in the manual.
- Refer to the troubleshooting guide for step-by-step solutions.
- If issues persist, consult advanced diagnostic techniques or contact support.
4.3 Advanced Diagnostic Techniques
Advanced diagnostics involve checking system logs, error codes, and utilizing specialized tools. Use diagnostic software to analyze performance metrics and identify hidden issues. Refer to the manual for specific error code meanings and repair procedures. Ensure all components are functioning within specified parameters for optimal performance and reliability. Regular advanced checks prevent major failures.

Accessing and Downloading the Manual
The TS210C manual is available online through official Toto websites or platforms like Manualzz. Download the PDF version for free to access detailed installation, maintenance, and troubleshooting guides;
5.1 Official Sources for the TS210C Manual
The TS210C manual can be accessed through Toto’s official website, trusted platforms like Manualzz, or authorized distributors. Ensure authenticity by downloading from these verified sources to access accurate installation, maintenance, and troubleshooting information for Toto Silas TS210C, Vivian TS220C, and Wyeth TS230C models.
5.2 How to Download the PDF Version
Visit Toto’s official website or trusted platforms like Manualzz. Search for “TS210C manual” and select the PDF version. Click the download link to save the 3 MB file, which covers installation, maintenance, and troubleshooting guides for Toto Silas TS210C, Vivian TS220C, and Wyeth TS230C models;
5.3 Navigating the Manual’s Content
The TS210C manual features a clear table of contents and index for easy navigation. Key sections include installation, maintenance, and troubleshooting guides. Users can quickly locate specific topics using numbered pages and detailed headings. The manual also includes diagrams and step-by-step instructions for optimal usability and comprehension.

Safety Precautions
Always follow safety guidelines when handling electrical components or performing maintenance. Ensure proper shutdown procedures in emergencies and adhere to industry standards to prevent accidents and ensure safe operation.
6.1 General Safety Guidelines
Adhere to all safety precautions when using the TS210C to avoid injuries and damage. Ensure proper grounding, avoid overloading circuits, and keep electrical components away from water. Always turn off power before maintenance and follow manufacturer instructions for safe operation and handling of electrical parts.
6.2 Handling Electrical Components
When handling electrical components of the TS210C, always disconnect power first and ensure the system is grounded. Use insulated tools to prevent shock and avoid touching live wires. Keep components dry and avoid overloading circuits. Follow proper installation and maintenance procedures to ensure safe and reliable operation.
6.3 Emergency Shutdown Procedures
In case of an emergency, switch off the main power supply immediately. Use the emergency stop button if available. Allow the system to cool down before intervention. Check for any leaks or damage. Never restart without verifying safety. Always refer to the manual for specific procedures to ensure proper safe operation.

Technical Specifications
The TS210C manual details comprehensive specifications, including product variations, finishes like polished chrome and brushed nickel, and compatibility with industry standards for reliable performance and durability.
7.1 Detailed Product Specifications
The TS210C manual outlines specific details for models like Toto Silas TS210C, including finishes such as polished chrome and brushed nickel, lever handle designs, and compatible valve systems. It also specifies technical components like escutcheons, gaskets, and adapters, ensuring clarity for installation and maintenance processes across all product variations.
7.2 Compatibility and Interoperability
The TS210C series, including Vivian TS220C and Wyeth TS230C, ensures compatibility with multiple valve systems, providing consistent trim appearance across installation depths. Available in polished chrome and brushed nickel, it integrates seamlessly with plumbing setups, offering functionality and aesthetic appeal. Its lever handle design enhances user experience, ensuring ease of installation.
7.3 Compliance with Industry Standards
The TS210C series adheres to industry standards for water efficiency and safety, ensuring reliable performance and environmental sustainability. Designed to meet rigorous plumbing regulations, it maintains consistent quality and durability, aligning with global benchmarks for faucet manufacturing and ecological responsibility, thus providing users with a trusted and compliant solution for their needs.

Warranty and Support
The TS210C is backed by a comprehensive warranty, ensuring coverage for manufacturing defects. Dedicated customer support is available for inquiries, while online resources and forums provide additional troubleshooting assistance and updates.
8.1 Warranty Terms and Conditions
The TS210C warranty covers manufacturing defects for a specific period, ensuring reliability and performance. Terms vary by model, typically including parts and labor coverage. Registration may be required, and conditions exclude misuse or unauthorized modifications. Detailed terms are outlined in the official manual for clarity and compliance.
8.2 Customer Support Contact Information
For assistance, contact TOTO USA customer support at (888) 295-8134 or visit www.totousa.com. Support is available to address troubleshooting, maintenance, and warranty inquiries, ensuring prompt resolution for all TS210C-related needs.
8.3 Online Resources and Community Forums
Access the TS210C manual and additional resources on platforms like Manualzz and All-Guides.com. Community forums and support groups offer peer-to-peer advice, troubleshooting tips, and shared experiences, enhancing your understanding and resolving common issues effectively;
Frequently Asked Questions
Find answers to common queries about the TS210C, including installation, features, troubleshooting, and maintenance. This section addresses user concerns and provides clear, concise solutions for optimal product use.
9.1 Common User Queries
Users often ask about installation steps, troubleshooting common issues, and understanding advanced features. Queries also include compatibility with other systems, maintenance tips, and warranty details. This section provides clear answers to these frequently raised questions, ensuring smooth operation and optimal performance of the TS210C series.
9.2 Clarifications on Product Features
The TS210C series includes models like Toto Silas TS210C, Vivian TS220C, and Wyeth TS230C, each offering unique features such as volume control, handle designs, and finishes. These products are designed for durability and efficiency, with compatibility across various systems. The manual clarifies these features to ensure proper usage and customization.
9.3 Solutions to Frequently Encountered Problems
Common issues with the TS210C include installation errors, leakage, and handle malfunctions. Ensure proper alignment during installation, tighten connections firmly, and replace worn gaskets to address leaks. For handle issues, check alignment and tighten screws. Refer to the manual for detailed troubleshooting steps to resolve these problems effectively and maintain optimal performance.

Advanced Features
The TS210C offers advanced customization options, including volume control trim and special functions for enhanced user experience. Explore system integration capabilities and optimize your setup with detailed manual guidance.
10.1 Customization Options
Customization options for the TS210C include handle designs, finish selections, and flow control settings. Users can choose from polished chrome, brushed nickel, or polished nickel finishes. The volume control trim allows for precise water flow adjustment, enhancing user experience. These features ensure the faucet blends seamlessly with various bathroom aesthetics while offering functional versatility.
10.2 Special Functions and Modes
The TS210C features an integrated off position for immediate water shut-off and consistent trim appearance regardless of valve installation depth. Special modes include flow control settings and optional handle designs, offering enhanced usability and water conservation. These functions ensure precise control and efficiency, catering to diverse user preferences and needs.
10.3 Integration with Other Systems
The TS210C seamlessly integrates with other systems, including compatible Toto models like Vivian TS220C and Wyeth TS230C. Its design ensures compatibility and consistent performance across configurations, making it easy to incorporate into existing setups. This integration capability enhances functionality and provides a cohesive user experience, tailored to diverse system requirements and user preferences.

Environmental Considerations
The TS210C is designed with eco-friendly elements, promoting water and energy efficiency. Proper disposal guidelines ensure minimal environmental impact, aligning with sustainable practices and reducing waste effectively.
11.1 Eco-Friendly Design Elements
The TS210C incorporates eco-conscious design elements, including low-flow technology and water-saving features, reducing environmental impact while maintaining performance. Its durable construction minimizes waste, ensuring longevity and aligning with global sustainability standards for a greener future.
11.2 Energy Efficiency Features
The TS210C features energy-efficient designs, including low-flow valves and optimized water usage, reducing energy consumption without compromising performance. Its advanced engineering ensures minimal energy waste, making it compliant with eco-friendly standards and promoting sustainable use in various applications.
11.3 Proper Disposal Guidelines
Ensure eco-friendly disposal by recycling components whenever possible. Separate metal, plastic, and electronic parts for proper processing. Check for hazardous materials like batteries or chemicals and dispose of them according to local regulations. Consult local guidelines for specialized disposal facilities to minimize environmental impact and promote sustainability.
The TS210C manual offers a comprehensive guide for optimal usage, covering installation, maintenance, and troubleshooting. Follow the provided tips for enhanced performance and eco-friendly practices to ensure longevity and efficiency of your product.
12.1 Summary of Key Points
12.2 Final Tips for Optimal Usage
For optimal TS210C performance, always refer to the manual for specific guidance. Adhere to safety precautions, perform regular maintenance, and troubleshoot issues promptly. Utilize customer support resources for assistance and ensure all updates are applied for enhanced functionality. Regular checks and proper handling will maintain efficiency and longevity of your device.