Author Archives: toni

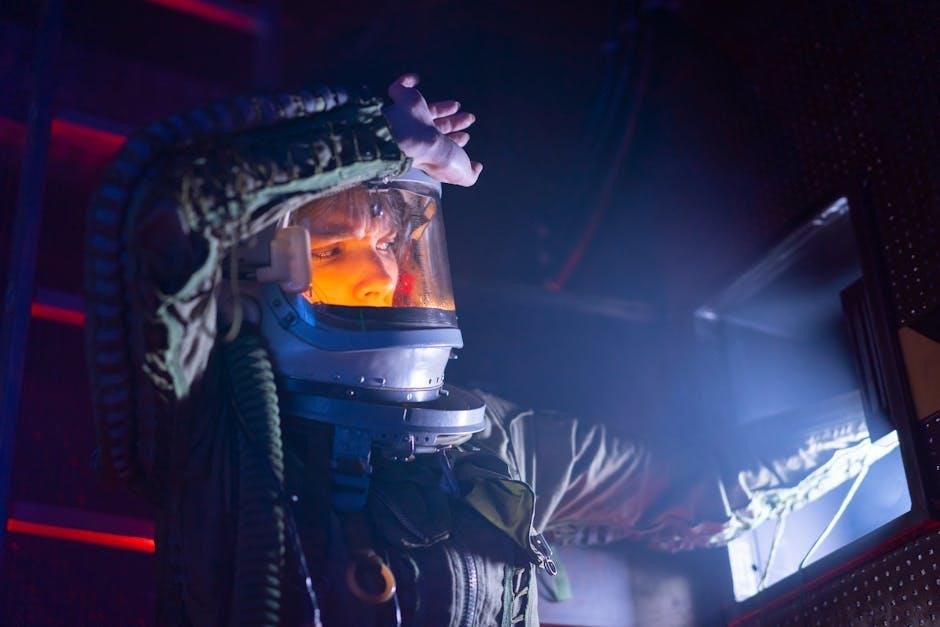
alien isolation trophy guide

Category : Guide

Welcome to the Alien: Isolation Trophy Guide, your comprehensive resource for unlocking all 51 trophies in this intense survival horror experience.

Overview of the Game and Trophy System

Alien: Isolation is a survival horror game where stealth and strategy are key to survival. The trophy system includes 51 trophies, ranging from story-related achievements to challenging collectible hunts. Players must navigate the eerie Sevastopol Station, avoiding the relentless alien and hostile humans. Trophies are divided into categories: story progression, collectibles like ID tags and archive logs, difficulty milestones, and special feats such as completing the game without dying. Collectibles are automatically saved, reducing replay stress. The game demands patience, as dying frequently is part of the learning process. A first playthrough on Hard difficulty is recommended to unlock key trophies like Survivor. This guide will help you navigate the challenges and unlock the coveted Platinum trophy.

Story-Related Trophies

These trophies are unlocked by progressing through the game’s story, with achievements tied to completing key missions like Awake, Welcome to Sevastopol, and A Hunt Begins.

Awake ー Complete the First Mission

The trophy “Awake” is awarded for completing the first mission of Alien: Isolation, marking your introduction to the eerie and tense world of Sevastopol. This story-related achievement is unmissable and sets the tone for the game. During this mission, you’ll learn the basics of survival, such as managing resources and avoiding detection. A key tip is to save your progress at the terminal on the Torrens before disembarking, as this ensures you don’t lose progress. Combat is not an option here, so stealth and patience are crucial. Once you complete this mission, the trophy will unlock, signaling your official start in the fight for survival against the deadly alien.

Welcome to Sevastopol ー Complete the Second Mission

The “Welcome to Sevastopol” trophy is earned upon completing the second mission of Alien: Isolation, where you arrive at the derelict Sevastopol Station. This mission introduces you to the oppressive atmosphere and the lurking danger of the alien. Key tips include exploring your surroundings cautiously, managing your limited resources, and using your motion tracker to detect threats. Avoid running, as noise attracts the alien, and utilize hiding spots like lockers when necessary. Crafting tools, such as noisemakers, can help distract enemies, but use them sparingly. Pay attention to environmental clues and audio logs to piece together the station’s dark history. Completing this mission seamlessly transitions you into the core survival mechanics of the game, preparing you for the challenges ahead;

A Hunt Begins ー Complete the Third Mission

The “A Hunt Begins” trophy is unlocked upon completing the third mission of Alien: Isolation, marking a pivotal point in the story where Amanda Ripley begins her desperate search for clues about her mother’s disappearance. This mission introduces more intense encounters with the alien, requiring heightened stealth and strategy. Key strategies include mastering the motion tracker to anticipate the alien’s movements, crafting essential tools like noisemakers and medkits, and utilizing hiding spots such as vents and lockers. The atmosphere becomes increasingly tense as the alien’s behavior grows more unpredictable, making careful navigation and resource management crucial. This mission sets the tone for the survival horror experience ahead, challenging players to stay vigilant and adaptable in the face of constant danger.

Collectible Trophies

Collectibles in Alien: Isolation include Archive Logs and ID Tags, hidden throughout Sevastopol. Collecting these unlocks trophies like “A Record of Disaster” and “The Taken.”

A Record of Disaster ー Collect an Archive Log

The “A Record of Disaster” trophy is earned by collecting your first Archive Log. These logs are scattered throughout Sevastopol and provide insight into the station’s tragic events. They can be found at computer terminals and come in both written and audio formats. Most terminals contain multiple logs, making them easy to discover. Once you interact with a terminal and retrieve a log, the trophy will unlock automatically. This trophy is a great starting point for players, as it introduces them to the game’s collectible system. The logs are saved instantly, so even if you die after collecting one, your progress remains. This trophy is straightforward and sets the stage for further collectible challenges.

The Missing ౼ Collect an ID Tag

The “The Missing” trophy is unlocked by collecting your first ID Tag. ID Tags are scattered throughout Sevastopol and provide insight into the station’s tragic events. Finding one is simple, as they are often in plain sight or hidden in rooms. Once you pick up an ID Tag, the trophy will unlock immediately. The game automatically saves your progress, so even if you die after collecting it, your achievement is secure. This trophy serves as an introduction to the game’s collectible system, encouraging exploration and setting the stage for more challenging collectible-related achievements. Each ID Tag has a unique name, but this trophy only requires finding one.

The Taken ౼ Collect All 50 ID Tags

The “The Taken” trophy is awarded for collecting all 50 ID Tags hidden throughout Sevastopol. These tags provide personal stories of the station’s crew and survivors, adding depth to the game’s lore. To unlock this achievement, you must thoroughly explore every area, as ID Tags are often hidden in hard-to-reach locations or concealed within rooms. Each ID Tag has a unique name, making it easier to track which ones you’ve collected via the in-game map menu. The game automatically saves each ID Tag you pick up, so even if you die, your progress remains. While the first ID Tag unlocks “The Missing,” finding all 50 requires dedication and careful exploration to ensure none are left behind.

Archivist ー Collect 100 Archive Logs

The “Archivist” trophy is earned by collecting 100 Archive Logs scattered throughout Sevastopol. These logs, found at computer terminals, provide insight into the station’s history and the events leading to its downfall. They come in both written and audio formats, with most terminals containing multiple logs. To unlock this trophy, you must methodically explore every accessible area and interact with terminals. The game automatically saves each log you collect, so progress is maintained even if you die. With over 150 logs available, reaching 100 is achievable with patience. Use the mission select feature to revisit areas and clean up any missed logs, ensuring you don’t miss this achievement. Guides like Maka’s collectible guide can help locate elusive logs.

Difficulty-Related Trophies

Challenging players to test their skills, these trophies require completing the game on Hard difficulty and without killing humans, emphasizing stealth and survival.

Survivor ー Complete the Game on Hard Difficulty

To earn the Survivor trophy, you must complete Alien: Isolation on Hard difficulty. This challenging mode demands precise stealth and cautious navigation, as enemies are more alert and deadly. The Alien is relentless, and even slight mistakes can lead to death. Success requires mastering the use of your motion tracker to monitor the Alien’s movements and avoiding detection by crouching and hiding. Resources are scarce, so conserve medkits and crafting materials wisely. Avoid running, as it attracts the Alien, and utilize distractions like noisemakers to divert its attention. Be prepared for intense encounters with Androids, which are tougher on Hard difficulty. Patience and strategy are key to overcoming this grueling challenge and claiming the Survivor trophy.

Mercy or Prudence? ౼ Complete the Game Without Killing Humans

The Mercy or Prudence? trophy requires completing Alien: Isolation without killing any humans. This adds a layer of complexity, as you must rely on stealth and non-lethal strategies to progress. Avoid confrontations with humans, as even accidental kills will void this trophy. Use distractions like noisemakers to divert the Alien’s attention away from humans, allowing you to slip past undetected. Crafting and resource management are crucial, as you’ll need tools to evade both the Alien and hostile humans. Patience is key, as this trophy demands careful planning and execution to ensure no human lives are lost during your journey through Sevastopol.

Special Trophies

These unique achievements challenge players to push their skills to the limit, requiring flawless gameplay and strategic thinking to unlock the rarest trophies in the game.

One Shot ౼ Complete the Game Without Dying

One Shot is one of the most challenging trophies in Alien: Isolation, requiring players to complete the game without dying; This achievement demands meticulous stealth, patience, and a deep understanding of the alien’s behavior. To succeed, start a new game on Easy difficulty and utilize the save/reload technique to avoid permanent death. Always keep your motion tracker handy to monitor the alien’s movements and never run unless absolutely necessary. Hide in vents or under tables when the alien is nearby, and avoid confrontation with androids unless equipped with appropriate tools. Conservation of resources like medkits and EMPs is crucial, and staying calm under pressure will greatly increase your chances of success. This trophy is a true test of skill and determination.

100 Times Too Many ー Die 100 Times

100 Times Too Many is a trophy that requires players to die 100 times in Alien: Isolation. This achievement is straightforward but time-consuming, as it involves intentionally or unintentionally meeting your demise repeatedly. To unlock it efficiently, play on higher difficulty levels like Hard or Nightmare, where enemies are more aggressive and deadly. You can also use the save/reload technique in Survivor Mode, dying repeatedly in the same section to rack up deaths quickly. Note that this trophy is missable if not focused on early, so it’s best to tackle it before attempting a no-death run. Patience and persistence are key to earning this unique and challenging trophy.

Concluding your Alien: Isolation trophy journey is rewarding yet challenging. Patience, stealth, and strategy are key. Explore thoroughly, save often, and avoid risks for success.

Final Thoughts and Strategies for Platinum

Earning the Platinum trophy in Alien: Isolation demands a meticulous approach. Start by completing a hard difficulty playthrough without killing humans, securing the Survivor and Mercy or Prudence? trophies. This strategy ensures you master stealth and resource management, essential for subsequent challenges. Collectibles like ID Tags and Archive Logs should be gathered thoroughly during this run to minimize cleanup. The One Shot trophy requires a separate, careful playthrough on Easy, where every decision must avoid death. Utilize save reloading to correct mistakes. Finally, clean up any remaining trophies, such as 100 Times Too Many, by intentionally dying. Patience and persistence will lead you to the Platinum, a testament to your skill and dedication.


simon boas a beginners guide

Category : United Kingdom

Simon Boas, a gifted storyteller and aid worker, faced a cancer diagnosis at 46 with optimism and grace. His viral newspaper articles inspired A Beginner’s Guide to Dying, a heartfelt meditation on life, death, and gratitude, blending humor with profound humanity.

1.1 Who is Simon Boas?

Simon Boas was a charismatic aid worker, writer, and philosopher who captivated audiences with his unique perspective on life and death. Diagnosed with incurable cancer at 46, he responded with remarkable optimism and humor, sharing his insights through viral newspaper articles. His writing, rooted in gratitude and humanity, inspired A Beginner’s Guide to Dying, a book that blends wit with wisdom, offering a heartfelt meditation on mortality and the joy of living.

1.2 The Concept of “A Beginner’s Guide to Dying”

A Beginner’s Guide to Dying is a poignant yet uplifting exploration of mortality, life, and gratitude. Written by Simon Boas during his final year, the book offers a unique perspective on death, emphasizing its role in appreciating life’s beauty. With humor and humanity, it provides practical advice for the dying and their loved ones, while celebrating the joy of existence. The book is less about dying and more about living fully, making it a universal guide to cherishing life’s preciousness.

The Diagnosis and Its Impact

Simon Boas was diagnosed with incurable cancer, a late-stage discovery that profoundly impacted his life. He faced mortality with optimism, embracing the beauty of life’s fleeting nature.

2.1 Simon Boas’s Cancer Diagnosis

Simon Boas was diagnosed with incurable, stage-four throat cancer, which had spread throughout his body. Initially misdiagnosed as acid reflux, the late-stage discovery left limited options. Despite this, he remained remarkably optimistic, focusing on the privilege of life rather than the unfairness of his fate. His diagnosis became a catalyst for reflection, inspiring him to share his insights on mortality and gratitude in A Beginner’s Guide to Dying.

2.2 How the Diagnosis Changed His Perspective on Life

Simon Boas’s cancer diagnosis profoundly shifted his outlook, moving from frustration to gratitude. He embraced life’s fragility, prioritizing love, kindness, and meaningful connections. His perspective transformed from fear to acceptance, viewing death as life’s natural conclusion. This shift inspired him to write, sharing lessons on living fully and dying with grace, leaving a legacy of hope and wisdom for others.

The Writing Process and Inspiration

Simon Boas’s writing journey began with viral newspaper articles, sharing his thoughts on life and illness. These pieces inspired him to expand his reflections into a book, driven by a desire to spread hope and wisdom.

3.1 How Simon Boas Began Writing the Book

Simon Boas started writing after his viral newspaper articles gained global attention. These pieces, reflecting on life and illness, inspired him to expand his thoughts into a book. Motivated by a desire to help others, he aimed to share practical advice and emotional insights, offering a unique perspective on mortality while emphasizing the joy of life. His writing process was deeply personal, blending humor and humanity to create a relatable and uplifting guide.

3.2 The Role of His Local Newspaper Articles

Simon Boas’s local newspaper articles played a pivotal role in shaping his book. These pieces, which went viral, explored themes of happiness, illness, and gratitude, resonating deeply with readers. The articles served as the foundation for A Beginner’s Guide to Dying, offering practical advice and emotional insights. Their success encouraged Boas to expand his ideas, blending humor and humanity to create a relatable and uplifting guide that transcended traditional approaches to discussing mortality.

Key Themes and Tone of the Book

A Beginner’s Guide to Dying masterfully blends humor and humanity, emphasizing gratitude and the joy of life. Its warm tone offers a moving yet uplifting perspective on mortality.

4.1 Humor and Humanity in the Face of Mortality

Simon Boas approaches mortality with remarkable humor and humanity, transforming a grim topic into a relatable and uplifting experience. His ability to find lightness in life’s darkest moments creates a unique emotional balance, making readers laugh and cry simultaneously. The book reflects his belief that humor is a powerful tool to confront death, while his humanity shines through in heartfelt reflections on life’s preciousness and the importance of connecting with others.

4.2 Gratitude and the Joy of Life

Simon Boas emphasizes gratitude as a cornerstone of his philosophy, urging readers to appreciate life’s simple joys. Despite his terminal diagnosis, he finds solace in the privilege of existence, celebrating the beauty of human connections and everyday moments. The book is a testament to living fully, encouraging readers to focus on love, kindness, and the richness of life, rather than material success or fleeting validations, thereby fostering a deeper appreciation for the present.

Practical Advice for the Dying and Their Loved Ones

Simon Boas offers heartfelt guidance, urging loved ones to reach out thoughtfully, listen without judgment, and avoid minimizing their feelings, fostering meaningful connections in life’s final stages.

5.1 Do’s and Don’ts for Interacting with the Dying

Simon Boas provides clear, compassionate guidance for interacting with the dying. He advises to reach out thoughtfully, listen without minimizing their feelings, and avoid unannounced visits. Emphasizing kindness, he encourages focusing on love and presence rather than unnecessary advice or clichés. His practical wisdom helps create meaningful connections, ensuring dignity and comfort in life’s final stages.

5.2 The Importance of Prioritizing Love and Kindness

Simon Boas underscores the transformative power of love and kindness, especially in life’s final stages. He advocates for prioritizing meaningful connections, emphasizing that love, not material success, truly matters. His words encourage self-compassion, highlighting the importance of cherishing moments and fostering warmth. By focusing on these values, we honor the dying and enrich our own lives with profound, lasting impact.

Reception and Reviews

A Beginner’s Guide to Dying became an international bestseller, praised for its humor, humanity, and wisdom. Readers and critics alike celebrated its emotional depth and life-affirming message.

6.1 Critical Acclaim and Bestseller Status

A Beginner’s Guide to Dying achieved remarkable success, becoming an international bestseller with a 4.6-star rating on Amazon. Critics praised its emotional depth, humor, and wisdom, with the Sunday Times calling it a “funny, touching meditation on death.” The book’s heartfelt reflections resonated globally, earning it a place as a modern classic. Its ability to balance mortality with life’s joy solidified its acclaim, making it a cherished and impactful read worldwide.

6.2 Reader Responses and Emotional Impact

Readers worldwide connected deeply with Simon Boas’s words, sharing emotional stories of how his book comforted them during grief. Many praised its honesty and humor, finding solace in its uplifting perspective on life. The book’s ability to spark reflection and gratitude resonated universally, with readers highlighting its practical advice and heartfelt vignettes. Its impact extends beyond mourning, inspiring a broader appreciation for life’s preciousness and the importance of kindness, leaving a lasting emotional legacy for all who read it.

Lessons for Living

A Beginner’s Guide to Dying offers profound lessons for living, emphasizing gratitude, kindness, and the preciousness of life. Boas’s optimism and focus on what truly matters inspire readers to cherish every moment and embrace life fully, even in the face of mortality.

7.1 The Privilege of Being Alive

Simon Boas profoundly highlights the privilege of existence, emphasizing life’s intrinsic value. His reflections on gratitude and contentment remind us to cherish moments, relationships, and experiences. By accepting death as life’s natural counterpart, he underscores the importance of living fully and appreciating the beauty in everyday moments, fostering a deeper appreciation for the gift of being alive and the opportunities it presents.

7.2 Embracing Death as a Part of Life

Simon Boas approaches death with remarkable acceptance, viewing it as an inevitable yet natural part of life. He underscores the importance of acknowledging mortality to truly appreciate existence. By normalizing death, he encourages readers to confront it openly, fostering a mindset that allows for living more authentically. His perspective transforms death from a feared endpoint into a reminder to cherish life’s moments, emphasizing the beauty of human experience and the interconnectedness of life and death.

Simon Boas’s Legacy

Simon Boas’s work transcends mortality, offering timeless lessons on gratitude, love, and life’s preciousness. His book has become a beacon of comfort and inspiration, reshaping how people perceive death and cherish life.

8.1 The Lasting Impact of His Words

Simon Boas’s words continue to resonate deeply, offering hope and clarity to countless readers. His book has become a comforting guide, helping people navigate grief and cherish life’s beauty. By sharing his journey with raw honesty and humor, he has redefined how we view death and living fully. His legacy lies in the timeless wisdom he imparted, encouraging gratitude, kindness, and a renewed appreciation for the privilege of being alive. His words remain a beacon of light for all facing life’s challenges.

8.2 How His Book Continues to Inspire

A Beginner’s Guide to Dying continues to inspire readers by offering a unique perspective on mortality and life. Simon Boas’s ability to blend humor, honesty, and wisdom creates a deeply personal connection with readers. His insights on gratitude, love, and the importance of human connection resonate universally, helping people find strength in difficult times. The book has become a source of comfort and clarity, encouraging readers to embrace life’s beauty while confronting death with courage and grace.

A Beginner’s Guide to Dying leaves readers with a profound appreciation for life’s beauty and a courageous approach to death. Simon Boas’s legacy endures through his timeless wisdom, reminding us to cherish every moment and embrace humanity with gratitude and kindness.

9.1 The Timeless Message of the Book

A Beginner’s Guide to Dying delivers a universal message about life’s preciousness and the inevitability of death. Simon Boas reminds us that existence is a privilege, encouraging gratitude, kindness, and living fully. His words transcend time, offering solace and inspiration to all, regardless of circumstance. The book’s blend of humor, humanity, and wisdom ensures its relevance for generations, making it a cherished guide for embracing life and facing death with courage and grace.

9.2 Final Thoughts on Life, Death, and Everything in Between

Simon Boas leaves readers with a profound yet simple truth: life’s beauty lies in its impermanence. He urges us to embrace death as a natural part of existence, fostering gratitude for the time we have. His final reflections emphasize the importance of love, kindness, and human connection, reminding us to cherish every moment. Boas’s optimism and wisdom create a lasting impact, encouraging us to live fully and die with grace, finding joy in life’s fleeting beauty.


how the word is passed pdf

Category : PDF

Clint Smith’s How the Word Is Passed explores the legacy of slavery in America, tracing its history and impact through narratives and reflections. The book delves into how stories of slavery are passed down, shaping cultural memory and identity. By examining historical sites, Smith connects past and present, offering a powerful exploration of race, justice, and memory. This work serves as a vital tool for understanding the ongoing dialogue about America’s complex history, while AI tools like ChatPDF enable users to interact with and summarize such texts, making deep insights more accessible.

Evolution of PDFs as a Communication Tool

PDFs have revolutionized document sharing by preserving formatting and enabling universal accessibility. Initially created for consistent presentation, they’ve evolved into essential tools for professional and academic communication. Their adaptability across devices and platforms has made them indispensable for sharing complex ideas. AI-powered tools now enhance PDFs, allowing users to interact, summarize, and extract insights effortlessly, while maintaining security features like encryption for sensitive information.

Early Development of PDFs

The Portable Document Format (PDF) was first introduced in the early 1990s by Adobe Systems, revolutionizing the way documents were shared and viewed. Created by John Warnock, co-founder of Adobe, the PDF was designed to provide a standardized format for electronic documents, ensuring that files would look consistent across different devices and operating systems. Initially met with skepticism, the PDF gradually gained popularity as its utility became apparent.

In its early stages, the PDF was primarily used for sharing documents like manuals, forms, and academic papers. Its ability to preserve formatting, including fonts, images, and layouts, made it ideal for professional and technical communication. The introduction of Acrobat software in 1993 further enhanced its functionality, allowing users to create, edit, and view PDFs with ease. This marked the beginning of PDFs becoming a staple in both personal and professional settings.

Despite its initial success, the PDF faced challenges, such as the need for specialized software to create and edit files. However, as technology advanced, these barriers were overcome, and the PDF became more accessible. Its adoption across industries, from education to law, highlighted its versatility and reliability. Today, the PDF remains a cornerstone of digital communication, enabling seamless information sharing worldwide.

The evolution of PDFs has also been influenced by the integration of AI tools, such as ChatPDF, which allow users to interact with documents in new ways. For instance, AI-powered readers can summarize lengthy PDFs, extract key insights, and even answer questions based on the content. This innovation underscores the PDF’s enduring relevance in an ever-changing digital landscape.

From its humble beginnings to its current ubiquity, the PDF has proven to be a resilient and adaptable format. Its ability to bridge gaps in communication and facilitate knowledge sharing has cemented its place as a vital tool in the digital age. Whether for personal use or professional applications, the PDF continues to play a central role in how we exchange information.

Clint Smith’s How the Word Is Passed: A Reckoning with the History of Slavery Across America is a compelling exploration of the legacy of slavery in the United States. Through a series of deeply personal and historical narratives, Smith examines how the stories of slavery are passed down through generations, shaping cultural memory, identity, and collective understanding. The book is not just a historical account but a reflective journey that bridges the past and present, offering insights into how America grapples with its complex and painful history.

Smith’s work is particularly relevant in today’s digital age, where information is readily accessible in formats like PDFs. The rise of AI-powered tools, such as ChatPDF, has transformed how we interact with and analyze documents like How the Word Is Passed. These tools enable users to ask questions, extract insights, and summarize complex texts, making the book’s powerful narratives more accessible to a broader audience. This fusion of traditional storytelling and modern technology highlights the evolving ways in which we engage with historical content.

The book has sparked important conversations about race, justice, and memory, resonating with readers and educators alike. By exploring historical sites and their connection to slavery, Smith challenges readers to confront uncomfortable truths and reflect on their own relationship with the past. As a PDF, the book can be easily shared and discussed, fostering a digital dialogue that mirrors the physical conversations it inspires. In this way, How the Word Is Passed serves as a bridge between history and the modern world, reminding us of the enduring impact of slavery and the importance of understanding its legacy.

Through its thought-provoking analysis and accessible format, How the Word Is Passed has become a vital resource for anyone seeking to understand America’s history and its ongoing implications. The book’s themes of memory, identity, and justice are as relevant today as they were during the time of slavery, making it a timeless and essential read;

PDFs, created by Adobe in the 1990s, revolutionized document sharing by preserving formatting across devices. Initially used for static content, PDFs have evolved with AI tools like ChatPDF, enabling users to interact, summarize, and extract insights dynamically. This transformation has enhanced accessibility, making complex texts like How the Word Is Passed more engaging and easier to analyze, bridging the gap between traditional reading and modern digital interaction.

The Portable Document Format (PDF) was first introduced by Adobe in the early 1990s as a solution to the growing need for a universal file format that could preserve document formatting across different devices and operating systems. Initially conceived by John Warnock, co-founder of Adobe, the idea was to create a format that would allow users to share documents without worrying about compatibility issues. The first version of PDF, known as PDF 1.0, was launched in 1993 and quickly gained popularity for its ability to maintain the integrity of text, images, and layout.

Despite its initial success, the adoption of PDFs was slow due to the need for specialized software to create and edit these files. Adobe Acrobat, the primary tool for working with PDFs, was expensive and not widely accessible. However, the release of the free Adobe Acrobat Reader in 1994 revolutionized the use of PDFs, making it possible for anyone to view these files without purchasing the full Acrobat suite. This move democratized the format and paved the way for its widespread use in industries such as publishing, education, and business.

The early development of PDFs also faced challenges, such as the limited functionality for editing and the large file sizes, which made them less practical for certain applications. However, Adobe continuously updated the format, introducing new features like compression algorithms to reduce file sizes and improved security options for protecting sensitive information. By the late 1990s, PDFs had become a standard for sharing documents electronically, particularly in professional and academic settings.

In 2008, Adobe opened up the PDF specification, allowing other companies to develop tools and software that could create and edit PDFs. This decision further accelerated the adoption of PDFs and led to the development of third-party tools like HiPDF and Smallpdf, which offered more affordable and user-friendly solutions for working with PDFs. Today, PDFs are ubiquitous, used for everything from official documents to e-books, and their versatility continues to make them a cornerstone of digital communication.

Impact of PDFs on Information Sharing

The introduction of PDFs revolutionized the way information is shared across platforms and devices. By providing a standardized format that preserves the layout, formatting, and visual integrity of documents, PDFs became an indispensable tool for professional, academic, and personal communication. One of the most significant impacts of PDFs was their ability to bridge the gap between different operating systems and software applications, ensuring that a document created on one system could be viewed identically on another without any loss of quality or formatting.

PDFs also introduced advanced security features, such as encryption and password protection, which made them ideal for sharing sensitive information. This aspect was particularly crucial for industries like law, finance, and healthcare, where confidentiality is paramount. Additionally, the ability to embed multimedia elements like images, hyperlinks, and even audio and video within PDFs enhanced the way information could be presented, making it more engaging and interactive.

The universal adoption of PDFs has also driven the development of complementary technologies, such as document conversion tools and AI-powered PDF readers. Tools like HiPDF and ChatPDF enable users to convert, edit, and interact with PDFs in innovative ways, such as summarizing long documents or extracting key insights. These advancements have further amplified the impact of PDFs, making them more accessible and user-friendly for a broader audience.


nh hiking guide

Category : Guide

New Hampshire offers breathtaking hiking experiences with its diverse trails, from challenging mountain peaks to serene forest paths. Known as the Granite State, it attracts outdoor enthusiasts with its stunning landscapes and picturesque scenery. The White Mountains provide some of the most spectacular hiking opportunities, catering to both casual hikers and seasoned adventurers. With thousands of trail miles, including the renowned White Mountain National Forest, New Hampshire promises unforgettable outdoor exploration for every skill level and interest.

Overview of New Hampshire’s Hiking Trails

New Hampshire’s hiking trails offer a diverse range of experiences, from easy, family-friendly walks to challenging summit climbs. The state is home to over 4,000 miles of trails, including the iconic White Mountain National Forest, which boasts 1,200 miles of paths. These trails wind through lush forests, cross sparkling streams, and lead to breathtaking vistas. Many trails are well-marked and maintained, making them accessible to hikers of all skill levels.

The White Mountains are a highlight for many hikers, with their rugged terrain and panoramic views. Trails like the Franconia Ridge Trail and the Gorge Brook Trail provide opportunities to explore alpine zones and experience the unique beauty of the region. Other areas, such as the Monadnock region, offer shorter but equally rewarding hikes with expansive views. Whether you’re seeking a leisurely stroll or an adrenaline-pumping adventure, New Hampshire’s trails cater to every preference and ability.

Seasonal changes add an extra layer of charm, with spring wildflowers, summer greenery, fall foliage, and winter snow-covered landscapes. With such variety, it’s no wonder New Hampshire remains a top destination for hikers from across the country.

Best Hikes in New Hampshire

New Hampshire boasts a variety of iconic hikes, offering breathtaking views and unforgettable experiences. Trails like Mount Lafayette, Franconia Ridge, and Mount Monadnock provide challenging climbs and stunning alpine scenery, while others feature serene forests and waterfalls.

Mount Lafayette and Franconia Ridge Trail Loop

One of New Hampshire’s most iconic hiking experiences, the Mount Lafayette and Franconia Ridge Trail Loop offers breathtaking panoramic views and challenging terrain. This 8.5-mile loop is a must for experienced hikers, featuring steep climbs and rugged trails. The loop includes Mount Lafayette, Little Haystack Mountain, and Mount Lincoln, with elevations reaching over 5,000 feet. Hikers are rewarded with stunning alpine vistas, especially during peak foliage season. The trail is part of the Appalachian Trail and is known for its exposed ridges and dramatic scenery. Proper hiking gear and physical conditioning are essential due to the trail’s difficulty. Weather conditions can change rapidly, so hikers should check forecasts before starting. This trail is a testament to New Hampshire’s rugged beauty and is a highlight for anyone exploring the White Mountains.

Mount Willard Trail

Mount Willard Trail is a beloved hiking destination in New Hampshire, offering some of the most stunning views in the White Mountains. This 3.2-mile round-trip trail is moderately challenging and suitable for hikers of various skill levels. It leads to the summit of Mount Willard, which stands at 3,054 feet, providing breathtaking panoramic views of Crawford Notch and surrounding peaks, including Mount Washington. The trail is well-maintained and features a steady incline, making it a popular choice for both families and seasoned hikers. In the fall, the foliage is spectacular, attracting many visitors. The trail is part of the White Mountain National Forest and also connects to the Appalachian Trail, adding to its appeal. Hikers can enjoy the peaceful forest surroundings and the rewarding vistas at the summit. It’s an excellent option for those seeking a memorable day hike with exceptional scenery. Be sure to check trail conditions and weather forecasts before heading out, as mountain conditions can change rapidly.

Welch-Dickey Loop Trail

The Welch-Dickey Loop Trail is a popular 4.5-mile loop hike in New Hampshire, known for its challenging terrain and rewarding scenery. Located in the White Mountain National Forest, this trail offers a rigorous workout with its steep inclines and rocky sections. The loop takes hikers through dense forests, over scrambles, and across open ledges, providing stunning views of the surrounding mountains and valleys. The trail includes two peaks: Welch Mountain (2,605 feet) and Dickey Mountain (2,734 feet), both offering panoramic vistas. The loop is particularly beloved for its variety of landscapes and the sense of accomplishment it brings. Hikers should be prepared for uneven terrain and potential weather changes. Bring plenty of water and snacks, as the trail can be physically demanding. The Welch-Dickey Loop is a must-do for those seeking a challenging yet scenic hike in the heart of New Hampshire’s wilderness. Its unique rock formations and alpine-like settings make it a standout among the state’s many trails.

Mount Monadnock via Gorge Brook Trail

Mount Monadnock, standing at 3,165 feet, is one of New Hampshire’s most iconic peaks, and the Gorge Brook Trail offers a direct route to its summit. This 2-mile trail is a popular choice for hikers seeking a challenging yet rewarding experience. The path begins in a lush forest, gradually ascending through a mix of hardwood and evergreen trees. As hikers climb higher, the terrain becomes steeper and rockier, requiring careful footing. The final stretch opens up to expansive views, with the summit offering panoramic vistas of the surrounding landscape. On a clear day, hikers can see for miles in every direction, taking in the beauty of New Hampshire’s countryside. The Gorge Brook Trail is an excellent option for those looking to experience the state’s natural beauty in a single, memorable hike. Its relatively short length and scenic payoff make it a favorite among both locals and visitors. Whether you’re a seasoned hiker or looking for a challenging day hike, Mount Monadnock via Gorge Brook Trail delivers an unforgettable adventure.

West Rattlesnake Mountain

West Rattlesnake Mountain is a beloved hiking destination in New Hampshire, known for its stunning views and relatively short, family-friendly trails. Located near Squam Lake, the mountain offers a 1.5-mile round-trip hike that is perfect for those seeking a less strenuous yet rewarding outdoor experience. The trail winds through a dense forest, emerging at a rocky overlook with panoramic views of the surrounding hills and lakes. On clear days, hikers can enjoy vistas stretching miles into the distance. The summit is particularly popular during foliage season, when the vibrant fall colors paint the landscape in shades of orange, red, and yellow. West Rattlesnake Mountain is an excellent choice for families or hikers looking to escape into nature without committing to a full-day trek. Its accessible location and scenic payoff make it a must-visit for anyone exploring New Hampshire’s hiking trails. Whether you’re a casual hiker or simply looking for a quick adventure, this trail promises an unforgettable experience.

Artists Bluff

Artists Bluff is a popular hiking destination in New Hampshire, renowned for its stunning views and accessible trails. Located in Franconia Notch State Park, this short but rewarding hike offers breathtaking panoramas of the surrounding mountains and valleys. The trail is approximately 1.5 miles round-trip, making it an excellent choice for families or those seeking a quick outdoor adventure. The path begins with a gentle ascent through a mixed forest before leading to an open rocky bluff. From the summit, hikers are greeted with spectacular views of Echo Lake, Cannon Mountain, and the Franconia Range. The bluff is particularly famous for its vibrant fall colors, attracting photographers and nature enthusiasts alike. Artists Bluff is also a great spot for picnicking, with its scenic overlook providing a peaceful setting to relax and enjoy the natural beauty of New Hampshire. Whether you’re a seasoned hiker or just starting out, this trail promises an unforgettable experience with its combination of ease and scenic splendor;

Mount Major

Mount Major is a beloved hiking destination in New Hampshire, offering a moderate yet rewarding climb with stunning views. Located in the Belknap Mountains, the summit stands at 1,786 feet, providing panoramic vistas of Lake Winnipesaukee and the surrounding landscape. The most popular route to the summit is the Gorge Brook Trail, which spans approximately 4;5 miles round-trip. This well-marked trail begins with a gentle ascent through a shaded forest before becoming steeper as it approaches the summit. Along the way, hikers can enjoy the serene sounds of Gorge Brook and the occasional glimpses of wildlife. The summit itself is open and rocky, offering unobstructed views that make the effort well worth it. Mount Major is a great option for hikers of most skill levels, though it can be quite busy on weekends. The trail is well-maintained, making it accessible for families and casual hikers. The combination of scenic beauty and manageable terrain makes Mount Major a must-visit for anyone exploring New Hampshire’s hiking trails.

Mount Pierce

Mount Pierce, standing at 4,310 feet, is a popular hiking destination in New Hampshire’s White Mountains. It is part of the Presidential Range and offers a rewarding day hike for outdoor enthusiasts. The most common route to the summit is via the Crawford Path, a well-maintained trail that spans approximately 6.4 miles round-trip. The hike begins with a gradual ascent through a lush forest, eventually leading to more open terrain with scenic views. As hikers climb higher, the trail becomes steeper and rockier, but the payoff at the summit is well worth the effort. From the top, visitors can enjoy breathtaking 360-degree views of the surrounding mountains and valleys. Mount Pierce is also notable for being the northernmost peak in the Presidential Range. The trail is suitable for hikers of moderate skill levels, though it can be challenging in inclement weather. With its stunning vistas and accessible trail, Mount Pierce is a must-visit for anyone exploring New Hampshire’s hiking trails.

North Moat Mountain and Red Ridge Loop

North Moat Mountain and Red Ridge Loop is a standout hiking trail in New Hampshire, offering a challenging yet rewarding experience. This 10.2-mile loop is known for its diverse terrain and spectacular scenic views. The trail takes hikers through dense forests, across streams, and up to the summit of North Moat Mountain, where panoramic views of the surrounding mountains and valleys await. The Red Ridge section of the loop adds a unique dimension, with its open ridges and dramatic overlooks. This trail is ideal for hikers seeking a full-day adventure with varied landscapes and elevation changes. While the length and terrain may be demanding for some, the vistas and sense of accomplishment make it a memorable experience; Proper preparation, including sturdy footwear and plenty of water, is essential for tackling this route. North Moat Mountain and Red Ridge Loop is a gem for those looking to explore the best of New Hampshire’s hiking offerings.

Percy Peaks

Percy Peaks is a popular hiking destination in New Hampshire, offering a scenic and moderately challenging trail. Located within the Nash Stream Forest, this 4.0-mile hike provides a rewarding outdoor experience. The trail features a mix of forested paths, rocky terrain, and occasional streams, leading hikers to the summit of Percy Peaks. Known for its stunning views, the summit offers panoramic vistas of the surrounding wilderness and distant mountains. The trail is well-marked and maintained, making it accessible for hikers of moderate skill levels. While the climb can be steep in certain sections, the payoff is well worth the effort. Hikers can enjoy the peaceful atmosphere of the forest and the sense of accomplishment upon reaching the top. Percy Peaks is a great option for those seeking a day hike with memorable scenery. Be sure to bring a map and compass, as the trail can be less crowded than some of the more popular routes in the state.

Pine Mountain

Pine Mountain is a beloved hiking destination in New Hampshire, offering a moderate 3.5-mile round-trip trail that is ideal for families and beginners. The trail winds through a mix of forested areas and open ledges, providing hikers with a variety of landscapes to enjoy. One of the highlights of Pine Mountain is its historic fire tower at the summit, which offers stunning 360-degree views of the surrounding countryside. On a clear day, hikers can see for miles, taking in the beauty of the White Mountains and beyond. The trail is well-maintained and relatively easy to navigate, making it a great option for those looking for a shorter but rewarding hike. The summit is also a peaceful spot to relax and enjoy a picnic while soaking in the breathtaking views. Pine Mountain is a must-visit for anyone exploring New Hampshire’s hiking trails, offering a memorable experience for hikers of all skill levels.


portion sizes for diabetics pdf

Category : PDF

Managing blood sugar and maintaining a healthy weight requires understanding proper portion sizes. The Diabetes Plate Method is a helpful tool for balanced meals, emphasizing portion control to avoid overeating and regulate carbohydrate intake effectively.

1.1 Why Portion Control is Crucial for Diabetes Management

Portion control is vital for managing blood sugar levels and preventing complications. It helps regulate carbohydrate intake, avoiding spikes in blood sugar. Proper portions prevent overeating, supporting weight management and improving insulin sensitivity. Balancing meals with appropriate portion sizes ensures better glycemic control and aligns with individualized meal plans for optimal diabetes care.

Understanding Portion Size vs. Serving Size

A portion is the amount of food you eat at one time, while a serving size is a standardized measurement used on nutrition labels. Understanding the difference helps in planning meals effectively for diabetes management.

2.1 Defining Portion Size and Serving Size

A portion size is the amount of food you choose to eat at one time, varying by individual appetite and needs. In contrast, a serving size is a standardized measurement, often found on nutrition labels, representing a specific amount of food. For example, a serving of meat is typically 3 ounces, about the size of the palm of your hand. Understanding this distinction is crucial for accurate meal planning and blood sugar management.

2.2 How Portion Sizes Have Changed Over Time

Portion sizes have significantly increased over the past few decades, particularly in restaurants. A single entrée can now equal three to four servings, leading to higher calorie and carbohydrate intake. This trend contributes to overeating, making it challenging for diabetics to manage blood sugar and weight. Awareness of these changes is essential for maintaining control over food intake and adhering to dietary guidelines.

The Diabetes Plate Method

The Diabetes Plate Method is a simple visual guide for balanced meals. It helps manage portion sizes by dividing a plate into sections for vegetables, protein, and carbs.

3.1 How to Use the Plate Method for Balanced Meals

The Diabetes Plate Method involves filling a 9-inch plate with 50% non-starchy vegetables, 25% protein, and 25% carbs. Add a side of dairy or fruit and choose water or a low-calorie drink. This visual guide helps manage portion sizes, ensuring balanced nutrition and better blood sugar control while supporting weight management goals.

3.2 Allocating Plate Sections for Different Food Groups

Divide your plate into three sections: 50% for non-starchy vegetables like spinach or broccoli, 25% for lean protein sources such as grilled chicken or fish, and 25% for whole grains or starchy vegetables like rice or potatoes. This allocation ensures a balanced meal, helping to stabilize blood sugar levels and meet dietary needs effectively while promoting overall health and well-being.

Estimating Portion Sizes Without Measuring Tools

Use your hands as a guide: a palm-sized portion for protein, a thumb-sized amount for cheese, and a fist-sized serving for grains or starches.

4.1 Using Your Hands as a Guide for Portion Sizes

Your hands can help estimate portion sizes. A palm-sized portion is ideal for protein like meat or fish. Use your thumb to measure cheese or fats, and a fist-sized amount for grains or starches. This method provides a quick and practical way to control portions, especially when measuring tools aren’t available. It helps maintain balanced meals and supports blood sugar management.

4.2 Common Household Items as Portion Guides

Common household items can help estimate portion sizes. A tennis ball represents about 1 cup of vegetables. A deck of cards or the palm of your hand measures 3 ounces of protein. A thumb-sized portion equals 1 ounce of cheese or fats. These visual guides make portion control practical and easy, especially when dining at home or eating out without measuring tools.

Managing Carbohydrate Portions

Balancing carbs is key for blood sugar control. Focus on whole foods, count carbs, and use tools like food labels and the Diabetes Plate Method to guide portions effectively.

5.1 The Impact of Carbohydrates on Blood Sugar Levels

Carbohydrates directly affect blood sugar levels, as they break down into glucose during digestion. Foods high in carbs, such as grains, starchy vegetables, and fruits, cause blood sugar to rise. The speed and extent of this rise depend on the type of carb and accompanying foods. Fiber-rich carbs, like whole grains, slow absorption, while refined carbs spike blood sugar rapidly. Managing carb portions is crucial for maintaining stable blood sugar levels and preventing complications.

5.2 Practical Tips for Counting Carbs

Effectively managing carbs starts with reading nutrition labels to identify serving sizes and carb content. Use the Diabetes Plate Method to allocate 25-30% of your plate to carb-rich foods. Track carbs in a food diary or app to stay within daily limits. Measure portions using household items like cups or your hand. Pair carbs with protein or fat to slow absorption. Be mindful of hidden carbs in sauces, dressings, and processed snacks.

Protein and Fat Portions for Diabetics

Protein and fat portions should be balanced to support blood sugar stability. Aim for 3-4 ounces of lean protein per meal, equivalent to the size of your palm. Healthy fats like avocado and nuts should be consumed in moderation, using your thumb as a guide for portion size. Focus on high-quality sources to optimize metabolic health.

6.1 Recommended Portion Sizes for Protein Sources

For diabetics, protein portions should be balanced to support blood sugar stability. Lean protein sources like poultry, fish, and legumes are ideal. Aim for 3-4 ounces per serving, roughly the size of your palm. Plant-based proteins, such as tofu or beans, should be about 1/2 cup cooked. Healthy fats like avocado and nuts should be consumed in moderation, using your thumb as a guide for portion size. Proper portioning helps maintain metabolic health and blood sugar control.

6.2 Balancing Healthy Fats in Your Diet

Healthy fats, like monounsaturated and polyunsaturated fats, are essential for heart health and blood sugar regulation. Use your thumb to measure portions—about 1 teaspoon of fats like olive oil or nuts per serving. Avocados and fatty fish are excellent choices, while saturated fats should be limited. Balancing fats helps maintain energy levels without overloading on calories or carbs, supporting overall metabolic and cardiovascular health effectively.

The Role of Fiber in Portion Control

Fiber-rich foods like vegetables and whole grains help control blood sugar and portion sizes by promoting satiety. Using the plate method, allocate half your plate to fiber-rich foods to naturally manage portions and improve digestion while maintaining blood sugar balance.

7.1 High-Fiber Foods and Their Portion Guidelines

High-fiber foods, such as vegetables, whole grains, and legumes, play a key role in portion control for diabetics. Non-starchy vegetables like broccoli or spinach can be consumed in larger portions (1-2 cups) due to their low calorie and high fiber content. Whole grains like brown rice or quinoa should be limited to 1/3 cup per serving. Legumes, such as lentils or beans, are portioned at 1/2 cup cooked, while fruits like berries or apples are typically 1 small piece or 1/2 cup. Incorporating these foods helps slow digestion, stabilize blood sugar, and reduce overall portion sizes naturally.

7.2 How Fiber Affects Blood Sugar Levels

Fiber slows the absorption of carbohydrates, helping to stabilize blood sugar levels. Soluble fiber, found in foods like oats, beans, and apples, forms a gel-like barrier, delaying sugar absorption. Insoluble fiber, such as in whole grains and vegetables, promotes satiety and prevents overeating. Both types improve insulin sensitivity and reduce blood sugar spikes, making high-fiber foods essential for diabetes management.

Managing Portion Sizes When Eating Out

Eating out can be challenging due to larger portions. Opt for smaller menu options, avoid high-calorie extras, and consider taking leftovers home to maintain portion control effectively.

8.1 Strategies for Dealing with Large Restaurant Portions

When dining out, request smaller portions or share meals to avoid overeating. Ask for a to-go box upfront and portion out your meal immediately. Avoid all-you-can-eat options and opt for healthier sides. Be mindful of high-calorie extras like sauces or cheese. Using the Diabetes Plate Method as a guide, ensure your plate is balanced with vegetables, protein, and carbs, even when eating out.

8.2 Tips for Making Healthier Choices at Restaurants

Choose grilled or baked options instead of fried. Opt for smaller plates or appetizer portions to control intake. Select meals rich in vegetables, lean proteins, and whole grains; Limit sugary drinks and desserts. Review nutrition information online before ordering. Don’t hesitate to ask for modifications, like less sauce or oil. Pair meals with a side salad to boost fiber and balance macronutrients effectively.

Grocery Shopping for Proper Portion Sizes

Read nutrition labels to compare serving sizes and choose products with appropriate portion sizes; Select pre-portioned snacks and fresh produce for healthier, balanced meal planning.

9.1 Reading Nutrition Labels for Serving Sizes

Reading nutrition labels helps identify serving sizes and nutritional content. Check the serving size and number of servings per package to understand portion guidelines. Focus on calories, carbohydrates, and fiber content, which are critical for blood sugar management. Compare brands to find options with appropriate serving sizes and fewer added sugars. Use the percent daily value to make informed choices for balanced meals and snacks.

9.2 Choosing Products with Appropriate Portion Sizes

Opt for products with clear serving size information and single-serving packages to simplify portion control. Avoid oversized packaging that may lead to overeating. When shopping, compare brands to find options with reasonable portion sizes and lower added sugars. Prioritize products high in fiber and low in carbohydrates to support blood sugar management. Always check nutrition labels to ensure the product aligns with your dietary needs and portion goals.

The Benefits of Proper Portion Sizes Beyond Blood Sugar Control

Proper portion sizes promote weight management and improve overall health, reducing the risk of heart disease and hypertension while enhancing energy levels and well-being.

10.1 Weight Management Through Portion Control

Portion control is essential for weight management, as it helps avoid overeating and keeps calorie intake in check. By adhering to recommended serving sizes, individuals can maintain a healthy weight, which is crucial for overall health and blood sugar regulation. Proper portions prevent excessive calorie and fat consumption, reducing the risk of obesity and related conditions while promoting a balanced diet.

10.2 Improving Overall Health and Well-being

Proper portion sizes promote balanced nutrition, enhancing overall health and well-being. By avoiding overeating, individuals reduce the risk of chronic diseases like heart disease and obesity. Balanced meals support steady energy levels and better mental health, fostering a healthier relationship with food and empowering informed choices for a higher quality of life.

Mastering portion sizes is key to managing diabetes effectively. Seek personalized advice from diabetes educators and utilize resources like meal planning guides to maintain a balanced diet and lifestyle.

11.1 Summarizing Key Points for Effective Portion Management

Effective portion management is crucial for blood sugar control and weight management. Use tools like the Diabetes Plate Method, hand guides, and nutrition labels to estimate sizes. Understand the difference between portion and serving sizes, balance meals with vegetables, proteins, and carbs, and avoid oversized restaurant portions. Consistency in carb intake and mindful eating habits will help maintain stable blood sugar levels and overall health. Consulting a dietitian can provide personalized strategies.

11.2 Encouraging Further Education and Professional Guidance

Seeking further education and professional guidance is essential for long-term success in managing diabetes through portion control. Consult with a registered dietitian or diabetes educator to create personalized meal plans. Engage in diabetes self-management education programs to learn practical skills and stay updated on the latest dietary recommendations. These resources provide tailored strategies and support, empowering individuals to maintain healthy habits and achieve their health goals effectively.


mri ordering guide

Category : Guide

Magnetic Resonance Imaging (MRI) is a non-invasive medical imaging technique that uses a strong magnetic field and radio waves to produce detailed images of internal structures.

1.1 What is MRI and How Does It Work?

MRI (Magnetic Resonance Imaging) is a non-invasive imaging technique that uses a strong magnetic field and radio waves to produce detailed images of the body’s internal structures. It doesn’t use ionizing radiation, making it safer for patients. The magnetic field aligns hydrogen atoms in the body, and radio waves disturb this alignment, creating signals that are used to generate high-resolution images of organs and tissues. This allows for accurate diagnosis of injuries and conditions without surgery.

1.2 Advantages of MRI Over Other Imaging Modalities

MRI offers superior soft tissue imaging compared to CT scans or X-rays, providing detailed views of organs, joints, and the nervous system. It avoids ionizing radiation, making it safer for long-term use. MRI is also highly versatile, capable of diagnosing a wide range of conditions, from musculoskeletal injuries to brain disorders, without the need for invasive procedures, enhancing diagnostic accuracy and patient safety.

Clinical Applications of MRI

MRI is widely used for detailed imaging of the brain, spine, joints, and internal organs, aiding in the diagnosis of tumors, injuries, and vascular diseases.

2.1 Common Indications for MRI Scans

MRI scans are commonly used to diagnose injuries, tumors, and diseases affecting the brain, spine, joints, and soft tissues. They are also employed to assess organ damage, detect cancer, and monitor treatment progress. MRI is particularly useful for evaluating claustrophobia in patients and provides detailed images without radiation, making it ideal for sensitive cases, including pediatric and prenatal imaging.

2.2 Specialized MRI Techniques (e.g., Functional MRI, Diffusion MRI)

Specialized MRI techniques include Functional MRI (fMRI), which maps brain activity, and Diffusion MRI, which tracks water movement in tissues. These advanced methods aid in diagnosing neurological disorders, assessing stroke damage, and visualizing tumor cellularity. They provide unique insights into tissue function, enhancing diagnostic accuracy and guiding targeted therapies effectively.

Patient Preparation and Safety

Patients must remove metal objects, inform about claustrophobia, and receive medical clearance. Safety protocols ensure compatibility with implanted devices and prevent adverse reactions during the MRI procedure.

3.1 Preparing Patients for an MRI Scan

  • Patient preparation involves removing metal items, changing into comfortable clothing, and arriving early for paperwork.
  • Inform patients to disclose medical history, metal implants, or claustrophobia to ensure safety.
  • Advise fasting if required and avoid bringing valuables or electronic devices.
  • Explain the procedure to reduce anxiety and ensure compliance during the scan.

3.2 Safety Considerations and Contraindications

MRI safety requires removing metal items and screening for contraindications like pacemakers or ferromagnetic implants. Patients with claustrophobia may need sedation or open MRI. Metallic objects pose risks due to the strong magnetic field. pregnancy is generally avoided in the first trimester unless medically necessary. Ensure proper patient screening and monitoring to prevent complications during the scan.

Ordering an MRI: A Step-by-Step Guide

Ordering an MRI involves selecting the appropriate protocol, preparing the patient, and ensuring insurance coverage. Follow guidelines to optimize image quality and diagnostic accuracy for accurate results.

4.1 Determining the Appropriate MRI Protocol

Determining the right MRI protocol involves assessing the patient’s condition and anatomical focus. Protocols vary by body region and condition, such as brain, spine, or joint imaging. Each protocol specifies sequences and parameters to optimize image quality and diagnostic accuracy. Consultation with radiologists ensures the correct approach for accurate results and effective patient care.

4.2 How to Interpret MRI Results

Interpreting MRI results requires expertise in radiology to identify normal and abnormal findings. Radiologists analyze images for structural anomalies, tissue damage, or pathologies. Reports highlight key observations and recommendations. Clinicians use these insights to diagnose conditions, guide treatments, and monitor progress. Accurate interpretation ensures effective patient care and informed decision-making. Advanced training and experience are crucial for precise and reliable MRI result analysis.

Cost and Insurance Considerations

MRI costs vary by location, scanner type, and insurance coverage. Patients should verify insurance eligibility and inquire about out-of-pocket expenses to plan financially for the procedure.

5.1 Understanding the Cost of an MRI

The cost of an MRI varies widely depending on factors such as location, type of scanner, and whether contrast agents are used. On average, a standard MRI can range from $500 to $3,000 or more. In some cases, insurance may cover a significant portion, reducing out-of-pocket expenses. It’s essential for patients to consult with their healthcare provider or insurance company to get accurate cost estimates and understand any potential financial responsibilities.

5.2 Insurance Coverage and Billing Process

Insurance coverage for MRI scans depends on the policy and medical necessity. Pre-authorization is often required. Patients should verify coverage details with their insurer. The billing process typically involves submitting claims to insurance providers, with out-of-pocket costs determined after processing. Understanding the billing process helps patients manage expenses effectively and avoid unexpected charges, ensuring a smooth financial experience throughout their MRI procedure.

Advanced MRI Techniques

Advanced MRI techniques include contrast-enhanced MRI and magnetic resonance angiography (MRA), enabling detailed visualization of blood vessels and tissue abnormalities for precise diagnostic insights.

6.1 Contrast-Enhanced MRI

Contrast-enhanced MRI uses a gadolinium-based agent to improve image clarity, highlighting specific tissues or abnormalities. It enhances visualization of tumors, inflammation, and vascular structures, aiding in accurate diagnoses. Common applications include brain, liver, and musculoskeletal imaging. The contrast agent is typically administered intravenously, and its use is tailored to the patient’s condition. This technique is particularly beneficial for detecting subtle pathologies that may not be visible on non-contrast scans.

6.2 Magnetic Resonance Angiography (MRA)

Magnetic Resonance Angiography (MRA) is a specialized MRI technique that visualizes blood vessels and their structures without the need for invasive catheters. It is commonly used to diagnose vascular conditions such as aneurysms, stenosis, and malformations. MRA can be performed with or without contrast, depending on the clinical scenario. This non-invasive method provides detailed images of arterial and venous systems, aiding in precise diagnostic and treatment planning.

Patient Selection Criteria

Patient selection for MRI involves assessing medical necessity, contraindications, and ability to tolerate the procedure. Ensure patients meet specific criteria for safety and diagnostic accuracy.

7.1 Identifying Suitable Candidates for MRI

Patients with soft tissue injuries, neurological conditions, or internal organ damage are ideal candidates for MRI. Ensure no ferromagnetic implants or severe claustrophobia. Open MRI or sedation may help anxious patients. Confirm medical necessity and safety for optimal imaging results.

7.2 Managing Patients with Claustrophobia or Anxiety

Use open MRI machines or sedation for anxious patients. Provide clear explanations and breathing techniques to reduce stress. Ensure a calm environment and offer reassurance. Consider pharmacological solutions if necessary. Patient comfort and safety are paramount to ensure successful imaging. Regular communication helps alleviate fears and improves cooperation during the scan.

Comparing MRI to Other Imaging Modalities

MRI offers superior soft tissue imaging compared to CT scans and does not use ionizing radiation, making it safer for repeated use. Ultrasound is less detailed but portable.

8.1 MRI vs. CT Scan

MRI and CT scans differ in imaging technology. MRI uses a magnetic field and radio waves, providing detailed soft tissue images without radiation. CT scans use X-rays, offering faster imaging for bones, lungs, and internal injuries. MRI is superior for soft tissue abnormalities, while CT is more effective for emergency situations and bony structures. Radiation exposure in CT scans is a key consideration, whereas MRI is radiation-free but may require longer scan times.

8.2 MRI vs. Ultrasound

MRI and ultrasound differ in technology and application. MRI uses magnetic fields for detailed soft tissue imaging, while ultrasound relies on sound waves for real-time imaging. Ultrasound is portable, cost-effective, and ideal for superficial structures like organs and joints. MRI provides higher resolution for complex conditions but requires longer scan times. Ultrasound is non-invasive and radiation-free but lacks the depth penetration of MRI, making it less suitable for deep tissues.

Troubleshooting Common Issues

Common MRI issues include motion artifacts, claustrophobia, and equipment malfunctions. Addressing these involves patient preparation, using open MRI machines, or employing sedation for anxious patients.

9.1 Resolving Motion Artifacts in MRI Images

Motion artifacts in MRI images occur when patients move during scans, causing blurred or distorted results. Techniques to resolve this include using faster scanning protocols, patient education on remaining still, and applying motion correction software. Additionally, breath-holding instructions and the use of sedation for anxious patients can minimize movement, ensuring clearer and more accurate diagnostic images.

9.2 Addressing Patient Compliance Challenges

Patient compliance is crucial for successful MRI scans. Challenges often arise due to claustrophobia, anxiety, or discomfort. Strategies to address these issues include patient education, using open MRI machines, and providing sedation when necessary. Clear communication about the procedure and expectations can also reduce anxiety and improve cooperation, ensuring high-quality imaging results.

Future Trends in MRI Technology

Future trends in MRI technology include advancements in speed, resolution, and accessibility. Emerging applications may enhance diagnostic capabilities and expand its use in various medical fields.

10.1 Advances in Speed and Resolution

Advances in MRI technology are expected to significantly improve scan speed and image resolution. Newer systems will enable faster imaging, reducing motion artifacts and enhancing patient comfort. High-resolution images will provide clearer details, aiding in early diagnosis and treatment planning. These innovations are driven by advancements in magnetic field strength, coil design, and AI integration, promising to revolutionize diagnostic medicine and improve patient outcomes.

10.2 Emerging Applications in Diagnostic Medicine

Emerging MRI applications are expanding diagnostic capabilities in oncology, neurology, and cardiology. Advanced techniques like functional MRI and diffusion tensor imaging are improving early detection of diseases. AI-driven analytics enhance image interpretation, enabling precise monitoring of treatment responses. These innovations are transforming MRI into a versatile tool for personalized medicine, offering new insights into complex conditions and improving patient care outcomes across various medical specialties.


black girls must die exhausted pdf

Category : PDF

Black Girls Must Die Exhausted is a captivating novel by Jayne Allen‚ exploring themes of modern womanhood‚ identity‚ and resilience through the journey of Tabitha Walker.

1.1 Overview of the Novel

Black Girls Must Die Exhausted by Jayne Allen introduces Tabitha Walker‚ a 33-year-old Black woman navigating modern womanhood‚ career ambitions‚ and an unexpected pregnancy. The novel delves into themes of identity‚ race‚ and generational patterns‚ offering a raw yet hopeful exploration of Tabitha’s journey. As the first book in a trilogy‚ it sets the stage for a compelling narrative about resilience‚ love‚ and self-discovery‚ resonating deeply with contemporary discussions on Black womanhood and societal expectations.

1.2 Author Jayne Allen and Her Inspiration

Jayne Allen‚ a passionate writer‚ draws inspiration from the complexities of Black womanhood and personal experiences. Her debut novel reflects a deep understanding of identity‚ race‚ and resilience. Allen’s work is influenced by her observations of societal expectations and the strength of women in her life‚ particularly her grandmother. She aims to explore themes of modern womanhood‚ creating relatable characters like Tabitha Walker‚ whose journey resonates with readers seeking authentic stories of struggle and triumph.

The Main Character: Tabitha Walker

Tabitha Walker‚ a determined young Black woman‚ navigates career ambitions and an unexpected pregnancy‚ embodying resilience and strength in the face of life’s challenges.

2.1 Tabitha’s Journey and Personal Growth

Tabitha’s journey is a testament to her resilience as she confronts unforeseen challenges‚ including an unexpected pregnancy after being told she might not conceive. Her path is marked by self-discovery‚ as she learns to balance her career aspirations with the demands of motherhood. Through her experiences‚ Tabitha evolves from a focused professional to a multifaceted individual‚ embracing the complexities of life. Her growth is fueled by courage‚ love‚ and the unwavering support of her friends.

2.2 The Role of Hair in Tabitha’s Identity

Hair plays a significant role in Tabitha’s identity‚ symbolizing her cultural heritage and personal evolution. Throughout her journey‚ her hairstyles reflect her inner struggles and growth‚ serving as a visual narrative of her self-discovery. The beauty shop emerges as a refuge‚ not just for grooming but for communal support‚ where she finds solace and validation. Hair becomes a metaphor for resilience‚ identity‚ and the interconnectedness of Black women’s experiences‚ deeply intertwined with her path to self-acceptance and empowerment.

Themes Explored in the Novel

The novel delves into modern womanhood‚ identity‚ and resilience‚ exploring themes of career ambition‚ motherhood‚ and generational legacies‚ offering a nuanced portrayal of Black women’s experiences.

3.1 Modern Womanhood and Black Identity

Tabitha Walker’s journey in Black Girls Must Die Exhausted mirrors the struggles of modern Black womanhood‚ blending career aspirations with cultural identity. The novel examines the dual pressures of societal expectations and personal ambition‚ highlighting how Black women navigate these challenges while preserving their heritage. Through Tabitha’s experiences‚ Jayne Allen sheds light on the intricate dance between identity‚ race‚ and femininity‚ offering a relatable and poignant portrayal of contemporary Black womanhood.

3.2 Balancing Career and Motherhood

Tabitha Walker’s narrative in Black Girls Must Die Exhausted delves into the challenges of balancing professional success with the demands of motherhood. After discovering her pregnancy‚ Tabitha confronts societal expectations and personal sacrifices‚ illustrating the struggles many women face. The novel portrays her journey as she adapts to new responsibilities‚ blending her career goals with the realities of parenthood‚ offering a candid exploration of the complexities women encounter in pursuit of a fulfilling life.

3.3 Generational Patterns and Family Legacy

Black Girls Must Die Exhausted examines the generational patterns and family legacy through Tabitha Walker’s experiences. Her grandmother’s adage‚ “Black girls must die exhausted‚” reflects the resilience and sacrifices of Black women across generations. The novel explores how these inherited patterns shape Tabitha’s identity and decisions‚ particularly as she navigates motherhood and career. It highlights the cultural and historical context of these legacies‚ offering a poignant look at the interplay between past and present in shaping Black women’s lives.

The Trilogy Structure

Black Girls Must Die Exhausted is the first book in a trilogy‚ setting the stage for Tabitha Walker’s journey through modern womanhood‚ career‚ and motherhood challenges.

4.1 Book 1: Setting the Stage

Black Girls Must Die Exhausted introduces Tabitha Walker‚ a young Black woman navigating career ambitions‚ unexpected pregnancy‚ and societal expectations. The novel lays the foundation for her journey‚ exploring themes of identity‚ resilience‚ and generational patterns. Through Tabitha’s experiences‚ the book sets the stage for the trilogy‚ delving into the challenges of modern womanhood and the importance of support systems. The first book establishes the tone‚ blending personal growth with cultural insights‚ preparing readers for the continuation of Tabitha’s story.

4.2 Upcoming Books in the Series

The trilogy continues with Tabitha Walker’s evolving journey‚ exploring deeper themes of identity‚ family‚ and societal expectations. The upcoming books promise to expand on her personal growth and the challenges of modern womanhood. They will delve into the cultural and generational patterns that shape her experiences‚ offering a nuanced exploration of Black identity and resilience. Readers can expect a compelling continuation of Tabitha’s story‚ blending humor‚ love‚ and strength‚ as the series further solidifies its place in African American fiction.

Cultural and Social Context

Black Girls Must Die Exhausted is set against the backdrop of modern race relations and the legacy of civil rights‚ reflecting the challenges Black women face in society today.

5.1 Race Relations and Civil Rights

The novel delves into the historical and contemporary struggles of race relations‚ drawing parallels between the civil rights era and modern-day challenges faced by Black women. Tabitha’s grandmother‚ who observed the civil rights movement‚ influences her perspective on resilience. The story highlights how societal expectations and systemic inequities continue to shape the lives of Black women‚ emphasizing the importance of understanding and addressing these issues in the pursuit of equality and justice.

5.2 The Role of the Beauty Shop as a Refuge

The beauty shop serves as a sanctuary for Tabitha and other Black women‚ offering a space for communal support and shared experiences. It symbolizes a cultural haven where hair becomes a metaphor for identity‚ strength‚ and resilience. Within its walls‚ stories are exchanged‚ and bonds are strengthened‚ providing solace from the external pressures of racism and societal expectations. This refuge underscores the importance of community and the enduring power of Black female solidarity in navigating life’s challenges.

The Support System

Tabitha’s support system‚ including her two longtime friends and her grandmother‚ plays a vital role in her journey‚ providing courage‚ laughter‚ and unwavering love during her challenges.

6.1 The Importance of Friendships

Tabitha’s friendships serve as a cornerstone of her support system‚ offering emotional strength and camaraderie. Her friends provide a safe space for her to navigate life’s challenges‚ sharing laughter and tears. Their bond is rooted in trust and mutual understanding‚ allowing Tabitha to confront her struggles with resilience. These relationships highlight the power of sisterhood in overcoming adversity‚ proving indispensable as she faces unexpected setbacks and personal growth.

6.2 The Influence of Tabitha’s Grandmother

Tabitha’s grandmother plays a pivotal role in shaping her perspective‚ particularly through the adage‚ “Black girls must die exhausted.” Her grandmother‚ who observed the struggles of Black women during the civil rights era‚ imparts wisdom that resonates deeply with Tabitha. This phrase becomes a guiding‚ yet challenging‚ mantra for Tabitha as she navigates her own journey of identity‚ career‚ and motherhood. Her grandmother’s insights offer both comfort and a harsh reality‚ influencing Tabitha’s resilience and determination to thrive despite obstacles.

The Title’s Significance

The title reflects the resilience and societal pressures Black women face‚ encapsulating Tabitha’s journey and the broader context of Black female experiences in modern society.

7.1 Unpacking the Phrase “Black Girls Must Die Exhausted”

The phrase‚ uttered by Tabitha’s grandmother‚ reflects the historical and contemporary struggles of Black women‚ emphasizing resilience and societal expectations. It serves as a metaphor for the physical and emotional toll faced by Black women‚ mirroring Tabitha’s journey of balancing career‚ motherhood‚ and identity. The phrase becomes a rallying cry‚ highlighting the strength and endurance required to navigate systemic challenges and generational patterns‚ while also questioning the sustainability of such exhaustion in modern life.

7.2 Historical and Contemporary Relevance

The phrase “Black Girls Must Die Exhausted” resonates deeply‚ bridging historical and modern struggles. Rooted in the civil rights era‚ it reflects the resilience of Black women facing systemic oppression. Today‚ it highlights ongoing challenges like racism‚ gender bias‚ and societal expectations. The novel underscores how these issues persist‚ making the phrase a powerful commentary on the endurance and strength required for survival. Its relevance lies in its ability to connect past and present‚ sparking conversations about equity and justice for Black women.

Reception and Impact

The novel received widespread acclaim‚ resonating deeply with readers and critics alike‚ cementing its place in African American fiction as a powerful exploration of modern womanhood and resilience.

8.1 Reviews and Reader Responses

Readers praised Black Girls Must Die Exhausted for its intimate storytelling and relatable portrayal of Tabitha Walker’s journey. Many highlighted the emotional depth and authenticity‚ calling it a “testament to modern womanhood.” The novel resonated deeply‚ particularly with Black women‚ who appreciated its honest exploration of identity‚ career‚ and motherhood. The book’s ability to balance humor and heartache left a lasting impact‚ with readers eagerly anticipating the next installments in the trilogy.

8.2 The Novel’s Place in African American Fiction

Black Girls Must Die Exhausted holds a significant place in African American Fiction‚ offering a fresh perspective on modern womanhood and identity. Its exploration of career‚ motherhood‚ and generational patterns resonates deeply with readers seeking authentic narratives. The novel’s emotional storytelling and cultural relevance position it as a vital contribution to contemporary Black literature‚ continuing the tradition of powerful female protagonists and unflinching societal commentary.

Black Girls Must Die Exhausted is a powerful exploration of modern womanhood‚ identity‚ and resilience. Through Tabitha Walker’s journey‚ Jayne Allen sheds light on the challenges Black women face‚ blending humor and heartache. The novel’s cultural relevance and emotional depth make it a standout in African American Fiction‚ leaving readers eager for the next installment in the trilogy. It’s a testament to the strength of Black women and their enduring spirit.


what you are looking for is in the library pdf

Category : PDF

What You Are Looking For Is in the Library: A Guide to Self-Discovery

Discover how libraries embody self-discovery through Sayuri Komachi’s intuitive guidance in Michiko Aoyama’s novel, highlighting community, connection, and personal growth, available as a PDF for global readers․

Michiko Aoyama is a celebrated Japanese author known for her heartfelt and thought-provoking novels․ Born in 1970 in Aichi Prefecture, Japan, Aoyama initially worked as a reporter before transitioning to fiction․ Her writing often explores themes of self-discovery, community, and the transformative power of literature․ What You Are Looking For Is in the Library showcases her unique ability to weave storytelling with the quiet wisdom of its enigmatic librarian, Sayuri Komachi․ Aoyama’s work has gained international acclaim, resonating with readers seeking inspiration and connection․ Her novel, available as a PDF, continues to charm audiences worldwide․ Learn more․

The Central Theme: Self-Discovery and Libraries

Michiko Aoyama’s novel beautifully explores the theme of self-discovery through the lens of a community library․ The library, guided by the enigmatic Sayuri Komachi, becomes a sanctuary for individuals seeking answers to life’s challenges․ Aoyama highlights how libraries transcend mere book repositories, evolving into spaces for personal growth and connection․ Komachi’s intuitive ability to recommend books aligns with visitors’ inner quests, emphasizing the transformative power of literature and community․ This heartwarming narrative celebrates the magic of libraries as hubs for self-discovery and human connection․ Learn more․

The Role of Sayuri Komachi

Sayuri Komachi, the enigmatic librarian, serves as a guiding light, connecting visitors to life-changing books․ Her intuitive understanding of their needs fosters personal journeys and growth․

The Enigmatic Librarian

Sayuri Komachi captivates as a librarian with an uncanny ability to understand her visitors’ deepest needs․ Her calm demeanor and intuitive nature make her a guiding force, connecting individuals to transformative books․ Often likened to characters from Miyazaki films, her presence feels almost magical․ Komachi’s role extends beyond books, fostering community bonds and offering solace․ Her wisdom and insight create a sanctuary where people find more than stories—they discover themselves․ This enigmatic figure is the heart of the library, embodying its spirit and charm․

Her Ability to Sense Visitors’ Needs

Sayuri Komachi’s extraordinary talent lies in her ability to intuitively understand each visitor’s innermost desires․ With a gentle smile, she asks, “What are you looking for?” Her profound intuition guides her to recommend books that resonate deeply with their souls․ Whether it’s a restless retail assistant seeking new skills or a mother navigating career challenges, Komachi’s recommendations are uncannily precise․ Her gift fosters personal growth and connection, making her a beloved figure in the community․ Her ability to sense needs transforms the library into a sanctuary of self-discovery and inspiration․

Structure of the Book

Structured around multiple vignettes, the book weaves interconnected stories of visitors guided by Sayuri Komachi’s recommendations․ Each chapter highlights the library’s role in transforming lives through literature․

Multiple Vignettes and Character Stories

The book is structured as a series of interconnected vignettes, each focusing on a different character whose life is transformed by a visit to the library․ Set in contemporary Tokyo, these short stories explore themes of self-discovery and personal growth․ A restless retail assistant, a mother overcoming workplace challenges, and an accountant with a passion for antiques are among the diverse characters whose journeys intersect at the library․ Through their experiences, the novel highlights the power of literature to guide individuals toward their true desires and foster meaningful connections within the community․

Key Characters and Their Journeys

The novel centers around Sayuri Komachi, the enigmatic librarian, and a cast of characters whose lives she touches․ A restless retail assistant seeks new skills, a mother navigates workplace challenges after maternity leave, and an accountant harbors a dream of opening an antique store․ Each character’s journey is unique, yet interconnected, as they find guidance through Komachi’s intuitive book recommendations․ Their stories explore themes of self-discovery, growth, and the transformative power of literature, weaving a tapestry of human connection and inspiration․

Cultural and Social Themes

The novel celebrates libraries as vibrant community spaces, fostering connection and personal growth․ It highlights cultural themes of Japanese society, emphasizing transformation and collective well-being․

Community and Connection

The library serves as a vibrant hub, fostering meaningful connections among diverse individuals․ Sayuri Komachi’s ability to sense visitors’ needs bridges gaps, creating a sense of belonging․ Through shared experiences and book recommendations, the novel highlights how libraries strengthen community bonds, offering solace and inspiration․ This cultural gem emphasizes the power of connection in transforming lives, making it a heartfelt tribute to the enduring role of libraries in fostering unity and understanding․

Personal Growth and Transformation

Sayuri Komachi’s intuitive recommendations guide visitors on journeys of self-discovery, fostering personal growth․ Through her insights, characters like a restless retail assistant and a mother overcoming workplace challenges find renewed purpose․ The library becomes a sanctuary for transformation, where books serve as catalysts for change․ This heartfelt novel illustrates how embracing our true desires and aspirations can lead to profound inner growth, resonating with readers seeking inspiration for their own life’s journey․

Comparison with Other Works

Similar to The Midnight Library and Before the Coffee Gets Cold, this novel shares themes of self-discovery and life-changing encounters, offering a unique yet familiar heartfelt experience․

Similarities to The Midnight Library

Much like Matt Haig’s The Midnight Library, What You Are Looking For Is in the Library explores themes of self-discovery and life-altering choices through a mystical library setting․ Both novels feature a central character guiding individuals at crossroads, offering transformative experiences․ The emotional depth, reflective tone, and focus on personal growth create a shared resonance, appealing to readers seeking stories about second chances and the power of introspection․

Unique Aspects of the Novel

What You Are Looking For Is in the Library stands out for its delicate blend of Japanese culture and universal themes․ Unlike other works, it centers on a librarian’s intuitive ability to sense visitors’ unspoken needs, crafting a story where books serve as catalysts for profound life changes․ The novel’s charm lies in its quiet, hopeful tone and its celebration of libraries as sacred spaces for connection and self-discovery, offering a unique perspective on how stories can guide us toward our true paths․

Availability in PDF and Other Formats

The novel is widely available in PDF and EPUB formats, accessible through digital libraries, online retailers, and platforms like Libby, making it easy for global readers to download and enjoy․

Downloading and Reading Options

The novel is available in PDF and EPUB formats, ensuring accessibility across various devices․ Readers can download the book from online retailers or borrow it through digital libraries using apps like Libby․ Additionally, the PDF version can be accessed via platforms offering free and paid downloads․ Many universities and libraries also provide free access to the book in digital formats․ This versatility makes it easy for readers worldwide to enjoy the story on smartphones, tablets, or e-readers, enhancing the reading experience with convenience and flexibility․

Access Through Digital Libraries

Readers can easily access What You Are Looking For Is in the Library through digital libraries, offering free or borrowed access to the PDF version․ Platforms like Libby allow users to borrow the book with a library membership, making it accessible globally․ Many universities and educational institutions also provide free access to the novel in digital formats․ This convenient option eliminates the need for physical copies, enabling readers to enjoy the story on smartphones, tablets, or e-readers, fostering a seamless reading experience for audiences worldwide․

Impact and Reception

The novel has received widespread acclaim for its uplifting message and celebration of libraries, resonating deeply with readers seeking inspiration and personal growth in a digital age․

Awards and Recognition

Michiko Aoyama’s novel has garnered significant acclaim, including being shortlisted for the Japan Booksellers Award and becoming a bestseller․ It was named a Times Magazine Book of the Year and praised as an “undeniable page-turner” by The New York Times․ The book’s heartfelt narrative has resonated globally, earning it a spot on bestseller lists worldwide and solidifying its place as a modern literary treasure․ Its success highlights the enduring power of storytelling and libraries in shaping human connection and personal growth․

Reader Reviews and Feedback

Readers have embraced the novel for its heartwarming and uplifting message, with many praising its ability to inspire hope and comfort․ Fans of The Midnight Library and Before the Coffee Gets Cold have found a kindred spirit in Aoyama’s work․ Reviewers highlight the books’ emotional depth, noting how it made them laugh, cry, and feel comforted․ The Irish Times called it “a tribute to the transformative power of books and libraries,” resonating deeply with those seeking connection and personal growth in their lives․

Michiko Aoyama’s What You Are Looking For Is in the Library is a heartwarming tale of self-discovery, community, and the transformative power of books․ Through Sayuri Komachi’s intuitive guidance, readers witness how libraries become hubs of connection and growth․ This uplifting novel, available as a PDF and in other formats, reminds us that what we seek is often found in unexpected places․ A must-read for anyone seeking inspiration and a deeper understanding of life’s journey․


eat smart scale manual

Category : Manuals

The Eat Smart Scale is a high-quality‚ affordable bathroom scale designed for accurate weight measurement. It’s known for durability‚ ease of use‚ and advanced features like user memory and body composition analysis‚ making it a perfect tool for health and wellness.

1.1 Overview of the Eat Smart Scale

The Eat Smart Scale is a high-quality‚ easy-to-use bathroom scale designed for accurate weight measurement. Known for its durability and user-friendly interface‚ it offers advanced features like weight tracking and multi-user support. The scale is ideal for health-conscious individuals‚ providing essential metrics to support fitness and wellness goals. With its sleek design and robust functionality‚ it is a reliable tool for monitoring progress. The Eat Smart Scale is backed by excellent customer support‚ ensuring any questions or concerns are promptly addressed. It is a practical and affordable solution for maintaining a healthy lifestyle.

1.2 Importance of Using a Digital Bathroom Scale

Using a digital bathroom scale‚ like the Eat Smart Scale‚ is essential for monitoring weight accurately and tracking progress toward health goals. It provides consistent measurements‚ helping users stay motivated and informed. Regular use encourages accountability and supports sustainable lifestyle changes. Digital scales are also convenient‚ offering features like memory storage for multiple users and body composition analysis. This makes them ideal for families or individuals focused on wellness. By incorporating a digital scale into daily routines‚ users can better understand their health metrics‚ making it a vital tool for achieving and maintaining a balanced lifestyle.

Key Features of the Eat Smart Scale

The Eat Smart Scale offers accuracy‚ durability‚ and advanced features like user memory‚ body composition analysis‚ and weight tracking‚ making it perfect for health and wellness monitoring.

2;1 Accuracy and Durability

The Eat Smart Scale is renowned for its precision and long-lasting build. It ensures accurate weight measurements with a high level of consistency‚ supported by a durable design that withstands regular use. The scale’s robust construction makes it reliable for daily use‚ while its advanced sensors provide precise readings‚ essential for tracking health progress. Its durability ensures it remains a dependable tool for maintaining your wellness journey over time.

2.2 User Memory and Body Composition Analysis

The Eat Smart Scale offers advanced features like user memory and body composition analysis‚ catering to multiple users. It stores individual profiles‚ ensuring personalized metrics for each user. Beyond weight‚ it measures body fat percentage‚ muscle mass‚ and other key metrics‚ providing a comprehensive health overview. This feature is ideal for families or shared use‚ as it maintains privacy and accuracy for each user. The body composition analysis helps users monitor their progress toward fitness goals‚ making it a valuable tool for holistic health tracking and management.

2.3 Weight Tracking Feature

The Eat Smart Scale’s weight tracking feature allows users to monitor their progress over time. It displays current weight‚ previous weight‚ and the difference‚ providing a clear visual of weight changes with arrow icons. This feature supports up to two users‚ making it ideal for shared use. The scale’s expanded capacity of 440 lbs (200 kg) ensures accuracy for a wide range of users. By tracking weight trends‚ users can set realistic goals and stay motivated throughout their health journey. This feature is essential for anyone aiming to manage their weight effectively and achieve long-term wellness.

Setting Up Your Eat Smart Scale

Setting up your Eat Smart Scale involves unboxing and preparing the device. First-time users must enter their physical information to enable accurate body metric calculations. This ensures personalized and precise measurements for effective health tracking.

3.1 Unboxing and Initial Preparation

Upon unboxing your Eat Smart Scale‚ carefully inspect the device and ensure all components are included. Place the scale on a flat‚ stable surface to ensure accuracy. Before first use‚ insert the provided batteries and allow the scale to calibrate. Avoid touching the surface during calibration to prevent interference. Once calibration is complete‚ the scale is ready for use. If you notice any damage or malfunction‚ contact customer support immediately. Proper preparation ensures optimal performance and accurate measurements from the start.

3.2 Entering Physical Information for First-Time Use

Before using the Eat Smart Scale‚ enter your physical information to ensure accurate measurements. Turn on the scale‚ select your user profile‚ and input your height‚ weight‚ age‚ and gender. This data allows the scale to calculate body composition metrics like BMI and body fat percentage. Follow the on-screen prompts or refer to the manual for specific button sequences‚ as they may vary by model. Once completed‚ the scale will store your information‚ enabling personalized tracking and progress monitoring. Proper setup is crucial for obtaining reliable and precise health data.

Using the Eat Smart Scale

Turn on the scale‚ ensure it’s calibrated‚ and step on it firmly. The scale will display your weight and additional metrics like body fat percentage. Step off‚ and review your results for tracking progress.

4.1 Step-by-Step Weighing Process

Start by turning on the Eat Smart Scale and ensuring it is placed on a flat‚ stable surface. Allow the scale to calibrate to zero. Step onto the scale gently but firmly‚ ensuring both feet are centered. Remain still until the scale displays your weight. The scale will automatically measure and display additional metrics such as body fat percentage‚ if enabled. Once the measurement is complete‚ carefully step off the scale. Review your results on the display or through the accompanying app‚ if connected. This process ensures accurate and reliable readings every time you weigh yourself.

4.2 Understanding Weight Tracking and Progress Monitoring

The Eat Smart Scale offers a weight tracking feature that displays your current weight‚ previous weight‚ and the difference‚ indicated by arrow icons. This helps monitor progress over time. Regular use allows you to track trends‚ providing insights into weight fluctuations. The scale supports up to two users‚ making it ideal for shared use. By consistently recording your weight‚ you can identify patterns and stay motivated. For accurate results‚ weigh yourself under similar conditions each time. This feature‚ combined with body composition analysis‚ offers a comprehensive view of your health journey‚ helping you make informed decisions to achieve your goals.

Advanced Features of the Eat Smart Scale

The Eat Smart Scale includes advanced features like body composition measurement‚ multi-user support‚ and memory functions‚ allowing personalized tracking and comprehensive health insights for multiple individuals.

5.1 Body Composition Measurement

The Eat Smart Scale offers advanced body composition measurement‚ providing insights into fat mass‚ lean mass‚ and water percentage. This feature helps users monitor progress beyond weight‚ enabling a holistic view of health. By analyzing electrical impedance‚ the scale delivers accurate metrics tailored to individual profiles. Regular use allows users to track changes and adjust their fitness and nutrition plans accordingly‚ promoting a balanced approach to wellness. This feature is particularly useful for fitness enthusiasts and those aiming to build muscle or reduce body fat effectively.

5.2 Multi-User Support and Memory Function

The Eat Smart Scale supports multiple users‚ allowing up to 8 individuals to track their progress independently. The memory function stores unique profiles‚ ensuring personalized metrics for each user. When a user steps on the scale‚ it automatically recognizes their profile and displays their data‚ eliminating confusion. This feature is ideal for households or shared spaces‚ as it maintains privacy and accuracy for everyone. The scale also tracks weight differences for each user‚ providing a clear view of progress over time. This multi-user capability makes it a practical and efficient tool for families or roommates focused on health and wellness together.

Maintaining Your Eat Smart Scale

Regularly clean the scale with a soft cloth and avoid harsh chemicals. Replace batteries as needed and store the scale on a flat‚ stable surface for optimal performance.

6.1 Cleaning and Care Tips

Regular cleaning ensures optimal performance and longevity of your Eat Smart Scale. Use a soft‚ dry cloth to wipe the surface‚ avoiding harsh chemicals or abrasive materials. For stubborn stains‚ dampen the cloth slightly but ensure it’s not soaking wet. Avoid submerging the scale in water or exposing it to excessive moisture‚ as this can damage the internal components. Store the scale on a flat‚ stable surface and ensure it’s placed on a hard‚ even floor to maintain accuracy. Regularly check the scale’s feet for dust or debris and clean them gently to prevent uneven measurements. For more detailed care‚ refer to the manual or contact customer support.

6.2 Battery Replacement and Maintenance

Proper battery maintenance is essential for the Eat Smart Scale’s optimal performance. Replace batteries when the scale displays a low battery indicator. Use high-quality‚ non-rechargeable batteries (e.g.‚ AAA or AA) for reliable power. Turn the scale off before replacing batteries to avoid power surges or errors. Avoid using rechargeable batteries‚ as they may not provide consistent voltage; Dispose of old batteries responsibly. If the scale won’t be used for an extended period‚ remove batteries to prevent leakage. Refer to the manual for specific instructions‚ as battery compartment locations may vary by model. Always ensure the scale is powered off during replacement to maintain accuracy and functionality.

Troubleshooting Common Issues

Troubleshooting the Eat Smart Scale involves resolving inaccurate readings by resetting it to factory settings or ensuring proper calibration. Refer to the manual for detailed guidance.

7.1 Resolving Inaccurate Readings

If your Eat Smart Scale displays inaccurate readings‚ ensure it’s placed on a flat‚ hard surface. Turn it off‚ wait a few seconds‚ then turn it back on. Calibrate the scale by stepping on it until it resets to zero. Check for loose batteries or damaged sensors. If issues persist‚ reset the scale to factory settings by pressing and holding the reset button for 5 seconds. For further assistance‚ refer to the user manual or contact EatSmart customer support.

7.2 Resetting the Scale to Factory Settings

To reset your Eat Smart Scale to factory settings‚ locate the reset button on the underside of the scale. Press and hold it for 5 seconds until the display shows “0.0” or “CAL.” This will clear all stored user data and restore default settings. Turn the scale off‚ wait 10 seconds‚ then turn it back on to complete the reset. Note that this will erase all saved profiles and weight history. After resetting‚ recalibrate the scale by stepping on it until it zeros out. For detailed instructions‚ refer to your user manual or contact EatSmart customer support.

The Eat Smart Scale is a valuable investment for tracking weight and body composition accurately. Its durability‚ ease of use‚ and advanced features make it a great tool for health-conscious users.

8.1 Benefits of Regular Use

Regular use of the Eat Smart Scale offers numerous benefits for health and wellness. It helps monitor weight changes accurately‚ providing valuable insights into progress over time. The scale’s memory function allows multiple users to track their metrics‚ fostering accountability and motivation. By consistently using the scale‚ individuals can set realistic goals and celebrate achievements‚ promoting a healthier lifestyle. Its durability ensures long-term reliability‚ making it a sustainable tool for ongoing health management. Regular use also enhances awareness of body composition‚ empowering users to make informed decisions about diet and exercise.

8.2 Final Tips for Maximizing the Scale’s Potential

To maximize the Eat Smart Scale’s potential‚ weigh yourself consistently‚ ideally at the same time each day. Use the weight tracking feature to monitor progress and set realistic goals. Regularly clean the scale to ensure accuracy and longevity. Take advantage of the body composition analysis to gain a deeper understanding of your health. For multiple users‚ utilize the memory function to track individual progress. Stay consistent with your measurements and review your data regularly to stay motivated. Proper maintenance and care will ensure the scale remains a reliable tool for your health journey.


archeer bt 07 manual manual pdf

Category : PDF

The Archeer BT-07 Manual PDF is a comprehensive guide designed to help users understand and utilize the Bluetooth transmitter and receiver effectively․ It covers features‚ functionality‚ and setup processes‚ ensuring seamless connectivity for various devices․ The manual also includes troubleshooting tips and detailed instructions for optimal performance‚ making it an essential resource for both beginners and experienced users․ With clear diagrams and step-by-step explanations‚ it simplifies the operation of the Archeer BT-07‚ enabling users to explore its full potential effortlessly․

Overview of the Archeer BT-07 Device

The Archeer BT-07 is a versatile Bluetooth transmitter and receiver designed to enhance audio connectivity․ It enables wireless streaming between devices‚ supporting both transmitter and receiver modes․ Compact and user-friendly‚ it connects via 3․5mm audio cables or optical cables‚ making it ideal for home and car audio systems․ This device bridges the gap between non-Bluetooth and Bluetooth-enabled devices‚ offering seamless audio transmission and high-quality sound reproduction‚ perfect for upgrading traditional audio setups to wireless functionality․

Importance of the User Manual for Optimal Usage

The user manual is essential for understanding the Archeer BT-07’s features and troubleshooting common issues; It provides clear instructions and diagrams to ensure optimal setup and usage․ By reading the manual‚ users can unlock the device’s full potential‚ resolve connectivity problems‚ and understand warranty terms․ It serves as a comprehensive guide for both beginners and experienced users‚ ensuring smooth and efficient operation of the device․

Downloading the Archeer BT-07 Manual PDF

The Archeer BT-07 Manual PDF is available for free download from official sources and trusted websites․ It provides easy access to comprehensive instructions for optimal device usage․

Official Sources for the Manual Download

The Archeer BT-07 Manual PDF can be downloaded from official sources like Rytram‚ GitHub‚ and TP-Link’s regional website․ These platforms provide free and easy access to the comprehensive guide‚ ensuring authenticity and reliability․ Users can trust these sources for a seamless download experience‚ as they offer direct links to the manual without redirects or additional sign-ups․ This ensures quick access to essential instructions and troubleshooting tips for optimal device usage․

Third-Party Repositories and Reliable Websites

Besides official sources‚ the Archeer BT-07 Manual PDF is available on third-party repositories like GitHub and Rytram․ These platforms offer free and easy downloads‚ ensuring users can access the manual without hassle․ Additionally‚ websites such as Peatix and specialized forums provide reliable links to the PDF․ Users are advised to verify the authenticity of the source to avoid downloading incorrect or malicious files․ These repositories are convenient for those seeking alternative download options․

Steps to Download and Save the Manual

To download the Archeer BT-07 Manual PDF‚ visit the official website or trusted third-party repositories like GitHub or Rytram․ Navigate to the download section‚ search for the Archeer BT-07 manual‚ and click the provided link․ Once redirected‚ select the PDF format and choose a location to save the file․ Ensure your device has sufficient storage space․ After downloading‚ open the PDF to view or print it for easy reference․ This process is quick and user-friendly‚ ensuring you have the manual readily available for future use․

Key Features and Functionality of the Archeer BT-07

The Archeer BT-07 is a versatile Bluetooth transmitter and receiver‚ enabling wireless audio streaming between devices․ It supports dual modes‚ seamless connectivity‚ and compatibility with various audio devices‚ ensuring enhanced flexibility for users seeking high-quality sound solutions․

Product Overview and Technical Specifications

The Archeer BT-07 is a dual-mode Bluetooth transmitter and receiver‚ designed to stream audio wirelessly between devices․ It features a compact design‚ 3;5mm audio jack compatibility‚ and supports optical connections for versatile use․ With Bluetooth 4․2 technology‚ it ensures stable and high-quality sound transmission․ The device is compatible with headphones‚ TVs‚ home stereos‚ and car audio systems‚ making it a versatile solution for enhancing wireless connectivity․ Priced affordably‚ it offers excellent value for its robust functionality and ease of use․

Operating Modes: Transmitter and Receiver

The Archeer BT-07 operates seamlessly in both transmitter and receiver modes‚ enabling flexible wireless audio streaming․ In transmitter mode‚ it connects to non-Bluetooth devices like TVs or stereos‚ while receiver mode allows it to stream audio from smartphones or tablets․ The device switches between modes effortlessly‚ ensuring compatibility with a wide range of devices․ Its physical controls function exclusively in wireless mode‚ providing intuitive operation for users seeking a reliable Bluetooth solution for their audio needs․

Compatibility with Various Devices

The Archeer BT-07 is designed to work seamlessly with a wide range of devices‚ including TVs‚ home stereos‚ headphones‚ and car audio systems․ It supports both Bluetooth and wired connections‚ ensuring compatibility with older devices that lack Bluetooth functionality․ The device is versatile‚ allowing users to stream audio from smartphones‚ tablets‚ or laptops‚ and can also connect to non-Bluetooth devices using 3․5mm audio or optical cables․ This makes it an ideal solution for enhancing audio connectivity across multiple platforms․

Pairing and Connectivity Guide

The Archeer BT-07 offers a seamless pairing process‚ ensuring stable connections between devices․ It supports both Bluetooth and wired setups‚ making it compatible with a variety of audio systems․ The guide provides clear instructions for pairing devices‚ troubleshooting common issues‚ and maintaining optimal connectivity for uninterrupted audio streaming․

How to Pair the Archeer BT-07 with Bluetooth Devices

To pair the Archeer BT-07‚ ensure the device is in pairing mode by holding the pairing button until the LED flashes blue․ Enable Bluetooth on your device and select “Archeer BT-07” from the available options․ The device will automatically connect‚ indicated by a steady blue light․ For non-Bluetooth devices‚ use the included 3․5mm audio cable or optical cable to establish a wired connection․ Refer to the manual for detailed pairing instructions and troubleshooting tips to ensure a stable connection․

Connecting to Non-Bluetooth Devices

To connect the Archeer BT-07 to non-Bluetooth devices‚ use the provided 3․5mm audio cable or optical cable․ This ensures compatibility with home stereos‚ older TVs‚ or car audio systems․ Simply plug the cable into the respective ports on both devices to establish a reliable wired connection․ This feature provides versatility‚ allowing the Archeer BT-07 to integrate seamlessly with devices that lack Bluetooth capabilities‚ enhancing its utility across different audio setups and environments․

Troubleshooting Common Connectivity Issues

If you encounter connectivity problems with the Archeer BT-07‚ start by resetting the device to its factory settings․ Ensure all physical connections‚ such as audio cables‚ are secure and undamaged․ Verify that Bluetooth pairing is correctly established and that devices are within range․ If issues persist‚ restart both the BT-07 and the connected device․ For advanced troubleshooting‚ consult the manual for detailed diagnostic steps and solutions to address specific connectivity concerns effectively․

Installation and Setup

The Archeer BT-07 Manual PDF provides a clear‚ step-by-step installation guide for first-time users‚ ensuring a smooth setup experience with detailed instructions and troubleshooting tips․

Step-by-Step Installation Guide

The Archeer BT-07 Manual PDF offers a detailed installation guide‚ ensuring users can set up their device with ease․ It begins with unpacking and charging‚ followed by connecting to power․ Next‚ users are guided through selecting the correct mode—transmitter or receiver․ The manual provides clear instructions for pairing with Bluetooth devices and connecting via auxiliary cables․ Troubleshooting common issues during setup is also covered‚ ensuring a seamless experience for all users․

Setting Up the Device for First-Time Use

For first-time use‚ charge the Archeer BT-07 fully and power it on․ The LED will indicate readiness․ Select the desired mode (transmitter or receiver) using the switch․ Automatically pair with your device or manually connect via Bluetooth settings․ Ensure the device is updated to the latest firmware for optimal performance․ The manual provides clear‚ step-by-step instructions to ensure a smooth and efficient setup process for all users․

Configuring the BT-07 for Different Devices

The Archeer BT-07 can be easily configured for various devices‚ including headphones‚ speakers‚ TVs‚ and car stereos․ Use the 3․5mm audio or optical cable for non-Bluetooth devices․ For wireless connections‚ enable Bluetooth on your device and pair with the BT-07․ The manual provides specific instructions for different device types‚ ensuring compatibility and seamless audio transmission․ Switch between transmitter and receiver modes depending on your setup needs for optimal performance across all connected devices․

Advanced Settings and Customization

The Archeer BT-07 offers customizable settings to enhance your audio experience․ Adjust output modes‚ optimize audio quality‚ and tailor configurations for specific devices or use cases‚ ensuring compatibility and superior sound performance․

Adjusting Audio Quality and Settings

The Archeer BT-07 manual provides detailed guidance on adjusting audio quality and settings․ Users can tweak output modes‚ optimize sound performance‚ and customize configurations to suit specific devices or environments․ Advanced settings allow for fine-tuning audio parameters‚ ensuring compatibility and enhancing overall sound quality․ By following the manual’s instructions‚ users can achieve the best possible audio experience tailored to their preferences and device requirements‚ making it versatile for various use cases and setups․

Customizing the Device for Specific Use Cases

The Archeer BT-07 manual details how to customize the device for specific scenarios‚ such as home theaters‚ car audio systems‚ or wireless headphones․ Users can adjust settings like audio codecs‚ latency‚ and device preferences to optimize performance․ The manual also provides tips for configuring the BT-07 to work seamlessly with different devices‚ ensuring enhanced sound quality and compatibility․ By tailoring settings to individual needs‚ users can maximize the versatility of the Archeer BT-07 for their unique applications and preferences․

Troubleshooting Common Issues

The Archeer BT-07 manual addresses common issues such as connectivity problems and audio delays‚ providing clear solutions to ensure smooth operation and optimal performance of the device․

Resolving Connectivity Problems

Connectivity issues with the Archeer BT-07 can often be resolved by restarting the device or resetting it to factory settings․ Ensure the device is fully charged and within range of the paired device․ Check for physical obstructions or interference from other devices․ If problems persist‚ restart the connected device or update the firmware to the latest version․ Refer to the manual for detailed troubleshooting steps to restore optimal connectivity and performance․

Fixing Audio Delay or Lag

Audio delay or lag with the Archeer BT-07 can be addressed by reducing interference from nearby devices or physical obstructions․ Ensure the device is updated with the latest firmware․ Resetting the BT-07 to factory settings may also resolve synchronization issues․ Adjusting the audio settings or switching between transmitter and receiver modes can help improve timing accuracy․ For persistent issues‚ consult the manual for advanced troubleshooting steps to restore smooth audio performance․

Resetting the Archeer BT-07 to Factory Settings

To reset the Archeer BT-07 to factory settings‚ press and hold both the volume up and volume down buttons for 10 seconds until the indicator light flashes․ This will restore the device to its default configuration․ After resetting‚ pair the device again with your Bluetooth devices․ Ensure your device is fully charged before performing the reset for optimal results․ This process can resolve connectivity issues and restore normal functionality․

Warranty and Support Information

The warranty offers one and a half years of coverage‚ with a 60-day hassle-free return policy․ Lifetime support is available via email for technical assistance․

Understanding the Warranty Terms

The warranty for the Archeer BT-07 covers manufacturing defects for one and a half years․ A 60-day hassle-free return policy is also provided‚ ensuring customer satisfaction․ The warranty period begins from the date of purchase and protects against faulty materials or workmanship․ For any issues‚ users can contact customer support via email for assistance or to initiate a return process․ This ensures peace of mind and reliable service for users of the Archeer BT-07․

Contacting Customer Support

For any inquiries or issues with the Archeer BT-07‚ customers can reach out to the support team via email․ The company offers lifetime technical support to ensure users receive assistance whenever needed․ Whether it’s troubleshooting‚ warranty claims‚ or general questions‚ the support team is available to provide prompt and effective solutions․ Users are encouraged to contact support for a smooth and hassle-free experience with their Archeer BT-07 device․

User Experience and Reviews

The Archeer BT-07 has received positive reviews for its ease of use and reliable performance‚ with users appreciating its comprehensive manual and seamless connectivity options․

Real-World Usage Feedback

Users have found the Archeer BT-07 to be highly versatile and user-friendly‚ with many appreciating its ability to seamlessly connect to home stereos‚ car systems‚ and wireless headphones․ The manual’s clear instructions have been praised for making setup and troubleshooting straightforward․ Priced at $49․99‚ it offers great value for its functionality․ While some users noted occasional connectivity hiccups‚ the overall consensus is positive‚ with many satisfied by its performance and ease of use․

Tips and Tricks from Experienced Users

Experienced users recommend using the Archeer BT-07 with non-Bluetooth devices for enhanced versatility․ Ensure the battery is fully charged before initial pairing for optimal performance․ Resetting the device occasionally can resolve connectivity issues․ For stable connections‚ keep it away from other wireless devices․ Experiment with different audio settings to find your preferred sound quality․ Regularly updating the firmware‚ if available‚ ensures the latest features and improvements․ These tips enhance your overall experience with the Archeer BT-07․

The Archeer BT-07 manual is essential for mastering its features․ Explore its capabilities‚ troubleshoot issues‚ and optimize performance for enhanced audio experiences and user satisfaction․

Final Thoughts on the Archeer BT-07 Manual

The Archeer BT-07 manual is a vital resource‚ offering detailed insights into the device’s functionality and troubleshooting․ Its clear instructions and diagrams ensure users can maximize their Bluetooth experience․ Whether for pairing‚ connectivity‚ or advanced settings‚ the manual provides comprehensive guidance․ By following its directives‚ users can resolve common issues and enhance their overall experience with the Archeer BT-07․

Encouragement to Explore and Utilize the Device Fully

Embrace the full potential of your Archeer BT-07 by thoroughly exploring its features and settings․ The manual serves as a gateway to unlocking advanced functionalities‚ ensuring a seamless and enhanced user experience․ Dive into the guide to discover hidden capabilities‚ customize settings‚ and troubleshoot with ease․ By fully utilizing the device‚ you can enjoy high-quality audio‚ reliable connectivity‚ and unparalleled convenience․ Make the most of your Archeer BT-07 and elevate your audio experience to new heights․