Author Archives: toni

turning point menu pdf

Category : PDF

Turning Point Restaurants is a daytime dining destination offering creative breakfast, brunch, and lunch options in a warm, relaxed atmosphere․ Known for seasonal specials and fresh ingredients, it provides a unique culinary experience with a focus on quality and flavor, operating daily from 7:30 am to 3 pm․

1․1 Overview of Turning Point as a Daytime Restaurant

Turning Point Restaurants operate from 7:30 am to 3 pm, 7 days a week, offering a blend of creative breakfast, brunch, and lunch options․ The relaxed, inviting atmosphere makes it a perfect spot for casual dining․ With a focus on fresh, local ingredients, the menu highlights seasonal specials and signature dishes, catering to diverse tastes while maintaining a commitment to quality and flavor․

1․2 Key Features of the Menu and Dining Experience

Turning Point Restaurants offer a diverse menu featuring creative breakfast, brunch, and lunch options․ The dining experience emphasizes fresh, locally sourced ingredients and seasonal specials․ The relaxed atmosphere, combined with signature dishes like skillets, pancakes, and omelettes, creates a welcoming setting for guests to enjoy flavorful meals tailored to various tastes and dietary preferences․

Menu Overview

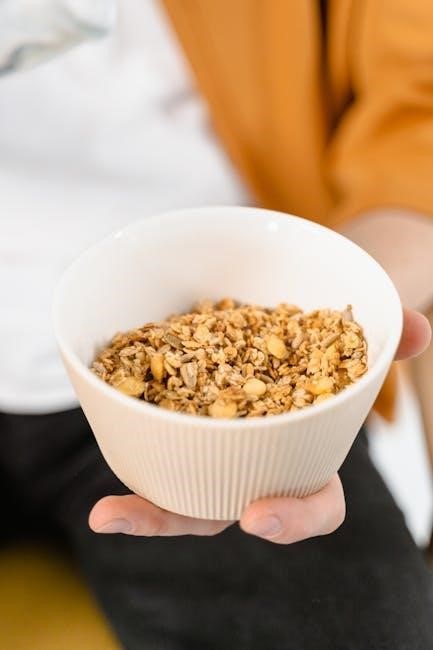
The menu features a wide variety of creative breakfast, brunch, and lunch options, including pancakes, waffles, salads, sandwiches, and seasonal specials, all made with fresh ingredients․

2․1 Breakfast Items: Pancakes, Waffles, and French Toast

Turning Point’s breakfast menu offers a variety of fluffy pancakes, crispy waffles, and decadent French toast․ From classic buttermilk pancakes to creative options like cinnamon roll pancakes and seasonal specials like peachy keen cornbread French toast, every dish is crafted with fresh ingredients and served in a warm, inviting setting․

2․2 Lunch Offerings: Salads, Sandwiches, and Grain Bowls

Turning Point’s lunch menu features fresh, flavorful options, including hearty salads, artisanal sandwiches, and nutritious grain bowls․ Favorites like the Grilled Chicken Salad and Chicken Pesto Panini are crafted with locally sourced ingredients, offering a balance of taste and nutrition․ These dishes are perfect for a satisfying midday meal, catering to diverse tastes and dietary preferences․

2․3 Specialty Items: Burritos, Frittatas, and Skillets

Turning Point’s specialty items include flavorful burritos, hearty frittatas, and loaded skillets․ The Chicken Quesadilla and Wilbur Skillet are popular choices, offering bold flavors and generous portions․ These dishes blend creativity with comfort, making them standout options for a satisfying breakfast or brunch experience, all made with fresh, high-quality ingredients to ensure exceptional taste and variety․

Pricing and Service Fees

Menu prices include an 18% service fee and 5% GST․ Smoothies and milkshakes range from $3 to $5, while hot drinks like coffee and hot chocolate cost $2․79 to $3․79․

3․1 Menu Price Ranges: Smoothies, Milkshakes, and Hot Drinks

Smoothies at Turning Point range from $3 to $5, offering refreshing blends like tropical and berry options․ Milkshakes are priced similarly, featuring flavors like chocolate and strawberry․ Hot drinks include coffee varieties starting at $2․69 and gourmet hot chocolates, with options like peppermint and marshmallow, priced up to $3․79, all made with high-quality ingredients․

3․2 Service Fee and GST: How Prices are Structured

All menu items at Turning Point are subject to an 18% service fee and 5% GST, added to every order․ These charges are clearly outlined to ensure transparency․ The service fee supports staff wages and operational costs, while GST is a standard tax․ Both are automatically included in the final bill, making pricing straightforward for customers․

Seasonal Specials

Turning Point offers rotating seasonal specials, featuring dishes like Peachy Keen Cornbread French Toast and Hot Nashville Chicken Benny․ These limited-time options highlight fresh flavors and creative twists, ensuring a unique dining experience with each visit․

4․1 Winter Menu Highlights: Hot Chocolates and Seasonal Dishes

Turning Point’s winter menu features warm, comforting dishes like Hot Nashville Chicken Benny and rich hot chocolates․ The Toasted Marshmallow Hot Chocolate, topped with whipped cream and graham crackers, is a standout․ Seasonal specials also include hearty skillets and festive French toast options, ensuring a cozy dining experience during the colder months․

4․2 Limited-Time Offers: Peachy Keen Cornbread French Toast

The Peachy Keen Cornbread French Toast is a limited-time favorite, featuring cornbread-infused French toast topped with caramelized peaches and a hint of cinnamon․ This seasonal offering combines sweet and savory flavors, making it a must-try during its availability․ It showcases Turning Point’s creative approach to seasonal ingredients and unique flavor combinations, perfect for a special treat during breakfast or brunch․

Dietary Options and Accommodations

Turning Point accommodates various dietary needs with gluten-free, vegetarian, and dairy-free options․ Guests can consult staff to ensure menu selections meet their specific requirements, ensuring inclusivity and satisfaction for all diners․

5․1 Gluten-Free, Vegetarian, and Dairy-Free Options

Turning Point offers a variety of gluten-free, vegetarian, and dairy-free options to cater to diverse dietary needs․ From vegan pancakes to dairy-free smoothies, the menu ensures flavorful choices for all diners․ Each dish is crafted to maintain taste and quality, providing inclusive options without compromising on culinary excellence․

5․2 Consultation with Restaurant Staff for Dietary Needs

Turning Point Restaurants encourages guests to consult with staff regarding dietary needs․ This ensures menu items meet specific requirements, accommodating gluten-free, vegetarian, and dairy-free preferences․ Staff assistance helps diners make informed choices, ensuring a safe and enjoyable dining experience tailored to their health and dietary preferences․

Catering Services

Turning Point offers customizable catering options, including preset packages or tailored menus with catering managers․ Prices include an 18% service fee and 5% GST, ensuring seamless events․

6․1 Custom Menu Creation with Catering Managers

Turning Point’s catering managers collaborate with clients to craft custom menus, ensuring dishes align with event themes and dietary preferences․ From breakfast items to seasonal specials, the team offers tailored options to suit any gathering․ Clients can choose preset packages or design a unique menu, with all selections finalized in a follow-up meeting to ensure seamless execution and satisfaction․

6․2 Packages and Pricing for Catering Orders

Turning Point offers flexible catering packages with transparent pricing, including an 18% service fee and 5% GST․ Clients can choose from preset menu packages or customize their selections․ Pricing varies based on menu choices, with smoothies and milkshakes ranging from $3 to $5․ A meeting with catering managers is required to finalize selections, ensuring all details are tailored to the event’s needs and budget․

Operating Hours and Locations

Turning Point Restaurants operate daily from 7:30 am to 3 pm, offering a convenient schedule for breakfast and lunch․ With multiple locations, customers can easily find a nearby restaurant to enjoy their favorite dishes in a relaxed setting․

7․1 Hours of Operation: 7:30 am to 3 pm, 7 Days a Week

Turning Point Restaurants maintain consistent hours, open daily from 7:30 am to 3 pm․ This schedule accommodates both early risers and midday diners, ensuring availability throughout the week․ The extended weekend hours allow customers to enjoy their favorite meals without interruption, making it a reliable choice for any day․

7․2 Finding a Turning Point Near You

Finding a Turning Point location is straightforward․ With multiple locations across regions, customers can easily locate a restaurant near them․ Visit the official website or use online directories to find the nearest branch․ Notable locations include spots in Northville, MI, and East Gate Square․ Each location offers a welcoming atmosphere, ensuring a consistent dining experience․ Check local listings for specific addresses and details․

Specialty Drinks

Turning Point offers a variety of specialty drinks, including gourmet hot chocolates with marshmallow syrup and whipped cream, and cold brews like the Toffee Cream Cold Brew, along with premium teas from Steven Smith Tea Company, ensuring a delightful beverage experience․

8․1 Gourmet Hot Drinks: Coffee and Hot Chocolate Varieties

Turning Point’s gourmet hot drinks include a signature 100% Arabica organic house blend coffee, available hot or iced, and a decadent hot chocolate selection․ The traditional hot chocolate is topped with whipped cream, while the marshmallow variety features toasted marshmallow syrup, whipped cream, and crushed graham crackers, offering rich, velvety flavors for any taste․

8․2 Specialty Cold Drinks: Toffee Cream Cold Brew

The Toffee Cream Cold Brew is a standout in Turning Point’s specialty cold drinks․ Rich, smooth cold brew coffee is infused with sweet toffee flavors, creating a refreshing and indulgent beverage; Priced at $8․10, it’s a perfect choice for coffee lovers seeking a unique twist on traditional cold brew, offering both flavor and refreshment in every sip․

Most Popular Menu Items

Turning Point’s most popular items include the Wilbur Skillet, Basic Omelet, Avocado Toast, and Warm Cinnamon Rolls, all praised for their flavorful and satisfying dishes․

9․1 Wilbur Skillet and Basic Omelet

The Wilbur Skillet is a fan favorite, featuring scrambled eggs, chorizo, onions, peppers, cheddar, and warm flour tortillas․ The Basic Omelet showcases farm-fresh eggs, crafted to perfection and customizable with a variety of fillings․ Both dishes highlight Turning Point’s commitment to quality ingredients and flavorful preparation, making them staples on the menu․

9․2 Avocado Toast and Warm Cinnamon Rolls

Avocado Toast features fresh, ripe avocados, scrambled eggs, and tomatoes on multigrain toast, offering a trendy and healthy option․ Warm Cinnamon Rolls are soft, gooey, and drizzled with icing, often paired with strawberries or nuts for added sweetness․ Both dishes are crowd favorites, blending freshness and flavor to create a delightful dining experience․

Restaurant Features

Turning Point offers a relaxed, inviting environment with a focus on fresh, locally sourced ingredients, creating a unique and memorable dining experience for all guests․

10․1 Relaxed Environment and Unique Dining Experience

Turning Point creates a welcoming ambiance, perfect for casual dining․ The restaurant’s cozy setting and friendly staff ensure a stress-free experience․ Guests can enjoy creative dishes in a warm, inviting atmosphere that feels like home․ Seasonal specials and a focus on fresh ingredients add to the unique charm, making every meal memorable and satisfying․

10․2 Use of Fresh, Local Ingredients

Turning Point emphasizes sustainability by sourcing fresh, local ingredients․ This commitment ensures vibrant flavors and supports local farmers․ The menu reflects seasonal availability, with dishes crafted to highlight the quality of the ingredients․ From farm-fresh eggs to locally-grown produce, every component is carefully selected to provide an authentic and wholesome dining experience for guests․

Tea Selection

Turning Point partners with Steven Smith Tea Company, offering a diverse selection of premium teas․ Their menu features green, white, black, and herbal infusions, each carefully crafted to provide a refined and satisfying experience․ This collaboration ensures high-quality, unique blends that complement the restaurant’s commitment to fresh, locally sourced ingredients, enhancing the overall dining experience for tea enthusiasts․

11․1 Partnership with Steven Smith Tea Company

Turning Point proudly collaborates with Steven Smith Tea Company, offering an exquisite selection of premium teas․ This partnership brings forth a variety of expertly crafted blends, including green, white, black, and herbal infusions․ Steven Smith, renowned for founding Tazo Teas, ensures each blend is of the highest quality, enhancing Turning Point’s commitment to exceptional flavor and quality in every cup․

11․2 Varieties: Green, White, Black, and Herbal Infusions

Turning Point offers a diverse selection of teas, including green, white, black, and herbal infusions․ Green teas are light and refreshing, while white teas provide delicate flavors․ Black teas deliver robust and rich profiles, and herbal options are naturally caffeine-free, offering fruity and floral notes․ These varieties cater to diverse tastes, ensuring a perfect cup for every preference, as detailed in their menu․

Desserts and Sweets

Turning Point offers sweet treats like cinnamon roll pancakes, warm cinnamon rolls, and decadent desserts․ Sides include fries and toasted marshmallow hot chocolate for a delightful finish․

12․1 Sweet Breakfast Options: Cinnamon Roll Pancakes

Turning Point’s Cinnamon Roll Pancakes are a delightful breakfast treat, blending the warmth of cinnamon with the fluffiness of pancakes․ Priced at $15․00 for three, they offer a sweet start to your day․ Made with fresh ingredients, these pancakes are drizzled with a sweet glaze, creating a perfect harmony of flavors․ A must-try for those seeking a breakfast-dessert fusion․

12․2 Sides: Fries and Toasted Marshmallow Hot Chocolate

Turning Point offers crave-worthy sides like crispy fries, perfect for accompanying any meal․ A standout is the Toasted Marshmallow Hot Chocolate, featuring marshmallow syrup, whipped cream, and crushed graham crackers․ This indulgent drink, priced at $3․79, complements the restaurant’s sweet and savory dishes, adding a delightful treat to your dining experience․

Turning Point Restaurants offers a delightful daytime dining experience with creative menu options, seasonal specials, and a cozy atmosphere, making it a must-visit for breakfast and brunch enthusiasts․

13․1 Final Thoughts on Turning Point Menu and Experience

Turning Point Restaurants offers a memorable dining experience with its creative, seasonal menu and welcoming atmosphere․ From hearty skillets to sweet cinnamon rolls, the dishes are crafted with fresh, local ingredients․ The addition of specialty drinks and teas enhances the meal․ With reasonable pricing, including service fees and GST, Turning Point is a delightful choice for breakfast and brunch enthusiasts seeking quality and flavor․


manual transfer switch wiring diagram

Category : Manuals

A manual transfer switch wiring diagram is a visual representation of electrical connections for safely integrating a generator with your home’s electrical system, ensuring power continuity during outages.

Understanding the Manual Transfer Switch Wiring Diagram

This diagram illustrates the electrical connections between a generator, main power source, and household circuits, using symbols and labels to clarify components and their relationships for safe installation.

2.1 Purpose of the Diagram

The purpose of a manual transfer switch wiring diagram is to provide a clear, visual guide for safely connecting a portable generator to a home’s electrical system during power outages. It illustrates the proper connections between the generator, main electrical panel, and transfer switch, ensuring a seamless transition of power. The diagram serves as a blueprint for electricians and homeowners to follow, detailing how to integrate the generator into the existing wiring system without risking damage or safety hazards. By using labels and symbols, it simplifies the understanding of complex electrical pathways, making installation more accessible. This visual aid is crucial for ensuring compliance with electrical codes and preventing dangerous shortcuts, such as illegal generator connections directly to the electrical panel. Ultimately, the diagram ensures reliable backup power supply while maintaining safety and efficiency.

2.2 Components Involved

The manual transfer switch wiring diagram involves several key components essential for a safe and functional installation. These include the manual transfer switch itself, which acts as the bridge between the utility power and the generator. The generator, typically portable, provides backup power during outages. The main electrical panel is where the transfer switch is connected, allowing it to control the flow of power to various circuits. Additional components such as circuit breakers, wiring, and connectors are necessary to complete the connections. A grounding rod is also required to ensure proper grounding of the generator, enhancing safety. Each component plays a critical role in the system, and their correct installation, as per the diagram, is vital for reliable operation and compliance with electrical codes. Understanding these components is the first step toward a successful installation.

Safety Precautions and Best Practices

Always turn off the main power supply before starting any work. Use proper tools and follow local electrical codes to ensure compliance. Proper grounding is essential for safety.

3.1 Essential Safety Measures

When working with a manual transfer switch wiring diagram, safety is paramount to avoid electrical hazards. Always disconnect the main power supply before starting any installation or maintenance. Use a multimeter to verify that no voltage is present at the work area. Proper grounding is critical; ensure the generator and transfer switch are connected to a grounding rod to prevent shocks. Wear protective gear, such as insulated gloves and safety goggles, to safeguard against electrical arcs or sparks. Follow the National Electric Code (NEC) guidelines to ensure compliance with safety standards. Never overload circuits, as this can lead to overheating and fires. Use appropriately rated wires and connectors to handle the current safely. Keep the work area well-ventilated, especially when using generators, to avoid carbon monoxide buildup. Always test the system after installation to ensure proper functionality. If unsure, consult a licensed electrician. Prioritize safety to prevent accidents and ensure reliable power transfer;

3.2 Legal and Compliance Considerations

When installing a manual transfer switch, adhering to legal and compliance standards is crucial to ensure safety and avoid legal issues. Always follow the National Electric Code (NEC) guidelines, as non-compliance can lead to fines or system rejection during inspections. Local electrical codes may vary, so consult your area’s specific regulations before proceeding. A permit is typically required for such installations, and work must be inspected by a certified authority. Ensure the transfer switch and generator are rated appropriately for the load they will handle, as specified by the manufacturer. Proper documentation, including wiring diagrams and installation manuals, must be maintained for future reference. Hire a licensed electrician if you are unsure about compliance requirements. Failure to meet legal standards can result in unsafe conditions, legal penalties, or invalidated insurance claims. Compliance ensures the system operates safely and efficiently, protecting both people and property. Always verify that components are UL-listed or meet equivalent standards.

Step-by-Step Wiring Diagram Explanation

The manual transfer switch wiring diagram guides you through connecting the generator to your home’s electrical system safely. Start by identifying the main components: the transfer switch, generator, and main electrical panel. Connect the generator’s output to the transfer switch’s “generator” terminals, ensuring correct polarity. Next, link the transfer switch to the main electrical panel, typically at a designated subpanel or circuit. The neutral wire may or may not be switched, depending on your system; verify this with your generator’s specifications. Grounding is critical for safety—connect the generator’s grounding terminal to a grounding rod. Use appropriately sized wires to prevent overheating and ensure reliable power transfer. Follow the wiring diagram’s labels and symbols, such as “Line,” “Load,” and “Generator,” to avoid confusion. Double-check all connections before energizing the system. Always refer to the manufacturer’s instructions for specific wiring requirements. Properly securing wires and ensuring tight connections are essential for safe and efficient operation. If unsure, consult a licensed electrician to avoid potential hazards. This step-by-step approach ensures a seamless and safe power transfer during outages.

Tools and Materials Needed for Installation

To install a manual transfer switch, you’ll need specific tools and materials. Essential tools include a voltage tester, wire strippers, pliers, screwdrivers, and a multimeter. For materials, you’ll require the transfer switch, appropriately sized wires, connectors, grounding rod, and circuit breakers or fuses. Mounting hardware like screws and brackets is also necessary. Ensure all components are compatible with your generator and electrical panel. Proper tools and materials are crucial for a safe and efficient installation. Always refer to the wiring diagram for specific requirements.

Installation Guide for Manual Transfer Switch

The installation of a manual transfer switch involves several critical steps to ensure safe and proper functionality. First, turn off the main power supply to your home or business. Locate the main electrical panel and install the transfer switch nearby. Connect the grounding rod to the generator and ensure all wires are securely attached to the correct terminals on the switch. Follow the wiring diagram to connect the utility power, generator power, and main service panel. Test the switch by manually toggling it to ensure smooth power transition. Proper installation requires adherence to electrical codes and safety standards. Always consult a licensed electrician if unsure about any step. This guide ensures a reliable connection between your primary power source and backup generator, providing peace of mind during power outages.

Troubleshooting Common Issues

When working with a manual transfer switch, several common issues may arise during installation or operation. One of the most frequent problems is no power from the generator, which can occur due to incorrect wiring or a tripped circuit breaker. Always refer to the wiring diagram to ensure connections are accurate. Another issue is the switch not activating properly, which may be caused by a faulty lever or improper installation. Additionally, overloaded circuits can prevent the switch from functioning correctly, so it’s essential to prioritize essential appliances. Lastly, grounding issues can lead to safety hazards, so verifying proper grounding connections is crucial. By addressing these common problems systematically, you can ensure reliable performance and safety. Regular maintenance and adherence to electrical codes will also help minimize potential issues.

Tips for DIY Enthusiasts

For DIY enthusiasts tackling a manual transfer switch installation, proper planning and preparation are key to success. Always follow the wiring diagram precisely to avoid errors. Turn off the main power supply before starting work to ensure safety. Use high-quality tools and materials to maintain reliability. Test the system after installation to confirm it works as intended. Consider labeling wires to simplify future maintenance. If unsure about any step, consult a licensed electrician to prevent potential hazards. Grounding the system correctly is non-negotiable for safety. Lastly, keep the manual handy for quick reference during the process. By adhering to these tips, DIY enthusiasts can achieve a safe and efficient installation. Remember, patience and attention to detail are essential for a successful project.

Differences Between Manual and Automatic Transfer Switches

Manual and automatic transfer switches serve the same purpose but differ in operation. A manual transfer switch requires an operator to physically switch between power sources, making it more cost-effective and straightforward for DIY installations. In contrast, an automatic transfer switch (ATS) detects power loss and switches to the backup generator without human intervention. ATS systems are more convenient and ideal for critical applications where uninterrupted power is essential. While manual switches are simpler and less expensive, automatic switches offer enhanced reliability and speed in emergency situations. Both types ensure safe power transitions, but the choice depends on specific needs and preferences. Understanding these differences helps in selecting the appropriate system for your backup power requirements.

Maintenance Tips for Longevity

Regular maintenance is crucial to ensure the longevity and reliability of a manual transfer switch. Start by inspecting the switch and its connections for wear, corrosion, or loose wires. Clean dust and debris from the switch to prevent malfunctions. Lubricate moving parts if necessary, as per the manufacturer’s instructions. Check the wiring connections to ensure they are secure and properly tightened. Test the switch periodically by simulating a power outage and verifying smooth transitions between power sources. Keep a maintenance log to track inspections and repairs. Finally, consider hiring a licensed electrician for an annual professional inspection to ensure compliance with safety standards and address any potential issues before they escalate. Proper care will extend the lifespan of your manual transfer switch and ensure reliable performance during power outages.

A manual transfer switch wiring diagram is an essential tool for ensuring safe and efficient power transfer during outages. By following the outlined steps and safety guidelines, homeowners and electricians can install and maintain these systems effectively. Proper wiring and regular maintenance are key to longevity and reliability. Understanding the components and their roles, adhering to legal standards, and troubleshooting common issues can prevent hazards and ensure uninterrupted power supply. Whether for a portable generator or a standby system, a manual transfer switch offers a practical solution for backup power needs. Always consult professional resources and follow local electrical codes to guarantee a safe and successful installation. This guide has provided a comprehensive overview, empowering users to confidently handle their manual transfer switch wiring projects.


lyman reloading manual pdf

Category : Manuals

The Lyman Reloading Manual is a trusted resource for reloaders, offering comprehensive data for rifle, handgun, and shotshell reloading. It provides detailed information on cartridge selection, bullet choices, and load preparation, making it a must-have for both beginners and experienced shooters. With over a century of expertise, the manual continues to evolve, ensuring accuracy and safety in ammunition reloading. The latest 49th Edition is available in softcover and hardbound formats, catering to diverse preferences and needs.

1.1 Overview of the Lyman Reloading Handbook

The Lyman Reloading Handbook is a comprehensive guide for ammunition reloaders, offering detailed load data for rifle, handgun, and shotshell cartridges. The 49th Edition provides updated information on powders, bullets, and techniques, ensuring safety and precision. It caters to both beginners and experienced shooters, making it an essential resource for reloading enthusiasts. The manual is available in PDF format for easy access and reference.

1.2 Importance of Reloading Manuals for Shooters

Reloading manuals like the Lyman guide are essential for shooters, providing precise load data, safety guidelines, and techniques. They enable shooters to customize ammunition for specific firearms and shooting scenarios, ensuring optimal performance. These manuals also promote safety by detailing proper procedures and precautions, making them indispensable for both novice and experienced reloaders. The Lyman manual is a trusted resource for achieving reliable and accurate reloads.

History and Evolution of the Lyman Reloading Manual

The Lyman Reloading Manual has been a core resource for reloaders for over a century, with continuous updates refining its data and techniques. The 49th edition is the most comprehensive yet, reflecting ongoing advancements in reloading technology and practices.

2.1 Key Editions of the Lyman Reloading Handbook

The Lyman Reloading Handbook has seen several landmark editions, with the 44th, 48th, and 49th being particularly notable. The 44th edition, released in 1967, is a favorite among veteran reloaders for its detailed data. The 48th edition, published in 2002, introduced updated load recipes and modern techniques. The 49th edition, the latest, offers expanded data for popular cartridges and includes both softcover and hardbound options, ensuring accessibility for all reloaders.

2.2 Major Updates in Recent Editions

Recent editions of the Lyman Reloading Handbook have introduced significant updates, including expanded load data for popular cartridges, new powder offerings, and enhanced safety guidelines. The 49th edition notably offers both softcover and hardbound formats, catering to user preferences. Additionally, the inclusion of cast bullet data and shotshell reloading information has been refined, ensuring comprehensive coverage for diverse reloading needs.

Content and Structure of the Lyman Reloading Manual

The Lyman Reloading Manual provides detailed load data for rifle, handgun, and shotshell cartridges. It includes step-by-step reloading techniques, safety guidelines, and essential tools like the Lyman Reloading Data Log.

3.1 Load Data for Rifle and Handgun Cartridges

The Lyman Reloading Manual offers extensive load data for both rifle and handgun cartridges, covering a wide range of calibers and bullet types. It provides detailed information on powder charges, bullet weights, and velocities, ensuring precise and safe reloading. The manual includes data for popular cartridges, such as .223 Remington, .308 Winchester, and 9mm Luger, as well as lesser-known calibers. With updates in recent editions, reloaders can access the latest advancements in ammunition reloading, making it a valuable resource for achieving optimal performance and accuracy.

3.2 Detailed Reloading Techniques and Safety Guidelines

The Lyman Reloading Manual provides step-by-step instructions for reloading processes, from case preparation to final assembly. It emphasizes safety, offering guidelines for handling powders, primers, and equipment. Detailed techniques ensure consistency and accuracy, while safety tips help prevent accidents. The manual also covers best practices for maintaining equipment and storing components, making it a comprehensive guide for safe and effective reloading.

Availability of the Lyman Reloading Manual in PDF Format

The Lyman Reloading Manual is widely available in PDF format, accessible through official Lyman websites, third-party platforms, and select retailers. This digital version offers convenience and easy accessibility.

4.1 Sources for Downloading the Lyman Reloading Manual PDF

Shooters can obtain the Lyman Reloading Manual PDF from official Lyman websites, trusted retailers, and platforms like Archive.org. Third-party sites often host free downloads, while retailers like MidwayUSA and Brownells provide digital versions. Ensure authenticity by sourcing from reputable platforms to avoid unauthorized or outdated content, ensuring safety and accuracy in reloading practices.

4.2 Benefits of the Digital Version

The Lyman Reloading Manual PDF offers unparalleled convenience, with instant access to data anytime, anywhere. Digital versions enable easy searches, bookmarking, and zooming for detailed viewing. They save physical storage space and reduce clutter, while regular updates ensure access to the latest reloading data. This format is ideal for modern reloaders who value efficiency, portability, and quick reference capabilities.

Special Features of the Lyman Reloading Manual

The Lyman Reloading Manual stands out with its extensive cast bullet data and shotshell reloading information, offering detailed guidance for specialized reloading needs while ensuring accuracy and safety.

5.1 Cast Bullet Data and Specialty Loads

The Lyman Reloading Manual excels in providing extensive data for cast bullet shooters, offering detailed load recipes and techniques tailored to lead projectiles. It is renowned as the most comprehensive resource for cast bullet enthusiasts, with a dedicated section addressing specific challenges and optimizations. Additionally, the manual covers specialty loads, ensuring reloaders can experiment with unique configurations while maintaining safety and performance standards. This makes it a go-to guide for those seeking precision and versatility in their reloading projects.

5.2 Shotshell Reloading Information

The Lyman Reloading Manual offers the most complete and up-to-date shotshell reloading information, covering cases, wads, and powders. Designed for precision and efficiency, it caters to both beginners and experienced reloaders. With practical data and expert tips, this section ensures the production of consistent, high-quality shotshells, making it an indispensable resource for those seeking reliable results.

Using the Lyman Reloading Manual for Beginners

The Lyman Reloading Manual is ideal for new reloaders, offering a step-by-step guide with clear instructions and safety guidelines. Its detailed load recipes and powder charges ensure a smooth start, making it a must-have for those new to reloading.

6.1 Step-by-Step Guide for New Reloaders

The Lyman Reloading Manual offers an essential step-by-step guide for beginners, covering the basics of reloading. It starts with understanding safety protocols, selecting the right tools, and preparing components. Each chapter builds on the previous, guiding new reloaders through the process of loading rifle, handgun, and shotshell cartridges. The manual emphasizes precision and caution, ensuring a solid foundation for successful reloading experiences.

6.2 Understanding Load Recipes and Powder Charges

The Lyman Reloading Manual provides detailed load recipes and powder charge guidelines, essential for ensuring safety and optimal performance. It outlines the importance of precise measurements and offers comprehensive tables for various cartridges. The manual emphasizes understanding the relationship between powder types, charge weights, and bullet selections, helping reloaders tailor loads to their specific firearms and shooting goals. This section is vital for mastering consistent and accurate reloads.

Advanced Techniques and Tips

The Lyman Reloading Manual offers advanced techniques for experienced reloaders, including precision case preparation, custom load development, and optimal bullet seating. It emphasizes safety and efficiency.

7.1 Optimizing Reloading for Specific Firearms

The Lyman Reloading Manual provides detailed guidance for tailoring reloads to specific firearms, ensuring optimal performance. It covers chamber specifications, barrel characteristics, and bullet compatibility, helping reloaders customize loads for precise accuracy and reliability. By matching bullet weight, powder charges, and case dimensions to the firearm’s design, shooters can enhance accuracy and functionality, ensuring safe and consistent results for both rifles and handguns.

7.2 Troubleshooting Common Reloading Issues

The Lyman Reloading Manual addresses common challenges like inconsistent velocities, case separations, and primer seating issues. It provides detailed solutions, such as checking brass quality, verifying powder charges, and ensuring proper die alignment. The manual also offers guidance on identifying and correcting issues related to over-pressure, bullet seating depth, and neck tension, helping reloaders achieve consistent and reliable results.

Accessories and Tools Featured in the Manual

The Lyman Reloading Manual highlights essential accessories like presses, dies, and powder measures. It also features the Lyman Reloading Data Log for tracking loads, ensuring precision and organization for reloaders.

8.1 Lyman Reloading Presses and Kits

The Lyman Reloading Manual details a range of presses and kits designed for precision and durability. From Manual to Automated Reloading Presses, Lyman offers tools like the All American 8 and Ideal C-Frame, catering to both beginners and seasoned reloaders. These presses are built for reliability, ensuring consistent results. The manual also includes setup guides and maintenance tips, helping users optimize their reloading experience. PDF versions of these manuals are available for easy access and reference.

8.2 Lyman Reloading Data Log and Other Accessories

The Lyman Reloading Data Log is an essential tool for documenting reloads, offering ample space for recording load recipes, powder charges, and results. It complements Lyman’s reloading presses and kits, ensuring organized tracking. Additional accessories like precision scales and powder measures enhance accuracy. These resources, detailed in the manual, help reloaders maintain consistency and safety. The PDF versions of these logs are easily accessible for convenient use.

Comparisons with Other Reloading Manuals

The Lyman Reloading Manual stands out for its comprehensive cast bullet data and detailed reloading techniques. It rivals manuals like Hodgdon and Speer, offering unique features and a user-friendly format.

9.1 Lyman vs. Hodgdon vs. Speer Reloading Manuals

The Lyman, Hodgdon, and Speer reloading manuals are top resources for reloaders. Hodgdon focuses on powder-specific data, Speer emphasizes bullet-specific loads, while Lyman excels in cast bullet data and detailed techniques. Lyman’s PDF availability enhances accessibility, making it a versatile choice for reloaders needing comprehensive guidance.

9.2 Unique Features of the Lyman Manual

The Lyman manual stands out for its extensive cast bullet data and detailed reloading techniques. It offers a reloading data log for tracking loads and provides both softcover and hardbound options. The 49th Edition includes comprehensive updates, ensuring accuracy and versatility. Its availability in PDF format enhances accessibility, making it a preferred choice for reloaders seeking detailed guidance and organizational tools.

User Feedback and Reviews

The Lyman Reloading Manual receives high praise from users for its comprehensive data and clear instructions. The PDF version is particularly appreciated for its convenience and accessibility.

10.1 Community Response to the Lyman Reloading Manual

The reloading community widely commends the Lyman manual for its detailed load data and practical advice. Many shooters appreciate the inclusion of cast bullet data and shotshell reloading information, while the PDF format enhances accessibility. Positive reviews highlight its value for both new and experienced reloaders, solidifying its reputation as a trusted resource in the field.

10.2 Recommendations for Improvement

Some users suggest more frequent updates to reflect new bullet and powder options. Additional data on niche calibers and cast bullet loads would be beneficial. Enhancing the PDF’s search functionality and adding more high-resolution images could improve usability. These improvements would further solidify the manual’s position as a go-to resource for reloaders of all skill levels.

The Lyman Reloading Manual remains a cornerstone for reloaders, adapting to new technologies. Its future editions promise enhanced data and digital accessibility, ensuring continued relevance.

11.1 The Role of Lyman in Modern Reloading

Lyman Products continues to lead the reloading industry with its comprehensive manuals and innovative tools. The Lyman Reloading Manual serves as an essential guide, offering precise load data and techniques. By combining tradition with modern advancements, Lyman empowers shooters to craft reliable ammunition, making it indispensable in today’s reloading community. Its commitment to accuracy and safety ensures its enduring relevance.

11.2 Expectations for Future Editions

Future editions of the Lyman Reloading Manual are expected to include updated load data for new cartridges, powders, and projectiles. Enhanced digital integration, such as interactive load calculators, may also be introduced. Expanded sections on cast bullets and shotshell reloading could be anticipated. Users hope for improved troubleshooting guides and more detailed safety protocols, ensuring the manual remains a leader in reloading resources.


honeywell air cooler manual

Category : Manuals

Safety Guidelines and Precautions

Always read the manual before using the Honeywell air cooler․ Ensure proper electrical connections and avoid water spillage․ Keep the unit away from flammable materials and ensure good ventilation for safe operation․

  • Place the cooler on a stable, flat surface to prevent tipping․
  • Avoid touching electrical components with wet hands․
  • Keep children away from moving parts and hot surfaces․
  • Never operate the cooler near open flames or sparks․

Regularly inspect the power cord and plug for damage․

1․1 General Safety Precautions

Always read the manual thoroughly before operating the Honeywell air cooler․ Ensure proper electrical connections and avoid water spillage․ Place the unit on a stable, flat surface to prevent tipping․ Keep the cooler away from flammable materials and ensure good ventilation in the room․ Regularly inspect the power cord and plug for damage․ Avoid touching electrical components with wet hands․ Never operate the cooler near open flames, sparks, or in areas with high humidity․ Follow all safety guidelines to ensure safe and efficient operation․

  • Keep children and pets away from moving parts and hot surfaces․
  • Avoid overloading the water tank to prevent leaks․
  • Disconnect the power before cleaning or maintaining the unit․

1․2 Important Safety Instructions Before Use

Before using the Honeywell air cooler, ensure the unit is placed on a stable, flat surface to prevent tipping․ Check all electrical connections for damage and ensure proper installation․ Avoid exposing the unit to direct sunlight or extreme temperatures․ Keep the area around the cooler well-ventilated to ensure efficient operation․ Always follow the recommended water level in the tank to avoid spills․ Never use the cooler near open flames or sparks, and ensure all safeguards are in place before turning it on․

  • Inspect the power cord and plug for any damage․
  • Use only genuine Honeywell parts for replacement․
  • Avoid operating the cooler in areas with high humidity․

Installation and Setup

Place the Honeywell air cooler on a flat, stable surface․ Ensure proper ventilation and distance from walls․ Fill the water tank carefully, avoiding overfilling․ Install any additional features like ice packs according to the manual instructions․

  • Position the cooler away from direct sunlight and heat sources․
  • Connect the unit to a power source with the correct voltage rating․
  • Ensure all parts are securely assembled before operation․
  • 2․1 Placement and Positioning of the Honeywell Air Cooler

    Place the Honeywell air cooler on a stable, flat surface in a well-ventilated area․ Ensure it is at least 6 inches away from any walls or obstacles to allow proper airflow․ Position the cooler in a location where it can distribute cool air evenly across the room․ Avoid placing it in direct sunlight or near heat sources, as this may reduce cooling efficiency․ Ideally, place it near a window or door to enhance ventilation and cooling performance․ Ensure the area around the unit is clear for optimal operation․

    • Check the manual for specific placement recommendations․
    • Use casters for easy mobility between rooms․
    • Avoid placing the cooler on carpets to ensure proper airflow․
    • Position it near a window for better ventilation․

    2․2 Filling the Water Tank and Ice Compartment

    To ensure optimal performance, fill the water tank with fresh, cold water․ Detach the tank from the unit and fill it to the maximum level indicated․ For enhanced cooling, place ice packs in the ice compartment․ Avoid using hot water, as it may damage the system․ Ensure the tank is securely locked back into place to prevent leaks during operation․

    • Use a clean water source to maintain hygiene and efficiency․
    • Add ice packs to lower the water temperature for cooler air․
    • Do not overfill the tank, as this may reduce airflow efficiency․

    2․3 Connecting and Installing Additional Features (e․g․, Ice Packs)

    For enhanced cooling, place ice packs in the designated ice compartment․ Ensure the compartment is dry before adding ice packs to prevent water damage․ Securely close the compartment lid to maintain optimal cooling performance․ Ice packs should be replaced as needed when they lose their cooling effectiveness․

    • Use compatible ice packs designed for your Honeywell air cooler model․
    • Avoid overloading the compartment, as this may obstruct airflow․
    • Replace ice packs every 6-8 hours for consistent cooling efficiency․

    Operating the Honeywell Air Cooler

    Turn on the unit, select your preferred cooling mode, and adjust settings using the remote control for efficient operation․ Ensure the water level is adequate for optimal performance․

    3․1 Understanding Cooling Modes and Functions

    The Honeywell air cooler operates in cooling mode, providing moist, cool air through water evaporation․ It features a manual water regulator knob in the ice compartment to control water flow over the Honeycomb Cooling Media, optimizing cooling and humidification․ The unit offers adjustable speed settings and airflow direction for customized comfort․ Use the remote control to conveniently switch modes, adjust settings, and monitor water levels․ Ensure the water tank is filled adequately for consistent performance․ Regularly check and clean the filter to maintain efficiency and airflow quality․

    • Cooling mode: Evaporative cooling for moist air․
    • Adjustable speed: Customize airflow strength․
    • Manual water regulator: Control humidification levels․
    • Remote control: Easy operation from a distance․

    3․2 Adjusting Speed Settings and Airflow Direction

    The Honeywell air cooler allows you to adjust speed settings to customize airflow strength․ Use the control panel or remote control to select from multiple speed options․ Airflow direction can be managed using the louvers, which can be adjusted manually to direct cool air where needed․ Ensure proper airflow by positioning the cooler correctly in the room․ Regularly cleaning the filter and Honeycomb Cooling Media will help maintain optimal airflow efficiency and performance․ Adjust settings based on room size and personal comfort preferences for the best results․

    • Multiple speed settings for airflow customization․
    • Adjustable louvers for directional airflow control․
    • Remote control for convenient operation․
    • Optimize airflow based on room conditions․

    3․3 Using the Remote Control for Convenience

    The Honeywell air cooler comes with a remote control, offering convenient operation from across the room․ Use it to adjust cooling modes, fan speed, and airflow direction without moving․ The remote allows you to customize settings effortlessly, ensuring optimal comfort․ Some models feature a timer function, enabling you to start or stop the cooler automatically․ This enhances energy efficiency and provides a seamless user experience․ Always ensure the remote batteries are properly installed for consistent performance․

    • Adjust cooling modes and fan speed remotely․
    • Control airflow direction with ease․
    • Set timers for automated operation․
    • Ensure batteries are correctly installed․

    Maintenance and Care

    Regularly clean the grille and cooling media to ensure efficient operation․ Drain the water tank periodically to prevent mineral buildup․ Check for damage and clean filters․

    • Clean the grille and cooling media regularly․
    • Drain the water tank to avoid mineral buildup․
    • Inspect and clean filters for optimal performance․

    4․1 Cleaning the Filter and Honeycomb Cooling Media

    Regular cleaning of the filter and honeycomb cooling media is essential for maintaining optimal performance․ Turn off and unplug the unit before cleaning․ Use a soft brush to remove dust and debris from the filter and media․ For stubborn dirt, mix mild detergent with warm water, gently scrub, and rinse thoroughly․ Allow all components to dry completely before reassembling to prevent mold growth․ Cleaning ensures efficient airflow and cooling efficiency, keeping your Honeywell air cooler functioning at its best․

    • Clean the filter and media regularly with a soft brush․
    • Use mild detergent for stubborn dirt․
    • Rinse thoroughly and allow to dry․

    4․2 Refilling the Water Tank and Monitoring Water Levels

    To ensure continuous operation, refill the water tank regularly․ Turn off the unit and unplug it before refilling․ Use clean, distilled water to prevent mineral buildup․ Avoid overfilling to prevent leaks․ Check water levels daily, especially in hot or dry conditions․ Refill when the water level is low to maintain optimal cooling performance․ Regular monitoring ensures efficient operation and prevents damage to the unit․

    • Use clean, distilled water for refilling․
    • Avoid mixing water with ice in the tank․
    • Check water levels daily for optimal performance․

    4․3 Drying the Unit After Use to Prevent Mold

    After each use, dry the Honeywell air cooler to prevent mold and mildew growth․ Turn off the unit, unplug it, and drain the water tank․ Use a clean towel to wipe the interior and exterior surfaces․ Allow the unit to air dry completely before storing it․ Regular cleaning and drying ensure optimal performance and prolong the unit’s lifespan․ Always follow the manual’s instructions for proper maintenance․

    • Turn off and unplug the unit before drying․
    • Drain the water tank and wipe all surfaces dry․
    • Regularly inspect for moisture or mold growth․

    Troubleshooting Common Issues

    Check for common issues like insufficient cooling, low airflow, or water leakage․ Ensure the unit is properly assembled and the water tank is filled․ Reset the unit if necessary․

    • Verify electrical connections and water levels․
    • Clean or replace the filter if clogged․
    • Ensure the air inlet and outlet are unobstructed․

    5․1 Identifying and Resolving Common Problems

    Common issues with Honeywell air coolers include insufficient cooling, low airflow, or water leakage․ Start by checking the power cord and ensuring the unit is properly plugged in․ Verify that the water tank is filled and the water pump is functioning․ If the cooler is not cooling, ensure the filter and honeycomb media are clean and free of blockages․ For low airflow, check if the air vents are obstructed or if the unit is placed too close to walls․

    • Reset the unit by turning it off and on again․
    • Inspect for water leaks and tighten any loose connections․
    • Ensure the remote control batteries are functional․

    5․2 Resetting the Unit and Checking Electrical Connections

    To reset your Honeywell air cooler, turn it off and unplug it from the power source․ Wait for 30 seconds before plugging it back in and turning it on․ This often resolves minor operational issues․ Always ensure the power cord is securely connected to both the unit and the electrical outlet․ Avoid using damaged cords or overloaded circuits, as this can cause malfunctions; If the cooler does not power on, check the outlet for functionality and ensure the circuit breaker has not tripped․

    • Inspect the power cord for any signs of damage or fraying․
    • Avoid using extension cords, as they may reduce performance․
    • Ensure the outlet is working correctly before troubleshooting further․

    Tips for Optimal Performance

    Position the Honeywell air cooler near a window for maximum airflow efficiency․ Adjust the manual water regulator to optimize cooling and humidity levels for your space․

    • Regularly clean the filter and honeycomb media to ensure proper airflow․
    • Monitor water levels in the tank to maintain consistent cooling performance․

    6․1 Maximizing Cooling Efficiency in Different Room Sizes

    For optimal performance, position the Honeywell air cooler in rooms sized 11-34 square meters, depending on the model․ Place it near a window to enhance cross ventilation and ensure even cooling distribution․

    1. In smaller rooms, use lower fan speeds to maintain consistent cooling without over-humidification․
    2. In larger spaces, adjust the manual water regulator to increase moisture output for better heat absorption․
    3. For maximum efficiency, ensure the water tank is full and the honeycomb media is consistently wet․

    Regularly cleaning the filter and cooling media also enhances airflow and cooling efficiency across all room sizes․

    6․2 Using the Manual Water Regulator for Humidity Control

    The Honeywell air cooler features a manual water regulator located in the ice compartment․ This knob allows you to adjust the water flow over the honeycomb media, controlling humidity levels and cooling efficiency․

    • For drier climates, reduce water flow to minimize humidity․
    • In humid environments, increase water flow for enhanced cooling․
    • Monitor the water tank level to ensure consistent performance․

    Adjusting the regulator balances moisture output with cooling needs, optimizing comfort in various settings․


footjoy size guide

Category : Guide

The FootJoy size guide is essential for ensuring optimal comfort and performance․ It helps golfers and casual wearers choose the perfect fit, addressing various foot shapes and preferences․

1․1 Why Understanding the Size Guide is Important

Understanding the FootJoy size guide is crucial for ensuring a proper fit, which directly impacts comfort and performance․ Ill-fitting shoes can lead to discomfort, poor gameplay, and even foot health issues․ The guide helps you navigate FootJoy’s diverse product range, ensuring you select the right size and width for your needs․ Proper sizing enhances overall satisfaction and longevity of the shoes․

1․2 Brief Overview of FootJoy Products

FootJoy is a renowned brand specializing in high-quality golf footwear and apparel․ Their product line includes a wide range of golf shoes, casual footwear, and accessories designed for performance, comfort, and style․ From classic models to innovative designs, FootJoy caters to men, women, and juniors, ensuring a perfect fit for every golfer․ Their commitment to quality, durability, and cutting-edge technology makes them a trusted choice among professionals and enthusiasts alike․

Understanding the FootJoy Size Chart

The FootJoy size chart offers a detailed guide for men, women, and juniors, ensuring accurate sizing․ It includes length and width options to help you find the perfect fit․

2․1 Men’s Shoe Size Chart

The FootJoy men’s shoe size chart provides a precise measurement guide, ensuring a comfortable and accurate fit․ It includes options for various foot lengths and widths, catering to different preferences․ The chart typically ranges from size 6 to 16, offering both standard and wide widths․ By aligning your foot measurements with the chart, you can determine the ideal size for optimal comfort and performance during golf or casual activities․ Proper fit is crucial for support and mobility․

2․2 Women’s Shoe Size Chart

The FootJoy women’s shoe size chart offers a detailed guide to help find the perfect fit․ It includes sizes ranging from 5 to 12, with options for narrow, standard, and wide widths․ The chart is designed to accommodate various foot shapes, ensuring comfort and support․ By matching your foot length and width to the chart, you can select the ideal size for golfing or casual wear․ Proper fit enhances performance and all-day comfort․

2․3 Junior Shoe Size Chart

The FootJoy junior shoe size chart caters to younger golfers, offering sizes from 1 to 7․ It includes narrow, standard, and wide widths to fit various foot shapes․ Proper fit is essential for growing feet to avoid discomfort and potential issues․ Parents should measure their child’s feet regularly, as sizes can change quickly․ Use the chart to find the ideal size for comfort and performance in golf or casual activities․

How to Measure Your Feet for the Best Fit

Measure your feet on flat ground, using a ruler to find the longest toe․ Ensure accurate length and width for the best fit in FootJoy shoes․

3․1 Step-by-Step Measurement Guide

To ensure the best fit, start by placing your foot flat on the ground․ Measure the length from the back of the heel to the tip of the longest toe․ Use a ruler or measuring tape to record the length and width․ Compare these measurements with the FootJoy size chart to determine your ideal size․ Repeat for both feet, as they may differ slightly, and choose the larger size for optimal comfort․

3․2 Understanding Foot Length and Width

Accurate foot length and width measurements are crucial for a proper fit․ Foot length determines your shoe size, while width ensures comfort and prevents issues like tightness or slipping․ Use a ruler or Brannock device to measure length from heel to longest toe․ Width is measured across the ball of the foot․ FootJoy offers narrow, standard, and wide options to accommodate different foot shapes, ensuring optimal comfort and performance for golfers and casual wearers alike․

FootJoy Width Options

FootJoy offers narrow, standard, and wide widths to cater to diverse foot shapes, ensuring a comfortable and precise fit for enhanced performance and all-day wearability․

4․1 Narrow, Standard, and Wide Widths Explained

FootJoy offers three width options to accommodate different foot shapes: Narrow, Standard, and Wide․ Narrow fits slender feet, Standard suits most wearers, and Wide provides extra room for broader feet․ Each width ensures optimal comfort and support, preventing discomfort or restrictive movement․ Understanding your foot width is crucial for a precise fit, enhancing performance and all-day wearability․

4․2 How to Determine Your Foot Width

To determine your foot width, measure the widest part of your foot using a Brannock device or ruler․ Stand barefoot on a flat surface, placing the ruler across the ball of your foot․ Compare the measurement to FootJoy’s size chart to identify whether you need Narrow, Standard, or Wide width․ Accurate measurement ensures the best fit, preventing discomfort and allowing optimal performance and comfort in your FootJoy shoes․

Choosing the Right Shoe Based on Usage

Selecting the right FootJoy shoe depends on your activity․ Golf shoes offer traction and stability, while casual styles prioritize comfort for everyday wear․ Match your lifestyle and needs for optimal performance and comfort․

5․1 Golf Shoes vs․ Casual Shoes

Golf shoes are designed for traction, stability, and waterproofing, featuring specialized outsoles for performance on the course․ Casual shoes prioritize comfort and versatility for everyday wear, offering softer cushioning and breathable materials․ Understanding these differences helps in selecting the right footwear based on your primary activity, ensuring both comfort and functionality․

5․2 Specialty Shoes for Different Playing Conditions

FootJoy offers specialty shoes tailored for specific playing conditions, such as waterproof designs for wet courses and breathable options for hot weather․ Spikeless shoes provide versatility for multi-surface play, while cleated models enhance traction on soft turf․ Each style ensures optimal performance and comfort, addressing unique demands of various golfing environments while maintaining the reliability of the FootJoy size guide for a precise fit․

Common Fit Issues and Solutions

Common fit issues include shoes being too tight or loose․ Solutions involve adjusting size, width, or using insoles․ Proper measurement ensures optimal comfort and performance․

6․1 When Shoes Are Too Tight or Too Loose

If shoes feel too tight, consider a half-size larger or wider width․ Loose shoes may require a smaller size or narrower width․ Proper measurement ensures comfort and prevents blisters or slipping․ Break-in periods can help with tightness, while insoles may address looseness․ Addressing fit issues early enhances performance and overall satisfaction with FootJoy products․

6․2 Breaking in New Shoes

Breaking in new FootJoy shoes ensures comfort and prevents discomfort during use․ Start by wearing them for short periods indoors to mold to your feet․ Gradually increase wear time․ Use shoe stretchers or softeners if needed․ For leather shoes, apply conditioner to enhance flexibility․ Proper break-in prevents blisters and ensures a snug, supportive fit, maximizing performance and comfort in golf or casual settings․

Comparing FootJoy Sizes to Other Brands

The FootJoy size guide helps compare sizes with other brands, ensuring consistent fit․ Sizes may vary slightly, so checking specific charts is crucial for accurate comparisons and comfort․

7․1 Size Consistency Across Brands

FootJoy sizes may differ slightly from other brands due to varying fits and materials․ While some brands offer standardized sizing, others cater to specific foot shapes or preferences․ Always compare size charts and read reviews to ensure consistency․ This helps avoid mismatches and ensures optimal comfort and performance across different brands, making it easier to find your perfect fit regardless of the brand you choose․

7․2 How FootJoy Sizes Relate to Other Popular Brands

FootJoy sizes are generally consistent with other popular brands, but slight variations may occur due to differences in fit and design․ For example, a size 10 in FootJoy might align closely with a size 10 in Nike or Adidas, but could run slightly larger or smaller depending on the specific style․ Always refer to the size chart and customer reviews for precise comparisons to ensure the best fit for your needs․

Care and Maintenance for Longevity

Proper care ensures FootJoy shoes last longer․ Regularly clean with mild soap, avoid extreme heat, and store in a dry, cool place to maintain quality․

8․1 Tips for Extending the Life of Your FootJoy Shoes

Regular cleaning with mild soap and water prevents dirt buildup․ Allow shoes to air dry naturally to avoid damage from heat․ Use shoe trees to maintain shape and reduce creasing․ Avoid harsh chemicals or abrasive cleaners․ Condition leather periodically to keep it supple․ Clean outsoles thoroughly after use․ Protect shoes from excessive moisture and store them in a cool, dry place when not in use․

8․2 Cleaning and Storage Best Practices

Use a soft brush to remove dirt from outsoles and uppers․ Dampen a cloth with mild soap and water for cleaning, avoiding harsh chemicals․ Allow shoes to air dry naturally, away from direct sunlight or heat․ Store in a cool, dry place, away from moisture․ Use shoe trees to maintain shape and prevent creasing․ Avoid stacking shoes to prevent damage․ Regular maintenance ensures longevity and preserves the quality of your FootJoy shoes․

The FootJoy size guide ensures a perfect fit, enhancing comfort and performance․ By following the guide, golfers can make informed choices, experiencing the best in footwear quality․

9․1 Final Thoughts on Using the FootJoy Size Guide

Using the FootJoy size guide ensures a personalized fit, boosting confidence and performance․ It helps golfers and casual wearers alike make informed decisions, prioritizing comfort and durability․ By following the guide, individuals can enjoy enhanced footwear experiences tailored to their specific needs, making every step or swing more enjoyable and effective․

9․2 Encouragement to Try FootJoy Products

FootJoy products are renowned for their exceptional comfort, durability, and performance, making them a top choice for golfers and casual wearers․ With a wide range of styles and sizes, FootJoy ensures a perfect fit for every foot․ Their commitment to quality and innovation guarantees a superior footwear experience․ Whether on the course or off, FootJoy delivers unmatched comfort and support, making them a must-try for anyone seeking reliable and stylish footwear․


nx stamping quick start guide

Category : Guide

The NX Stamping Quick Start Guide provides an overview of Siemens NX’s sheet metal stamping capabilities, offering tools for efficient design, simulation, and production. It helps users master the software, streamlining workflows and reducing costs for modern manufacturing.

Overview of NX Stamping

The NX Stamping Quick Start Guide introduces users to Siemens NX’s advanced sheet metal stamping tools, designed to optimize design, simulation, and production processes. It provides a comprehensive overview of the software’s capabilities, focusing on streamlining workflows for industries like electronics and consumer goods. The guide covers essential tools, settings, and best practices, ensuring users can efficiently create and simulate stamping processes. By leveraging NX Stamping, engineers can enhance precision, reduce costs, and accelerate production. This resource is tailored for both new and experienced users, offering a clear path to mastering NX Stamping’s powerful features and integrating them into manufacturing workflows.

Applications of NX Stamping

NX Stamping is widely used in industries requiring precise sheet metal fabrication, such as electronics, automotive, aerospace, and consumer goods. It excels in creating intricate designs for small components, like those found in electronic devices, while also handling larger-scale applications, such as vehicle body panels. The NX Stamping Quick Start Guide highlights its versatility, showcasing how it streamlines production for complex geometries and thin-gauge materials. By integrating design and simulation tools, NX Stamping ensures high-quality outputs, making it an essential tool for manufacturers aiming to enhance efficiency and reduce production costs across various sectors. Its applications span from prototyping to full-scale production, catering to diverse manufacturing needs.

System Requirements

NX Stamping requires a multi-core processor, 8GB RAM, and a 64-bit operating system (Windows 10/11). A dedicated GPU is recommended for optimal performance and visualization.

Hardware and Software Requirements

For optimal performance, NX Stamping requires a multi-core processor (Intel i5 or AMD equivalent) and at least 8GB of RAM, with 16GB recommended for complex projects. A 64-bit operating system (Windows 10 or 11) is mandatory. Additionally, a dedicated GPU with DirectX 11 support is recommended for enhanced visualization. Ensure sufficient storage, as the software requires up to 10GB of disk space. Internet connectivity is needed for updates and licensing. Software prerequisites include .NET Framework 4.8 and compatible drivers for your graphics card. For detailed specifications, refer to the official Siemens documentation to ensure compatibility with your system configuration.

Installation Guide

Download the NX Stamping Quick Start Guide installer from the official Siemens website. Run the installer, follow on-screen prompts, and complete the installation to access advanced stamping tools for efficient manufacturing.

Step-by-Step Installation

Ensure your system meets the hardware and software requirements for NX Stamping.
Download the latest version of the NX Stamping Quick Start Guide from the official Siemens website.
Run the installer and follow the on-screen instructions to begin the installation process.
Select the desired installation location and choose any additional features you wish to include.
Wait for the installation to complete, which may take several minutes.
Once installed, launch NX Stamping and configure your settings as needed.
Familiarize yourself with the interface and tools to start your projects efficiently.

Navigating the User Interface

The NX Stamping interface features intuitive toolbars, menus, and a command bar, allowing users to efficiently access and utilize its comprehensive stamping design and simulation tools.

Understanding the NX Stamping Interface

The NX Stamping interface is designed for user-friendly navigation, featuring toolbars, menus, and a command bar that simplify access to its comprehensive tools. The interface allows 3D model creation and manipulation, with commands organized to streamline workflows. The command bar, typically located at the bottom, displays the current command and offers input options for parameter adjustments. This layout ensures efficiency and precision in designing and simulating sheet metal components, making it an essential tool for modern manufacturing environments focused on optimizing production processes.

Customizing the Workspace

The NX Stamping interface allows for extensive customization to meet individual user needs, enhancing productivity and workflow efficiency. Users can personalize toolbars, menus, and shortcuts to access frequently used commands quickly. The workspace can be tailored by arranging panels, windows, and tabs to suit specific tasks, such as sheet metal design or simulation. Additionally, users can customize settings and preferences for tools, colors, and layouts to optimize their experience; This flexibility ensures that the interface adapts to the user’s workflow, streamlining operations and improving overall performance in manufacturing environments focused on precision and efficiency.

Creating a New Project

The NX Stamping Quick Start Guide simplifies initiating sheet metal projects, offering step-by-step instructions to set up and configure new designs efficiently within Siemens NX.

Starting a New Sheet Metal Project

Starting a new sheet metal project in Siemens NX is streamlined with the NX Stamping Quick Start Guide. The guide provides clear instructions for setting up and configuring new projects, ensuring efficiency from the outset. Users can easily select predefined templates or create custom setups tailored to their specific needs. The interface offers intuitive tools for defining project parameters, such as material properties and thicknesses. Additionally, the guide highlights best practices for organizing files and utilizing libraries to accelerate the design process. By following these steps, users can quickly transition from concept to production, leveraging NX Stamping’s advanced capabilities for precise and efficient sheet metal design.

Designing Sheet Metal Components

The NX Stamping Quick Start Guide provides essential tools and settings for designing sheet metal components. It offers a user-friendly interface with toolbars and menus for easy access to commands. The guide includes features like bend allowances and punch placement, ensuring precise and efficient design workflows. By following the guide, users can optimize their sheet metal designs for manufacturing, leveraging NX Stamping’s advanced capabilities to enhance productivity and accuracy.

Using Stamping-Specific Tools

The NX Stamping Quick Start Guide introduces users to specialized tools designed for precision sheet metal stamping. These tools enable the creation of complex geometries, accurate bend allowances, and detailed punch layouts. The software offers advanced features like die design and forming simulation, ensuring optimal results. Users can leverage these tools to streamline workflows, reduce material waste, and enhance product quality. The guide emphasizes mastering these tools to achieve efficient and accurate stamping processes, making it an essential resource for manufacturers focused on precision and productivity.

Simulating the Stamping Process

The NX Stamping Quick Start Guide enables users to simulate stamping processes for enhanced efficiency and accuracy. It provides insights into material behavior and potential design flaws, ensuring optimal outcomes through precise modeling and analysis.

Running and Interpreting Simulations

Running simulations in NX Stamping allows users to analyze material behavior and identify potential design flaws. The Quick Start Guide provides step-by-step instructions for setting up simulations, including defining parameters and material properties. Once simulations are executed, users can interpret results through detailed reports and visualizations, such as stress distributions and deformation patterns. These insights enable engineers to optimize stamping processes, improve product quality, and reduce production costs. The guide also offers tips for refining simulations based on real-world conditions, ensuring accurate and actionable outcomes. By leveraging these tools, users can enhance their design efficiency and achieve precise manufacturing results.

Best Practices

Adopt best practices by utilizing NX Stamping tools effectively, optimizing design workflows, and enhancing simulation accuracy to streamline processes, improve manufacturing efficiency, and reduce costs.

Mastering NX Stamping

Mastering NX Stamping involves leveraging its advanced tools to optimize sheet metal design and simulation processes. Start by familiarizing yourself with the NX Stamping Quick Start Guide, which provides essential tips and best practices. Understand the software’s specific tools for stamping, such as die design and forming simulation. Customize your workspace to enhance productivity and streamline workflows. Practice with real-world projects to refine your skills. Additionally, explore Siemens’ resources, including tutorials and community forums, to stay updated on the latest features and techniques. By consistently applying these strategies, you can achieve mastery in NX Stamping, ensuring efficient and precise manufacturing outcomes.

Troubleshooting Common Issues

Address software and design issues in NX Stamping by checking system requirements, reinstalling updates, or consulting Siemens’ support resources and user forums for solutions.

Resolving Software and Design Problems

Common issues in NX Stamping often relate to software compatibility or design inaccuracies. Ensure your system meets the minimum hardware and software requirements to prevent performance issues. Reinstalling updates or restarting the program can resolve glitches. For design problems, verify part accuracy and simulation settings. Consult Siemens’ support resources or user forums for tailored solutions. Utilize diagnostic tools to identify errors and apply patches as needed. Referencing the NX Stamping Quick Start Guide can also provide troubleshooting tips for specific scenarios, helping you restore functionality and achieve precise results efficiently.

Additional Resources

Explore Siemens’ official guides, online tutorials, and community forums for advanced learning. The NX Stamping Quick Start Guide and user manuals provide detailed support for troubleshooting and mastering the software.

Further Learning and Support

For deeper understanding, Siemens offers extensive resources, including official guides, webinars, and community forums. The NX Stamping Quick Start Guide complements these materials, providing step-by-step instructions and best practices. Online tutorials and user manuals are available for troubleshooting and mastering advanced features. The Siemens NX playlist on YouTube features tips and tricks to enhance your skills. Additionally, forums like Eng-Tips provide valuable insights and support from experienced users. For programming, resources like the NX Open Getting Started Guide and SNAP documentation are essential. These tools ensure users can efficiently learn and apply NX Stamping, achieving their design and production goals effectively.


what provides the set of guiding principles for managing wildlife

Category : Guide

Wildlife management principles provide a framework for maintaining ecological integrity while balancing human activities with conservation goals, ensuring sustainability and ethical treatment of wildlife populations.

1.1 Definition and Importance of Wildlife Management

Wildlife management refers to the practice of managing wildlife populations and their habitats to ensure sustainability and conservation. It involves scientific, ethical, and practical approaches to maintain ecological balance and biodiversity. The importance lies in preserving species, ecosystems, and natural resources for future generations while addressing human-wildlife conflicts and promoting coexistence. Effective management ensures healthy wildlife populations, supports ecosystem services, and aligns with human economic and cultural needs. It also fosters ethical treatment of animals and integrates research, policy, and community engagement to achieve long-term conservation goals.

1.2 Historical Development of Wildlife Management Practices

Wildlife management practices have evolved from ancient hunting regulations to modern, science-based conservation strategies. Early efforts focused on game laws and sustainable harvesting, while the 20th century saw the rise of ecological principles and habitat preservation. Key milestones include the establishment of protected areas, wildlife refuges, and international agreements like CITES. The field has shifted from exploitation to sustainability, integrating biodiversity conservation, ethical considerations, and community involvement. Historical lessons highlight the importance of adaptive management, balancing human needs with ecological integrity to ensure the long-term survival of wildlife populations and ecosystems.

Key Ecological Principles Guiding Wildlife Management

Key ecological principles, such as biodiversity conservation, carrying capacity, and ecosystem balance, provide the foundation for effective wildlife management, ensuring sustainable and ecologically sound decision-making practices.

2.1 Biodiversity Conservation

Biodiversity conservation is a cornerstone of wildlife management, focusing on the protection and restoration of diverse ecosystems, species, and genetic variability. It ensures the survival of plants and animals by maintaining healthy ecosystems, which provide essential services like clean water, pollination, and climate regulation. Conservation efforts often involve habitat preservation, species protection, and the control of invasive species. By safeguarding biodiversity, wildlife managers help maintain ecological balance, support ecosystem resilience, and ensure the long-term sustainability of natural resources. This principle underscores the interconnectedness of all living organisms and their roles in maintaining a functional planet.

2.2 Carrying Capacity and Population Dynamics

Carrying capacity refers to the maximum number of a species an environment can sustain indefinitely, influenced by resource availability, habitat quality, and environmental factors. Population dynamics involve the study of factors affecting population sizes, such as birth rates, mortality, migration, and disease. Understanding these principles helps wildlife managers maintain balanced ecosystems, preventing overpopulation or declines that could harm species or habitats. By monitoring and managing populations within their carrying capacity, conservation efforts can ensure long-term sustainability and ecological health, aligning with broader conservation goals and maintaining biodiversity.

2.3 Ecosystem Balance and Habitat Preservation

Ecosystem balance and habitat preservation are critical for maintaining biodiversity and ensuring species survival; Wildlife managers focus on preserving natural habitats to sustain diverse ecosystems, which in turn support complex interactions between species and their environments. By protecting critical habitats, managers can mitigate the impacts of human activities and climate change. Restoring degraded habitats and maintaining ecological integrity are essential for long-term conservation. These efforts ensure that ecosystems remain resilient, supporting both wildlife and human needs while promoting overall environmental health and sustainability.

Ethical Considerations in Wildlife Management

Ethical considerations in wildlife management emphasize animal welfare, rights, and the moral obligation to protect species. They guide decisions to ensure sustainable practices and mitigate human-wildlife conflicts responsibly.

3.1 Animal Welfare and Rights

Animal welfare and rights are central to ethical wildlife management, emphasizing the humane treatment and protection of animals. These principles ensure that wildlife management practices minimize stress, pain, and harm to animals. They also advocate for the preservation of natural behaviors and habitats, aligning with conservation goals. Ethical considerations include avoiding unnecessary interventions and ensuring that management decisions prioritize animal well-being. Additionally, these principles address concerns about animal rights, promoting policies that respect species’ intrinsic value and safeguard their welfare in human-dominated landscapes. Balancing human activities with animal welfare is crucial for sustainable and ethical wildlife management strategies.

3.2 Human-Wildlife Conflict Mitigation

Human-wildlife conflict mitigation focuses on reducing clashes between humans and wildlife, often arising from habitat encroachment or resource competition. Strategies include habitat preservation, wildlife corridors, and community engagement to foster coexistence. Compensation schemes for crop or livestock losses help alleviate tensions. Education campaigns highlight the importance of wildlife conservation and the need for harmonious coexistence. Effective mitigation requires balancing human needs with ecological preservation, ensuring sustainable solutions that protect both wildlife and livelihoods while addressing the root causes of conflicts. This approach promotes biodiversity conservation and maintains ecosystem health for future generations.

Legal and Regulatory Frameworks for Wildlife Management

Legal frameworks, including international treaties and national laws, provide principles for wildlife management, ensuring conservation and sustainable use through regulatory enforcement.

4.1 International Agreements and Treaties

International agreements and treaties establish foundational principles for wildlife management, ensuring global cooperation to address shared conservation challenges. Key treaties like CITES and CMS regulate the trade and migration of species, while others, such as the Ramsar Convention, focus on habitat protection. These agreements provide legal frameworks to combat illegal wildlife trafficking, promote sustainable use of resources, and safeguard biodiversity. By fostering collaboration among nations, international treaties are crucial for maintaining ecological balance and ensuring the long-term survival of wildlife populations. They also guide national policies, reinforcing global commitments to conservation.

4.2 National and Local Laws Governing Wildlife

National and local laws provide specific regulations and enforcement mechanisms for wildlife management within defined jurisdictions. These laws often include protections for endangered species, restrictions on hunting and fishing, and rules for habitat preservation. For example, the U.S. Endangered Species Act and the European Union’s Habitats Directive are cornerstone legislations. Local ordinances may address regional concerns, such as controlling invasive species or managing human-wildlife conflicts. Together, these legal frameworks ensure compliance with broader conservation goals while adapting to local ecological and social contexts, balancing biodiversity protection with human activities.

Economic Principles Influencing Wildlife Management

Economic principles guide wildlife management by balancing costs, benefits, and market dynamics, ensuring sustainable practices and equitable resource distribution while conserving biodiversity and ecosystem services effectively.

5.1 Sustainable Tourism and Wildlife-Based Economies

Sustainable tourism and wildlife-based economies play a crucial role in wildlife management by providing economic incentives for conservation. These practices promote responsible travel to natural areas, fostering environmental awareness and generating revenue for local communities. Wildlife-based economies, such as ecotourism, create jobs and income sources that value biodiversity, encouraging the preservation of habitats and species; By aligning economic benefits with conservation goals, these approaches ensure that wildlife and ecosystems are protected while supporting human well-being. This balance is essential for long-term sustainability and the ethical use of natural resources.

5.2 Cost-Benefit Analysis in Conservation Decisions

Cost-benefit analysis is a crucial tool in wildlife management, helping decision-makers evaluate the trade-offs between conservation actions and alternative uses of resources. By systematically comparing the potential costs and benefits of different strategies, such as habitat restoration or anti-poaching measures, managers can prioritize actions that maximize conservation outcomes while minimizing economic and social impacts. This approach ensures that limited resources are allocated efficiently, balancing ecological goals with human needs. Transparent and inclusive cost-benefit analyses also foster stakeholder engagement, ensuring that diverse interests are considered in conservation planning. This method is essential for making informed, equitable decisions that align with long-term sustainability and ethical wildlife management practices.

Social and Cultural Dimensions of Wildlife Management

Social and cultural dimensions emphasize the role of community engagement, cultural values, and traditional knowledge in shaping wildlife management practices, fostering coexistence and inclusive decision-making processes.

6.1 Indigenous Knowledge and Traditional Practices

Indigenous knowledge and traditional practices offer invaluable insights into wildlife management, emphasizing holistic approaches that balance ecological integrity with cultural preservation. These practices, passed through generations, often incorporate detailed understanding of local ecosystems, seasonal patterns, and animal behavior. Indigenous communities frequently employ sustainable hunting, gathering, and land-use methods that maintain biodiversity while meeting human needs. Their holistic view of nature as a interconnected system provides a unique perspective on conservation. Incorporating these traditional practices into modern wildlife management strategies fosters resilience, cultural preservation, and effective resource stewardship, ensuring long-term ecological balance and community well-being.

6.2 Community Engagement and Participation

Community engagement and participation are vital for effective wildlife management, fostering collaboration between local stakeholders and conservation efforts. By involving communities, managers can address human-wildlife conflicts, promote coexistence, and ensure sustainable practices. Outreach programs, education, and inclusive decision-making empower locals, fostering a sense of ownership and responsibility. This approach enhances compliance with conservation goals, leveraging local knowledge to design tailored strategies. Active participation ensures that wildlife management aligns with community needs, creating a harmonious balance between human activities and ecological preservation, ultimately leading to more resilient and sustainable outcomes for both people and wildlife.

Monitoring and Adaptive Management Strategies

Monitoring and adaptive management strategies involve continuous assessment, data collection, and flexible adjustments to wildlife management plans, ensuring sustainable conservation and effective responses to ecological changes and challenges.

7.1 Role of Science and Research in Wildlife Management

Science and research are foundational to effective wildlife management, providing evidence-based strategies for conservation and sustainable practices. Through ecological studies, population dynamics, and habitat analysis, research informs decision-making to ensure biodiversity preservation; Scientific data helps identify threats, such as climate change or invasive species, and guides mitigation efforts. Research also fosters innovation in monitoring techniques, enabling precise tracking of wildlife health and trends. By integrating biological, ecological, and social sciences, wildlife management becomes adaptive and responsive, ensuring long-term ecosystem balance and species survival while addressing human-wildlife interactions and ethical considerations.

7.2 Adaptive Management and Feedback Loops

Adaptive management is a dynamic approach that relies on continuous monitoring and feedback loops to refine wildlife management strategies. By incorporating scientific research and field observations, managers can adjust practices in response to changing conditions and outcomes. Feedback loops ensure that lessons learned from past actions inform future decisions, fostering resilience and improving effectiveness. This iterative process enables wildlife managers to address uncertainties, mitigate unintended consequences, and enhance biodiversity conservation. Adaptive management promotes flexibility, ensuring that strategies evolve alongside ecological and societal needs, while maintaining the core principles of wildlife conservation and sustainability.

Case Studies and Real-World Applications

Case studies provide practical examples of wildlife management principles in action, showcasing successful conservation programs and adaptive strategies that balance ecological and human needs effectively;

8.1 Successful Wildlife Management Programs

Successful wildlife management programs, such as the African Elephant Conservation and Yellowstone Wolf Reintroduction, demonstrate effective application of guiding principles. These programs integrate scientific research, community engagement, and adaptive strategies to achieve ecological balance. Key factors include habitat preservation, population monitoring, and conflict mitigation. For instance, the recovery of gray wolves in Yellowstone highlights the importance of ecosystem restoration and human-wildlife coexistence. Similarly, elephant conservation efforts emphasize anti-poaching measures and sustainable land-use practices. These examples showcase how aligning management practices with ecological and ethical principles ensures long-term wildlife sustainability and biodiversity preservation.

8.2 Lessons Learned from Failed Initiatives

Failed wildlife management initiatives highlight the importance of aligning practices with ecological principles. Overreliance on technology without community input and inadequate adaptive management are common pitfalls. For example, some programs failed due to insufficient data collection or ignoring local stakeholders, leading to ineffective conservation outcomes. These failures underscore the need for robust monitoring systems, interdisciplinary collaboration, and flexible strategies. Lessons learned emphasize the importance of balancing human and wildlife needs while prioritizing ecological sustainability. Such insights guide the development of more resilient and effective wildlife management strategies in the future.


cracking the pm interview pdf

Category : PDF

Cracking the PM Interview by Gayle Laakmann McDowell and Jackie Bavaro is a comprehensive guide for aspiring product managers‚ offering insights into landing a PM role in tech.

Overview of the Book and Its Authors

Cracking the PM Interview is a detailed guide co-authored by Gayle Laakmann McDowell and Jackie Bavaro‚ offering insights into landing a product manager role. Published in 2013‚ the 589-page book covers essential topics like resumes‚ cover letters‚ interview questions‚ and case studies. Gayle‚ with a background in computer science and an MBA‚ brings extensive tech interview experience. Jackie‚ a former Google PM‚ provides real-world product management expertise. The book is available in print and as a free PDF download‚ making it accessible to aspiring PMs worldwide. It’s a must-read for anyone preparing for PM interviews.

Why This Book is Essential for Aspiring Product Managers

Cracking the PM Interview is indispensable for aspiring product managers‚ providing a roadmap to secure a PM role. It offers practical tips‚ frameworks‚ and real-world examples‚ helping candidates navigate interviews effectively. The book covers resume crafting‚ common interview questions‚ and case study solutions‚ ensuring readers are well-prepared. By addressing ambiguities in PM roles and offering actionable advice‚ it bridges the gap between theory and practice. Its accessible PDF format makes it a convenient resource for anyone aiming to excel in product management interviews and launch their career in tech.

Understanding the Role of a Product Manager

A product manager drives the vision‚ strategy‚ and execution of a product‚ collaborating with teams to solve problems and deliver value.

Key Responsibilities of a Product Manager

A product manager’s primary duties include defining the product vision‚ prioritizing features‚ and collaborating with cross-functional teams to execute the strategy. They must deeply understand customer needs‚ market trends‚ and business goals to make data-driven decisions. PMs are responsible for roadmapping‚ setting KPIs‚ and analyzing metrics to measure success. They also handle stakeholder communication‚ balancing competing demands while maintaining alignment with company objectives. Problem-solving‚ leadership without authority‚ and continuous iteration are essential skills for managing the end-to-end product lifecycle effectively.

Skills and Qualities Required for Success in PM Roles

Success in PM roles demands a unique blend of skills: strong communication‚ strategic thinking‚ and problem-solving abilities. PMs must be customer-focused‚ with a deep understanding of user needs. They need to lead without authority‚ fostering collaboration across engineering‚ design‚ and marketing teams. Analytical skills are crucial for data-driven decision-making‚ while creativity helps in innovating solutions. Adaptability‚ resilience‚ and attention to detail are also vital. A product manager must balance technical‚ business‚ and user-centric perspectives‚ driving products from concept to launch while maintaining alignment with company goals and stakeholder expectations.

Preparing for the PM Interview

Cracking the PM Interview offers valuable tips and frameworks to help aspirants understand the role‚ craft strong resumes‚ and excel in interviews with confidence and clarity.

Resume and Cover Letter Tips for PM Positions

Cracking the PM Interview emphasizes the importance of tailoring resumes and cover letters for product management roles. Avoid generic formats and focus on showcasing product-specific experiences‚ highlighting metrics-driven achievements‚ and demonstrating a customer-centric mindset. Use clear‚ concise language to convey your role in shaping products and solving user problems. Avoid listing mere duties; instead‚ illustrate your impact through specific examples. The book also advises against overly technical jargon‚ ensuring your application is accessible to non-technical hiring managers. A well-crafted resume and cover letter are your first opportunity to tell a compelling story of your product sense and leadership abilities.

Common PM Interview Questions and How to Approach Them

Cracking the PM Interview outlines common questions asked in product management interviews‚ such as product design‚ metrics‚ and behavioral scenarios. To excel‚ focus on frameworks like the CIRCLES method (Customer‚ Impact‚ Revenue‚ Cycle‚ Lean‚ Empathy) for structured problem-solving. Practice answering questions like “Design an alarm clock for the blind” or “How would you improve a feature?” Use storytelling techniques to highlight your problem-solving process and decisions. Emphasize your customer-centric approach and ability to prioritize. The book also stresses the importance of asking clarifying questions to demonstrate critical thinking and collaboration skills‚ ensuring you stand out as a strategic thinker.

Mastering PM Interview Case Studies

Cracking the PM Interview provides frameworks for solving product-focused problems‚ such as identifying customer needs and outlining solutions. It includes real-world examples to practice these strategies effectively.

Frameworks for Solving Product-Focused Problems

Cracking the PM Interview provides structured frameworks to tackle product-focused problems‚ ensuring clarity and effectiveness. Key steps include defining the product’s goal‚ identifying challenges‚ proposing solutions‚ and outlining implementation strategies. These frameworks help candidates systematically approach complex scenarios‚ demonstrating their ability to think critically and strategically. Real-world examples and practical tips are included to aid in mastering these techniques‚ making it easier to articulate solutions during interviews and beyond. This systematic approach not only impressed interviewers but also equips aspiring PMs with tools for real-world product management challenges.

Real-World Examples and Implementation Steps

Cracking the PM Interview enriches learning with real-world examples‚ illustrating how to apply frameworks in practical scenarios. Detailed implementation steps guide candidates through problem-solving‚ from defining product goals to executing solutions. These examples mirror actual PM challenges‚ helping aspirants understand how to prioritize features‚ align with company goals‚ and communicate strategies effectively. By walking through these cases‚ readers gain confidence in their ability to handle real-world product management tasks‚ making the transition from theory to practice seamless and impactful. This hands-on approach ensures preparedness for both interviews and on-the-job responsibilities.

Transitioning into Product Management

Cracking the PM Interview provides guidance for professionals transitioning into PM roles‚ addressing key considerations for engineers‚ designers‚ and others seeking to shift careers into product management.

From Engineering to PM: Key Considerations

Transitioning from engineering to product management requires a shift in mindset and skill set. Engineers bring technical expertise‚ but PM roles demand strong communication and stakeholder management. The book emphasizes understanding product vision‚ customer needs‚ and business goals. Engineers must learn to prioritize features‚ balance technical feasibility with user value‚ and collaborate cross-functionally. The authors provide frameworks for engineers to leverage their technical background while developing PM skills‚ ensuring a smooth transition into product management roles. This section is crucial for engineers aiming to bridge the gap between technical execution and strategic product leadership.

From Design to PM: Building the Right Mindset

Transitioning from design to product management requires a mindset shift from focusing on visuals to understanding product goals and user needs. Designers must embrace strategic thinking‚ prioritizing features that align with business objectives. The book highlights the importance of developing communication skills to collaborate with engineers‚ stakeholders‚ and customers. Designers bring a unique user-centric perspective‚ but they must also learn to balance aesthetics with technical feasibility and market demands. This section guides designers in cultivating the analytical and decision-making skills necessary to thrive in PM roles‚ ensuring a seamless transition from design to product leadership.

Leverage Cracking the PM Interview to refine your skills‚ practice case studies‚ and implement strategies for landing your ideal PM role in technology.

How to Use the Book to Land Your Dream PM Job

Cracking the PM Interview provides a structured approach to securing a product management role. Start by understanding the fundamentals of PM responsibilities and skills. Use the book’s frameworks to tackle interview questions effectively. Practice real-world case studies to build confidence. Tailor your resume and cover letter using the provided tips. Focus on understanding product goals‚ identifying problems‚ and developing solutions. Implement the strategies outlined to stand out in interviews. By systematically applying these insights‚ you can increase your chances of landing your ideal PM position in the tech industry.

Additional Resources for Continued Learning

Supplement your learning with resources like Design For How People Learn by Julie Dirksen and The Lean Product Playbook by Dan Olsen. Explore platforms like Open Library for free eBooks and Academia for research papers. Subscribe to newsletters such as Intercom’s product management insights. Utilize online communities and forums dedicated to PM discussions. These resources‚ combined with Cracking the PM Interview‚ provide a holistic approach to mastering product management and staying updated with industry trends. Continuous learning is key to excelling in this dynamic field.


root canal post operative instructions

Category : Instructions

Proper post-operative care after a root canal is essential for ensuring a smooth recovery and minimizing potential discomfort. Following these guidelines helps promote healing and prevent complications.

1.1 Importance of Following Instructions

Adhering to post-operative instructions is crucial for ensuring proper healing and preventing complications after a root canal. Neglecting these guidelines can lead to infection, prolonged discomfort, or even treatment failure. By following the recommended care, patients minimize the risk of issues like tooth fracture or reinfection. Proper care also safeguards the tooth until it is permanently restored. Compliance ensures a smooth recovery and maximizes the success of the procedure, allowing the tooth to heal effectively and function normally.

Managing Pain and Discomfort

After a root canal, mild discomfort and sensitivity are normal due to inflammation and healing. Following instructions helps minimize pain and ensures proper recovery.

2.1 Recommended Pain Relief Medications

For effective pain management, consider alternating between 500-1000 mg of Tylenol and 400-800 mg of Ibuprofen every 4 hours. This regimen helps reduce inflammation and discomfort. Always follow the recommended dosages and consult your dentist if pain persists beyond a few days. Over-the-counter medications are usually sufficient, but prescription options may be provided if needed. Proper use of pain relief medications ensures a more comfortable recovery period following your root canal treatment.

2.2 Ice Therapy for Swelling

Apply an ice pack or ice wrapped in a plastic bag to the affected area for 15-20 minutes, alternating with 15-minute breaks. This helps reduce swelling and discomfort. Repeat this process for the first 6-8 hours post-treatment. Ice therapy is most effective within the initial 24 hours, as it minimizes inflammation and eases pain. Ensure the ice does not directly touch the skin to avoid irritation. This simple technique can significantly enhance your comfort during the early stages of recovery after a root canal procedure.

2.3 Duration of Discomfort

Mild discomfort or sensitivity after a root canal is normal and typically lasts for 2-5 days. Some patients may experience soreness for up to a week, especially when chewing. The discomfort usually subsides gradually as the inflammation heals. Severe pain is uncommon and should be reported to your dentist. Over-the-counter pain relievers, such as ibuprofen, can help manage mild to moderate discomfort during this period. It’s important to follow the recommended dosage and monitor your symptoms to ensure proper healing.

Temporary Filling Care

A temporary filling protects the tooth until a permanent restoration is placed. Avoid chewing on hard foods or objects to prevent dislodging the filling and ensure proper healing.

3.1 Avoiding Chewing on the Treated Tooth

It is crucial to avoid chewing or biting on the treated tooth until it is fully restored. Chewing can dislodge the temporary filling, irritate the area, or fracture the tooth. Stick to a soft diet and use the opposite side of your mouth for chewing. This precaution ensures the tooth remains protected while healing and prevents potential complications, such as infection or further damage. Avoiding chewing on the treated tooth is essential for a successful recovery and proper healing of the root canal treatment.

3.2 Handling a Lost Temporary Filling

If your temporary filling falls out, contact your dentist immediately. Until you can be seen, you can purchase over-the-counter dental temporary filling material from a pharmacy. Follow the instructions to cover the exposed area temporarily. Avoid chewing on the tooth, as this could cause further damage or discomfort. A lost temporary filling can expose the tooth to bacteria, increasing the risk of infection. Prompt attention is necessary to ensure proper healing and prevent complications, ensuring the success of your root canal treatment.

Dietary Recommendations

Eat soft, non-chewy foods like applesauce, yogurt, and mashed potatoes to avoid discomfort. Avoid hard or sticky foods that could damage the treated tooth or temporary filling.

4.1 Soft Foods to Eat

Opt for soft, non-chewy foods such as applesauce, yogurt, scrambled eggs, mashed bananas, tofu, and oatmeal. These foods are gentle on the treated tooth and promote healing. Avoid hard or sticky foods that could cause discomfort or damage to the temporary filling. Soft foods like avocados, cottage cheese, and cooked pasta are also excellent choices during the initial recovery period. Ensure your diet is nutrient-rich to support the healing process and maintain oral health.

4.2 Foods to Avoid

Avoid hard, crunchy, sticky, or spicy foods that could irritate the treated tooth or dislodge the temporary filling. Refrain from consuming nuts, chips, raw vegetables, or chewy candies. Hot or cold foods should also be avoided initially to minimize sensitivity. Stay away from acidic or sharp foods that could cause discomfort. Opting for a soft diet during the healing period reduces the risk of complications and ensures a smoother recovery. Avoiding these foods helps protect the tooth and promotes optimal healing.

Oral Hygiene Practices

Brush gently with fluoride toothpaste and floss carefully to avoid irritating the treated area. Maintain regular hygiene habits to prevent infection and promote healing. Be gentle!

5.1 Brushing and Flossing Guidelines

Brush gently with a soft-bristled toothbrush and fluoride toothpaste, focusing on the treated area. Floss carefully to remove plaque without irritating the gumline. Avoid aggressive brushing or flossing that could disrupt the healing process. Use antibacterial mouthwash if recommended by your dentist to reduce bacteria and promote recovery. Maintain regular oral hygiene to prevent infection and ensure proper healing of the treated tooth. Avoid using harsh products or hard-bristled brushes that may cause sensitivity or discomfort.

5.2 Avoiding Irritants

Avoid smoking, alcohol, and excessive caffeine during recovery, as they can hinder healing and irritate the treated area. Stay away from spicy, acidic, or sharp foods that may cause discomfort or inflammation. Refrain from using straws, as the suction can dislodge the temporary filling. Additionally, avoid biting or chewing on hard objects like ice or nails, which could damage the tooth or surrounding tissues. Protecting the treated tooth from irritants helps ensure a smooth recovery and prevents complications.

Follow-Up Appointments

Follow-up appointments are crucial for monitoring healing and ensuring proper recovery. Typically scheduled within 3-4 weeks, these visits allow your dentist to assess progress and prepare for permanent restoration.

6.1 Timeline for Permanent Restoration

The timeline for permanent restoration typically begins 3-4 weeks after the root canal procedure. During this period, the tooth is monitored to ensure proper healing. Your dentist will assess the tooth’s condition and prepare it for a crown or filling. This step is critical for restoring the tooth’s strength and functionality. Adhering to this timeline helps prevent complications, such as tooth fracture or bacterial reinfection. Proper scheduling ensures a seamless transition from temporary to permanent restoration, guaranteeing long-term success and tooth longevity.

6.2 Importance of Final Restoration

The final restoration is crucial for ensuring the long-term success of your root canal treatment. A permanent crown or filling protects the tooth from bacterial reinfection and structural damage. Without it, the tooth remains vulnerable to fracture and decay. Temporary fillings are not designed for long-term use and may deteriorate over time, compromising the tooth’s integrity. Completing the final restoration ensures the tooth functions normally, allowing you to chew and bite confidently. It is essential for maintaining the health and longevity of the treated tooth.

Additional Recovery Tips

Avoid smoking and alcohol, as they can hinder healing and increase the risk of complications. Use saltwater rinses to promote healing and reduce inflammation gently.

7.1 Avoiding Smoking and Alcohol

Smoking and alcohol consumption should be avoided during the recovery period following a root canal. Smoking can slow down the healing process and increase the risk of infection, while alcohol can irritate the treated area and interfere with pain management. It is recommended to abstain from these activities for at least 24-48 hours after the procedure. This allows the temporary filling to set properly and reduces the chance of complications. Staying hydrated with water and avoiding irritants will support a smoother and faster recovery.

7.2 Salt Water Rinses

Rinsing with warm salt water is a simple yet effective way to promote healing after a root canal. Dissolve one teaspoon of salt in a cup of warm water, swish the solution gently around your mouth, and spit it out. Repeat this process 2-3 times a day, especially after meals. Salt water helps reduce swelling, kill bacteria, and cleanse the area around the treated tooth. Avoid vigorous rinsing to prevent dislodging the temporary filling. This practice supports a clean and healthy recovery environment for your tooth.


confessions of an advertising man pdf

Category : PDF

Overview of “Confessions of an Advertising Man”

Confessions of an Advertising Man by David Ogilvy is a seminal book on advertising, offering insights into agency management, client relationships, and the essence of effective campaigns. Widely regarded as a classic, it remains relevant in the digital age, with its principles still guiding modern marketers. The book is available in PDF format on various platforms, making it accessible to readers worldwide.

Confessions of an Advertising Man by David Ogilvy is a landmark book that combines memoir, practical advice, and industry insights. First published in 1963, it offers a candid look at Ogilvy’s career, detailing his rise in advertising and his philosophy on effective campaigns. The book is structured into chapters, each addressing key aspects of advertising, from managing agencies to nurturing client relationships. Its timeless wisdom and practical guidance have made it a must-read for professionals. The PDF version is widely available online for easy access.

1.2 Key Themes and Insights

The book delves into core advertising principles, emphasizing the importance of research, creativity, and client focus. Ogilvy stresses the need for clear communication and the power of the “big idea.” He shares practical advice on agency management, client acquisition, and retention, highlighting ethical practices. His insights on brand positioning and copywriting remain influential. The PDF version captures these themes, offering a comprehensive guide for both aspiring and seasoned advertisers to refine their strategies and achieve success in the industry.

1.3 Why It’s a Timeless Classic

Confessions of an Advertising Man remains a timeless classic due to its enduring relevance and practical wisdom. Ogilvy’s principles, such as the power of research and the importance of creativity, continue to resonate in modern advertising. The book’s accessible style and real-world examples make it a valuable resource for both newcomers and industry veterans. Its insights transcend time, offering a foundation for success in advertising that aligns with today’s digital landscape, ensuring its continued popularity and influence.

David Ogilvy: The Author and His Legacy

David Ogilvy, a visionary in advertising, founded Ogilvy & Mather and revolutionized the industry with his innovative principles. His legacy endures through Confessions of an Advertising Man, a testament to his profound impact on modern marketing.

2.1 Early Life and Career

David Ogilvy was born in 1911 in West Horsley, England. He attended St. Cuthbert’s School and later studied at Christ Church, Oxford. Ogilvy’s early career included working as a chef, a salesman, and even a farmer. His transition into advertising began at Gallup, where he conducted market research. This experience shaped his data-driven approach to advertising. Ogilvy later moved to New York, where he co-founded Hewitt, Ogilvy, Benson & Mather, which became a global advertising powerhouse.

2.2 Founding of Ogilvy & Mather

In 1948, David Ogilvy co-founded Ogilvy & Mather with a modest investment. The agency quickly gained prominence through campaigns for clients like Dove and American Express. Ogilvy’s emphasis on research, creativity, and client trust became hallmarks of the firm. His leadership transformed the agency into a global advertising giant, known for innovative strategies and iconic campaigns that set new standards in the industry.

2.3 Contributions to Advertising

David Ogilvy revolutionized advertising through his emphasis on research-based strategies and the “big idea” concept. He introduced the “brand positioning” approach, focusing on unique selling propositions. Ogilvy also championed the role of copywriters, believing that “the customer is not a moron” and deserves clear, compelling messaging. His work set benchmarks for effective campaigns, influencing generations of advertisers and solidifying his legacy as the “Father of Advertising.” His principles remain foundational in both traditional and digital marketing.

Chapter-by-Chapter Breakdown

The book is divided into five chapters, each addressing key aspects of advertising. Chapter 1 explores the author’s background, while Chapters 2-5 focus on agency management, client acquisition, retention, and professional development.

3.1 Chapter 1: Background

Chapter 1 delves into Ogilvy’s early life and career, tracing his journey from selling stoves to becoming a chef, and eventually, a copywriter. His experiences laid the foundation for his advertising philosophy, emphasizing creativity and consumer insights. This chapter sets the stage for the practical advice offered in subsequent sections, providing readers with a clear understanding of the author’s professional origins and the principles that shaped his success in the industry.

3.2 Chapter 2: How to Manage an Advertising Agency

Chapter 2 focuses on the principles of effective agency management, emphasizing leadership, client relationships, and operational efficiency. Ogilvy shares insights on fostering a collaborative environment, hiring talented individuals, and maintaining client trust; He stresses the importance of clear communication and strategic planning, providing practical advice on how to build and sustain a successful advertising agency. These timeless strategies remain relevant, offering valuable lessons for both traditional and digital marketing professionals today.

3.3 Chapter 3: How to Get Clients

Chapter 3 delves into strategies for attracting clients, highlighting the importance of research, personalized approaches, and professionalism. Ogilvy emphasizes understanding client needs, crafting compelling pitches, and showcasing creative solutions. He advocates for building trust through transparency and delivering results, which are key to winning and retaining clients. These principles, outlined in the PDF version of the book, remain essential for marketers aiming to grow their client base effectively in today’s competitive landscape.

3.4 Chapter 4: How to Keep Clients

Chapter 4 focuses on client retention, stressing the importance of consistent performance, open communication, and exceeding expectations. Ogilvy advises agencies to prioritize client satisfaction, deliver measurable results, and adapt to their evolving needs. He also underscores the value of nurturing long-term relationships through trust and reliability. These strategies, detailed in the PDF, provide a roadmap for maintaining client loyalty in an ever-changing advertising landscape, ensuring sustained success for agencies and marketers alike.

3.5 Chapter 5: How to Be a Good Advertising Man

Chapter 5 delves into the qualities and practices essential for excelling in advertising. Ogilvy emphasizes the importance of creativity, thorough research, and clear communication. He advocates for understanding consumer psychology and crafting compelling stories that resonate. Additionally, he stresses the need for humility, continuous learning, and ethical practices. These principles, outlined in the PDF, serve as a blueprint for aspiring advertising professionals to build successful, integrity-driven careers in the industry.

The Concept of the “Big Idea” in Advertising

Ogilvy’s “Big Idea” is the cornerstone of effective advertising, emphasizing a single, powerful concept that resonates with audiences and drives successful campaigns, as detailed in the PDF.

4.1 The Role of Creativity in Advertising

Creativity is the heartbeat of advertising, driving innovative campaigns that captivate audiences. Ogilvy emphasizes that creativity must be purposeful, aligning with strategic goals to deliver measurable results. He advocates for bold, imaginative ideas that stand out in a crowded marketplace. By combining creativity with thorough research and consumer insights, advertisers can craft compelling messages that resonate deeply. This approach ensures that campaigns are not only artistic but also effective in driving business success, as highlighted in the PDF.

4.2 Case Studies of Successful Campaigns

Ogilvy’s book is rich with real-world examples of campaigns that triumphed due to brilliant creativity and strategic thinking; He highlights his iconic work for Rolls-Royce, where the headline “At 60 miles an hour, the only sound you hear is the ticking of the clock” became legendary. Similarly, campaigns like Dove’s “Real Beauty” demonstrate how emotional connections and clear messaging drive success. These case studies underscore Ogilvy’s belief that creativity, aligned with consumer insights, is the cornerstone of effective advertising.

The Relevance of the Book in the Digital Age

Despite being written in 1963, Ogilvy’s principles remain highly relevant in today’s digital landscape. His emphasis on creativity, clear messaging, and understanding consumer behavior aligns perfectly with modern marketing strategies. The book’s timeless insights continue to inspire both traditional and digital advertisers, offering a solid foundation for crafting impactful campaigns in an ever-evolving industry.

5.1 How Ogilvy’s Principles Apply to Modern Advertising

Ogilvy’s principles, such as the importance of the “Big Idea” and understanding customer motivations, remain cornerstone strategies in modern advertising. His emphasis on clear, persuasive messaging aligns with the demands of digital platforms, where attention spans are short. The book’s focus on research, creativity, and client relationships continues to inspire digital marketers, proving that timeless principles can thrive alongside cutting-edge technologies and data-driven approaches.

5.2 The Impact of Digital Marketing on Traditional Advertising Strategies

Digital marketing has revolutionized traditional advertising by introducing data-driven targeting, real-time analytics, and interactive campaigns. While Ogilvy’s principles remain foundational, digital tools now enable more precise audience engagement and measurable outcomes. Traditional strategies like print ads and TV commercials are now complemented by social media, SEO, and programmatic advertising, creating a hybrid approach that blends creativity with technology for enhanced effectiveness and reach in the modern marketplace.

Where to Find the PDF Version

Confessions of an Advertising Man PDF can be found on popular platforms like Amazon, Google Books, and mann-ivanov-ferber.ru, offering easy access to this advertising classic.

6.1 Popular Platforms for Download

The PDF version of Confessions of an Advertising Man is available on various platforms. Amazon offers the book in both paperback and digital formats, while Google Books provides a preview. Additionally, websites like mann-ivanov-ferber.ru and Internet Archive have downloadable versions. Users can also find free PDFs on platforms like ResearchGate or Academia.edu. However, always ensure to access the file from legal sources to avoid copyright infringement. This ensures a safe and ethical reading experience.

6.2 Legal and Ethical Considerations ofDownloading

6.2 Legal and Ethical Considerations of Downloading

Downloading Confessions of an Advertising Man requires adherence to copyright laws. Ensure the PDF is obtained from authorized platforms like Amazon or Google Books to avoid legal issues. Accessing copyrighted material illegally undermines authors and publishers. Ethical downloading promotes fair compensation for intellectual property, supporting creators and maintaining the integrity of content. Always opt for legal sources to respect the rights of David Ogilvy and his publishers.

Additional Resources and Further Reading

Explore more advertising wisdom with recommended books like Ogilvy on Advertising and online courses on platforms like Coursera, offering insights into digital marketing and creative strategies.

7.1 Recommended Books on Advertising

For deeper insights into advertising, explore Ogilvy on Advertising and Where Good Ideas Come From by Steven Johnson. D&AD: The Copy Book offers practical copywriting tips, while The Mind of the Strategist by Kenichi Ohmae provides strategic thinking. These books complement Ogilvy’s principles, offering fresh perspectives on creativity, strategy, and modern marketing. They are essential reads for anyone looking to master the craft of advertising in today’s fast-paced digital landscape.

7.2 Online Courses and Tutorials Inspired by Ogilvy

Online courses inspired by Ogilvy’s teachings are widely available, offering practical insights into advertising strategies. Platforms like Coursera and LinkedIn Learning feature courses on campaign planning, copywriting, and brand management, reflecting Ogilvy’s emphasis on creativity and effectiveness. These resources are ideal for professionals seeking to apply Ogilvy’s principles in modern digital marketing, ensuring his legacy continues to shape the advertising industry.

Confessions of an Advertising Man remains a timeless guide for advertisers, offering enduring insights. Its principles continue to inspire modern marketing strategies, ensuring Ogilvy’s legacy endures.

8.1 Final Thoughts on the Book’s Importance

Confessions of an Advertising Man is a cornerstone of advertising education, offering timeless wisdom that transcends eras. Its practical advice and insights into human behavior make it indispensable for marketers. The book’s relevance in the digital age underscores its enduring value, ensuring Ogilvy’s principles remain a guiding light for professionals. Available in PDF, it continues to inspire, making it essential reading for anyone seeking to master the art of advertising.

8.2 Encouragement to Read and Apply the Principles

Confessions of an Advertising Man is a must-read for anyone in marketing. Its timeless principles, such as the power of the “big idea” and understanding consumer behavior, remain invaluable today. Readers are encouraged to apply Ogilvy’s insights to craft compelling campaigns and build lasting client relationships. Available in PDF, the book’s accessibility ensures its wisdom can inspire a new generation of advertisers, helping them succeed in an ever-evolving industry.