manual camera settings cheat sheet pdf
Category : PDF
Manual camera mode offers full control over aperture, shutter speed, and ISO, empowering photographers to achieve precise and creative results. A cheat sheet simplifies mastering these settings for optimal photography outcomes.
1.1 What is Manual Mode?
Manual mode allows photographers to gain full control over their camera settings, including aperture, shutter speed, and ISO. This mode enables creative decisions and precise adjustments to capture images according to the photographer’s vision. Unlike automatic modes, manual mode requires understanding the exposure triangle and how these elements interact. A manual camera settings cheat sheet can help photographers master these adjustments and achieve consistent results in various lighting conditions.
1.2 Benefits of Shooting in Manual Mode
Shooting in manual mode provides photographers with creative control over their images, allowing for precise adjustments to aperture, shutter speed, and ISO. This mode enables better management of lighting conditions, depth of field, and motion capture. It also helps in achieving consistent results and enhances learning by understanding the exposure triangle. A manual camera settings cheat sheet can guide photographers in optimizing these settings for various scenarios, ensuring high-quality outcomes.
Understanding the Exposure Triangle
The exposure triangle consists of aperture, shutter speed, and ISO, which together control image brightness. Balancing these elements is key to mastering manual photography, as outlined in a manual camera settings cheat sheet for optimal results.
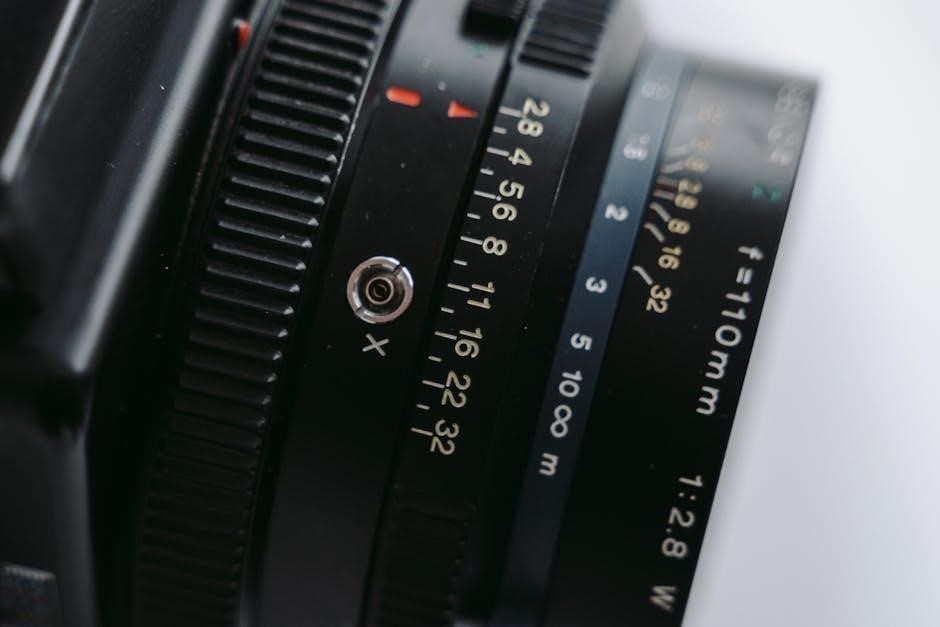
2.1 Aperture: What It Is and How It Affects Your Photos
Aperture refers to the camera lens opening that controls light entry and depth of field. Lower f-stops (e.g., f/2.8) create a shallow focus, blurring backgrounds, while higher f-stops (e.g., f/16) keep more of the image sharp. This setting is crucial for portraits and landscapes, as explained in a manual camera settings cheat sheet for mastering depth of field effects.
2.2 Shutter Speed: Controlling Motion and Blur
Shutter speed determines how long the camera’s sensor is exposed to light, controlling motion and blur. Faster speeds (e.g., 1/500s) freeze action, while slower speeds (e.g., 1 second) create motion blur. This setting is essential for capturing dynamic effects, as detailed in a manual camera settings cheat sheet to help photographers master timing and creativity in various lighting conditions.
2.3 ISO: Sensitivity to Light and Noise Reduction
ISO adjusts the camera’s sensor sensitivity to light, with lower values (e.g., ISO 100) suited for bright conditions and higher values (e.g., ISO 6400) for low light. While higher ISOs introduce noise, modern cameras minimize this. A manual camera settings cheat sheet helps photographers balance ISO with aperture and shutter speed for optimal image quality and minimal noise in various lighting scenarios.
Mastering Aperture Settings
Mastering aperture settings involves understanding f-stops and depth of field. A lower f-stop value means a shallower depth of field, blurring backgrounds. Use a manual camera settings cheat sheet for practical tips on choosing the right aperture for your desired effect.
3.1 Understanding f-Stops and Depth of Field
Understanding f-stops is key to mastering aperture. Lower f-stop values (e.g., f/2.8) create a shallower depth of field, blurring backgrounds, while higher values (e.g., f/11) keep more in focus. A manual camera settings cheat sheet can help you remember these relationships. Experiment with different f-stops to achieve the desired effect in your photos, balancing creativity with technical precision.
- Use low f-stops for portraits to isolate subjects.
- Use high f-stops for landscapes to keep everything sharp.
3.2 Practical Tips for Choosing the Right Aperture
Choosing the right aperture involves balancing creativity and technical needs. Use low f-stops (e.g., f/2.8) for portraits to blur backgrounds and high f-stops (e.g., f/11) for landscapes to keep everything sharp. A manual camera settings cheat sheet can guide you in selecting apertures for specific scenarios, ensuring your photos achieve the desired depth of field and visual impact.
- Start with a mid-range aperture (f/5.6) for everyday shots.
- Adjust based on lighting and the depth of field you want.
Shutter Speed: Creative Control Over Motion
Shutter speed controls motion capture, allowing you to freeze action or create blur. A manual camera settings cheat sheet helps you choose speeds for sharp images or artistic effects.
4.1 Freeze Motion vs. Create Blur
Shutter speed is key to controlling motion in photos. A fast shutter speed freezes action, capturing sharp images of moving subjects. Conversely, a slow shutter speed creates blur, adding artistic motion effects. A manual camera settings cheat sheet provides guidelines for choosing the right speed, helping photographers achieve desired effects in various scenarios, from sports to creative compositions.
4.2 Guidelines for Different Scenes
Mastering shutter speed requires adapting to different scenarios. For dynamic shots, use fast speeds to freeze motion in sports or wildlife. For creative blur, slower speeds capture flowing water or movement. A manual camera settings cheat sheet offers tailored advice, ensuring optimal results in varied lighting and subjects, from portraits to landscapes, while balancing aperture and ISO for perfect exposure.
ISO Settings: Balancing Light and Noise
ISO adjusts the camera’s sensitivity to light, crucial for balancing exposure. Lower ISOs reduce noise, while higher ISOs capture low-light scenes, guided by a cheat sheet for optimal results.
5.1 How ISO Impacts Image Quality
ISO controls the camera’s light sensitivity, directly affecting image quality. Lower ISOs (100-400) minimize noise, ensuring sharp, clean photos. Higher ISOs (1600+) capture low-light scenes but introduce digital noise, degrading image clarity. Balancing ISO with aperture and shutter speed is key for optimal results, as outlined in a manual camera settings cheat sheet for precise control and minimal grain in various lighting conditions.
5.2 Best Practices for ISO Usage
Start with the lowest ISO (100-200) for bright lighting to minimize noise. In low-light conditions, increase ISO cautiously, balancing noise and image clarity. Use Auto ISO with a maximum limit for consistency. Refer to a manual camera settings cheat sheet for optimal ISO ranges in various scenarios, ensuring sharp, grain-free photos by adjusting ISO alongside aperture and shutter speed effectively.
White Balance: Capturing Accurate Colors
White balance ensures accurate color representation by adjusting to lighting conditions. Use presets like Daylight or Tungsten, or customize for precise results. A cheat sheet helps you quickly reference ideal settings for various lighting scenarios, enhancing your photos’ color accuracy and professional appeal.
6.1 Understanding Color Temperature
Color temperature, measured in Kelvin, defines the warmth or coolness of light. Lower values (e.g., 3200K) produce warm tones, while higher values (e.g., 5500K) create cool tones. Accurate white balance aligns with the light source’s color temperature, ensuring true-to-life hues. A cheat sheet simplifies matching settings to lighting conditions, enhancing color accuracy and visual appeal in your photos, whether in daylight, tungsten, or fluorescent settings.
6.2 Setting White Balance for Different Lighting Conditions
White balance ensures accurate colors by matching the lighting conditions. Use presets like Daylight (5500K), Tungsten (3200K), or Fluorescent (3800K-4500K) for common scenes. For unique lighting, manually adjust or use a grey card for custom settings. This enhances image quality and ensures natural hues in various environments, from indoor to outdoor photography, helping you capture the scene as it truly appears.
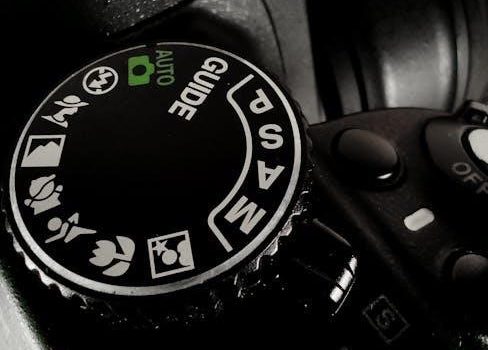
Choosing the Right Camera Mode for Your Scene
Selecting the appropriate camera mode enhances your photography. Aperture Priority, Shutter Priority, and Manual Mode each offer unique benefits, helping you capture the perfect shot in any setting.
7.1 Aperture Priority vs. Shutter Priority
Aperture Priority (A/Av) and Shutter Priority (S/Tv) modes offer partial manual control. Aperture Priority focuses on depth of field, while Shutter Priority controls motion. Both modes are ideal for learning manual settings without full manual complexity. Use Aperture Priority for portraits and landscapes, and Shutter Priority for sports or dynamic scenes to freeze or blur motion effectively. This balance helps photographers transition smoothly to Manual Mode.
7.2 When to Use Manual Mode
Manual Mode is ideal for complex lighting scenarios, creative control, and precise results. Use it in challenging conditions like backlit scenes, low-light environments, or when specific effects are needed, such as freezing motion or creating motion blur. It’s also perfect for artistic expressions, like star trails or intentionally overexposed images, allowing full control over aperture, shutter speed, and ISO for professional-grade photography.
Composition Tips for Manual Shooting
Mastering manual mode enhances composition by allowing precise control over depth of field, motion blur, and lighting. Use framing techniques, balance elements, and explore negative space for visually appealing photos.
8.1 Framing Your Subject
Framing your subject is essential for creating visually appealing photos. Use natural or man-made elements like archways, trees, or fences to create depth and context. Leading lines, symmetry, and negative space can enhance composition. Experiment with angles and perspectives to add dynamism. In manual mode, adjust aperture for selective focus or shutter speed to convey motion, ensuring your subject stands out. A cheat sheet can help you remember these framing techniques for quick reference while shooting.
8.2 Leading Lines and Symmetry
Leading lines guide the viewer’s eye to your subject, creating dynamic compositions. Use roads, shorelines, or patterns to draw attention. Symmetry adds balance and order, ideal for reflections or architecture. In manual mode, adjust aperture for depth of field to emphasize lines, or use shutter speed to blur movement, enhancing visual flow. A cheat sheet can help you remember these techniques for impactful framing and balanced shots.
Common Mistakes in Manual Mode and How to Avoid Them
Overexposure, underexposure, and incorrect focus are common errors. Use a cheat sheet to guide settings and ensure proper lighting, focus, and depth of field for better results.
9.1 Overexposure and Underexposure
Overexposure occurs when too much light enters, washing out details, while underexposure results in dark images. Use a cheat sheet to balance aperture, ISO, and shutter speed for optimal exposure. Bracketing shots and adjusting settings based on lighting conditions can help avoid these issues. Regularly reviewing photos ensures proper adjustments for desired results in manual mode photography.
9.2 Incorrect Focus and Depth of Field
Incorrect focus and depth of field issues arise when aperture settings don’t align with your creative vision. A low f-stop can blur backgrounds but may compromise sharpness. Use manual focus for precision and ensure depth of field preview reflects your intent. Regularly review and adjust settings to avoid unintended results, as outlined in your manual camera settings cheat sheet.
Practicing with Manual Settings
Consistent practice with manual settings sharpens your skills. Regular exercises, like experimenting with aperture and shutter speed, help master exposure and composition. Use your manual camera settings cheat sheet as a guide to refine techniques and ensure optimal results in various lighting conditions.
10.1 Exercises to Improve Your Skills
Start by experimenting with aperture, shutter speed, and ISO in different lighting conditions. Practice capturing motion with various shutter speeds and test depth of field using different f-stops. Regularly review your photos to identify areas for improvement. Use your manual camera settings cheat sheet to guide your practice sessions. Consistent practice will enhance your understanding and confidence in manual mode photography.
10.2 Reviewing and Learning from Your Photos
Regularly reviewing your photos helps identify strengths and areas for improvement. Analyze exposure, focus, and composition. Use your manual camera settings cheat sheet to cross-reference settings and understand their impact. Adjust techniques based on outcomes and apply lessons to future shoots. This reflective process enhances your skills and builds confidence in manual mode photography over time.
Using a Manual Camera Settings Cheat Sheet
A manual camera settings cheat sheet provides quick guidance for aperture, ISO, shutter speed, and white balance. It helps photographers apply optimal settings in various lighting conditions effectively.
11.1 What to Include in Your Cheat Sheet
Your cheat sheet should include key exposure elements like aperture, shutter speed, and ISO, along with guidelines for their use in different lighting conditions. Add notes on white balance and exposure compensation for accurate color and brightness. Incorporate practical tips for common scenarios, such as portraits, landscapes, and low-light photography. Also, include visual diagrams or tables to simplify understanding and application of these settings in real-time shooting situations.
11.2 How to Apply the Cheat Sheet in Real Shooting Scenarios
Start by assessing the lighting to choose initial settings. Adjust ISO based on brightness, lower for bright, higher for low light. Set aperture for depth of field—low f-stop for portraits, high for landscapes. Choose shutter speed to freeze or blur motion. Review photos and tweak settings for best results. Keep the cheat sheet handy and practice regularly to improve skills.